Crochet Mini Bag Shaped Like a Cat – Hello Kitty Style, Perfect for Small Treasures
Hey everyone!
Welcome to my Blog! Your support is what directly allows me to keep creating more free video tutorials and patterns for our amazing crochet community!
Want to contribute? Here are three ways you can show your support:
-
Tip me: https://paypal.me/nebeskacrochetlove
-
Buy patterns: https://payhip.com/NebeskaCrochetwithLove
- Become a Patron and unlock even more content: https://herohero.co/crochetwithlove
Thanks a million, my crochet friends! Wishing you joy and color through yarn.
I truly believe in the magic of creativity.
-----
Hello My Crochet Friends!
Do you have yarn scraps at home? You can use them to crochet small items, like this mini pouch.
Today, I have another super simple and quick pattern for crocheted mini pouches in the shape of a Hello Kitty cat. This crocheted mini pouch is great whether you wear it as a decorative charm or use it as a case for keys, headphones, a chip card, coins... for all sorts of treasures. The pouch is sure to delight any little girl who loves the Hello Kitty character!

These mini pouches are easy to crochet. It's a pouch formed by two identical parts crocheted together. It closes with two loops, but you could also use a button. I crocheted a white cat, but there are many other colors you can choose for your cat.
Have fun crocheting!
VIDEO TUTORIAL
You can find the step-by-step video tutorials below which will help you along if you prefer to watch video instruction rather than using a written pattern. Don’t forget to subscribe if you like me videos, it’s FREE!
![]()
If you pin my patterns to your Favorites and share it on social media as a link, I will be able to share a lot more free crochet patterns for you all.
Stay in touch at Facebook, Instagram and Pinterest.
Let's start or PIN this idea to your Pinterest boards for later.
![]()

For even more crochet patterns, check out my e-book.
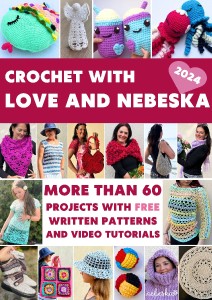
More pattern? CROCHET WITH LOVE AND NEBESKA
I'm thrilled to present my 2024 e-book, CROCHET WITH LOVE AND NEBESKA!
Inside, you'll discover over 60 projects with patterns and video tutorials to inspire you all year long.
You can download the e-book as a PDF, complete with clickable links to easily find the patterns you're looking for. Perhaps you missed a pattern and are now happy to find it here.
Or maybe you're just looking for inspiration for your next project – I hope my ideas spark your creativity! The e-book is FREE and you can share it with your friends.
Have questions? Join the Facebook Group OR my Youtube Community!
I hope this article will be useful for you! If you have any additional questions, feel free to join my Facebook Group or Youtube Community. I created these groups for you to share pictures, ask questions, and help each other out.
This crocheted mini pouch can serve as a keychain charm or a small notions bag, and even a beginner can easily crochet it. You can play around with different color variations. I crocheted mine using Cilka yarn, which I love to use.

Materials
The crocheted mini pouch works up quickly. It consists of two identical pieces that are crocheted together. We'll also crochet the eyes, nose, bow, and embroider the whiskers.
What will you need?
Yarn – I chose my favorite Cilka yarn. I opted for white for the Hello Kitty cat, but you can choose any color you like.
![]()
Additional Yarn Scraps:
-
Color B – Black (for eyes)
-
Color C – Orange (for the nose)
-
Color D – Burgundy (for the bow)
Recommended Yarn:
-
Cilka
-
Composition: 100g / 280m / 100% Acrylic
Tools:
-
Hook: 3.0 mm
-
Tapestry needle (for seaming and embroidering)
-
Stitch marker
-
Scissors
Difficulty Level: Level 1 – Easy, for beginners

US crochet terms:
SlSt – slip stitch
CH/s – chain/s
SC - single crochet
HDC - half double crochet
DC - double crochet
TR - treble
SK - skip
T - turn
ST/s - stitch(es)
REP – repeat
CROCHETED MINI POUCH - CAT
INSTRUCTIONS AND PATTERN NOTES
-
In this pattern, a ch 1 at the beginning of a row does not count as a stitch.
-
I recommend starting with a magic ring. Work in joined rounds on the right side.
-
( ) – The number in parentheses indicates the total number of stitches in the round after completing it.
-
Finished Size: Approximately 8 cm (3.15 inches) using the recommended hook size.
-
Please note that the size may vary depending on your individual crocheting style and tension.
-

WRITTEN PATTERN
Color A Hook: 3.00 mm
Notes for this pattern:
-
Ch 1 at the beginning of a row does not count as a stitch.
-
I recommend starting with a magic ring. Work in joined rounds on the right side, closing each round with a slip stitch.
-
R1: Ch 3 (counts as dc), 11 dc into the magic ring. Join with a sl st to the 3rd ch at the beginning of the round (12 dc).
-
R2: Ch 3 (counts as dc) and 1 dc into the 1st st. 2 dc into each st around. Join with a sl st to the 3rd ch at the beginning of the round (24 dc).
-
R3: Ch 3 (counts as dc) and 1 dc into the 1st st. 1 dc into the next st. *2 dc into the next st, 1 dc into the next st*. Repeat from * to * across. Join with a sl st to the 3rd ch at the beginning of the round (36 dc).
-
R4: Ch 3 (counts as dc) and 1 dc into the 1st st. 1 dc into the next 2 st. *2 dc into the next st, 1 dc into the next 2 st*. Repeat from * to * across. Join with a sl st to the 3rd ch at the beginning of the round (48 dc).
-
R5: Ch 1. Skip 1 st. (2 dc, 2 tr) into the next st. (2 tr, 2 dc) into the next st. Skip 1 st. Sl st into the next 10 st. Skip 1 st. (2 dc, 2 tr) into the next st. (2 tr, 2 dc) into the next st. Skip 1 st. *1 hdc into the next 3 st, 2 hdc into the next st*. Repeat from * to * 2 times. *1 sc into the next 3 st, 2 sc into the next st*. Repeat from * to * 3 times. *1 hdc into the next 3 st, 2 hdc into the next st*. Repeat from * to * 2 times. Skip 1 st. Sl st to join and close the round.
Cut yarn and weave in the loose end.
Repeat the process to crochet the second piece of the same size. IMPORTANT NOTE: Do not cut the yarn after finishing the second piece. You will continue with it to crochet the side of the pouch, a total of 3 rows of single crochet:
-
R6: Ch 1, turn your work. Sc into each st around the entire bottom section until you reach the beginning of the ear section (approx. 35 sc).
-
R7 - R8: Ch 1, turn your work. Sc into each st around the entire bottom section until the end of the row.

ASSEMBLY - FINISHING AND SEAMING – INSTRUCTIONS AND RECOMMENDATIONS
Single crochet (sc) both pieces together using slip stitches (or you can sew them) up to the tops of the ears. While crocheting, also make the loop in the middle between the ears:
-
Shorter Loop: Ch 12. Sl st into each ch. Join with a sl st.
-
Longer Loop: Ch 20. Sl st into each ch. Join with a sl st.
Cut yarn and weave in the loose end.
EYES
Color B Hook: 3.00 mm Start with a magic ring. Crochet into the magic ring: Ch 2, 3 hdc, and 1 sl st into the magic ring. Cut yarn, leaving a long tail for sewing. Crochet one more eye. Sew the eyes onto the head and weave in the loose end.
NOSE
Color C Hook: 3.00 mm Start with a magic ring. Crochet into the magic ring: Ch 2, 2 hdc, and 1 sl st into the magic ring. Cut yarn, leaving a long tail for sewing. Sew the nose onto the head and weave in the loose end.
BOW
Color D Hook: 3.00 mm Start with a magic ring. Crochet into the magic ring: Ch 1 (counts as sc), 1 hdc, 1 dc, 1 tr, 1 dc, 1 hdc, 2 sc, 1 hdc, 1 dc, 1 tr, 1 dc, 1 hdc, 2 sc. Join with a sl st to the 1st st. Cut yarn, leaving a long tail for sewing. Sew the bow onto the head and weave in the loose end.
WE ARE DONE!
YOUR WONDERFUL CROCHETED MINI POUCH - HELLO KITTY CAT IS FINISHED. I BELIEVE IT WILL BRING JOY TO YOUNGER AND OLDER GIRLS.

What’s Next?
Pin this post: Save this tutorial to your Pinterest boards so that you can come back to it later.
Leave a comment: I love to hear your feedback. Tell me in the comments below!
Share on Instagram and Facebook: When you make this project, share it on social media and tag me @sonanebeska. I love to see what you make!
More Crochet TOY'S patterns?
For even more TOY'S crochet patterns, check out my collection.
All of the patterns on that list of beautifully designed, and suitable for both beginners and experienced crocheters.
Explore More Crochet Patterns
If you love to crochet BASKETS as much as I do, I think you’ll love these other free crochet patterns.
♥♥♥
Have fun and let me know what you make. I would love to know how your project turns out.
Please don't forget to like and I really appreciate your comments.
If the pattern did not make sense to you, please don’t hesitate to contact me, I am happy to help :)
If you like this pattern, please follow and share my projects on social networks as a THANK YOU and to help me to create new projects and patterns for you.
Thank you very much once again for your visit and see you soon!
♥♥♥


