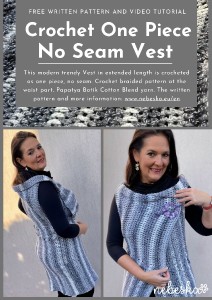
Crochet Modern No Seam Vest with Braided pattern
Hello My Crochet Friends!
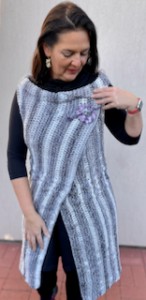
Today I prepared a tutorial for a wonderful modern and non-traditional vest in an extended length to the knees.
The vest has a super simple design and construction, where you crochet the whole vest as one piece without sewing.
I chose the beautiful Papatya Batik Cotton Blend yarn and a gray-toned color with subtle transitions from light, slightly creamy to dark gray, anthracite. I am delighted with this yarn, it is nice, soft and great to work with.

This vest is a wonderful, original and very versatile piece to your wardrobe. The great thing is that it can be worn in almost any season and for different kinds of occasions.
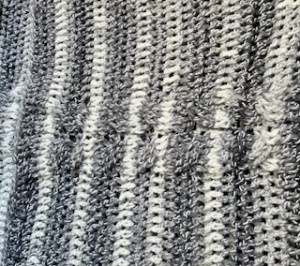
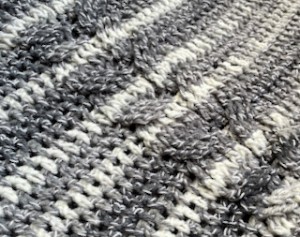
I chose a simple pattern of double crochet stitches and chose a double braided pattern for the waist part. The vest is thus slightly narrowed at the waist and looks very elegant.
The pattern is for woman size L, you can easily adjust this size to be larger or smaller, you can crochet the vest longer or shorter, whatever style suits you.
This vest is great from spring, summer, even fall if you want to dress warmer for cooler days or evenings. It is wonderful in the transitional period between winter and spring or summer and autumn.
The vest has a simple construction - it is crocheted as ONE large rectangle in rows from top to bottom.
I believe that this simple and yet elegant vest design will please not only you, but also your friends or colleagues.
Are you looking forward to this modern elegant vest with a braided pattern?
So let's get straight to work so you can head out in this vest as soon as possible.
VIDEO TUTORIAL
You can find the step-by-step video tutorials below which will help you along if you prefer to watch video instruction rather than using a written pattern. Don’t forget to subscribe if you like me videos, it’s FREE!
![]()
If you pin my patterns to your Favorites and share it on social media as a link, I will be able to share a lot more free crochet patterns for you all.
Stay in touch at Facebook, Instagram and Pinterest.
Let's start or PIN this idea to your Pinterest boards for later.
![]()
More Crochet patterns?
For even more crochet patterns, check out my e-book.
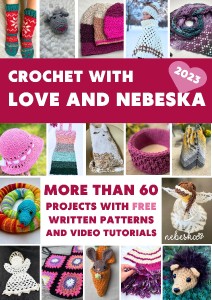
CROCHET WITH LOVE AND NEBESKA
I prepared for you the e-book CROCHET WITH LOVE AND NEBESKA, it is a set of more than 60 projects with instructions and video instructions for the whole year 2023!
You can download the e-book as a pdf with links to allow you to better find the guide you need. Or maybe you missed one of the pattern instructions and now it will make you happy, or you are just looking for inspiration and one of my ideas will move you in your next creation!
This e-book is FREE and you can share it with your friends. Due to the size, it is necessary to download CROCHET WITH LOVE AND NEBESKA from the link (it cannot be sent as an e-mail attachment). Click on the ebook link or image and download the e-book CROCHET WITH LOVE AND NEBESKA 2023 for FREE.
https://forms.gle/CyJZqXs4fTWechtE6
All of the patterns on that list of beautifully designed, and suitable for both beginners and experienced crocheters. They are different levels of difficulties and techniques that you might have never seen before. Just click on them and you can find the free pattern, each of the patterns comes with a video tutorial.
CROCHET MODERN NO SEAM VEST WITH BRANDED PATTERN
This pattern is made for beginners - only a basic skill level is required to make it. If you don't understand any of my instructions, don't worry I am here for you.
Have questions? Join the Facebook Group OR my Youtube Community!
I hope this article will be useful for you! If you have any additional questions, feel free to join my Facebook Group or Youtube Community. I created these groups for you to share pictures, ask questions, and help each other out.

CROCHET MODERN NO SEAM VEST WITH BRANDED PATTERN - DIRECTIONS
So let me now get started and tell you what you will need in order to crochet this amazing CROCHET MODERN NO SEAM VEST WITH BRANDED PATTERN.
This CROCHET MODERN NO SEAM VEST WITH BRANDED PATTERN is very fun and quick to make.
The pattern uses only basic crochet stitches - double crochets and chains.
This easy-to-fit vest is a crocheter's dream, made flat without the need for shaping. The pretty braided stitch pattern in the waist part and double crochet stitches is smartly designed as a rectangle with 2 holes for arms. The no seam VEST is worked in rows, back and forth.
The entire vest is crocheted with amazing yarn
Papatya Batik Cotton Blend
https://www.vlnika.cz/z22816-prize-papatya-batik-cotton-blend
![]()
The choice of yarn was easy - I had ready a beautiful pleasant light iridescent self-patterning yarn Papatya Batik Cotton Blend, a pleasant mixture of white cotton and acrylic.
1 skein: 100 g / 225 m / 70% acrylic + 30% cotton
The pattern was made with yarn Papatya Batik Cotton Blend.
This yarn made from cotton-acrylic, so it’s soft, affordable, and really easy to care for. Plus, this yarn comes in more than 10 gorgeous colors.
For this L size VEST you will need 6 skeins.
Scissors and tapestry needle
Crochet hook: 5.0 - 5.5 mm
Difficulty Level: Level 1 – Easy, for beginners
Abbreviations (US Crochet Terms):
SP - space
SlSt – slip stitch
CH/s – chain/s
TR - treble
HDC - half double crochet
DC - double crochet
SK - skip
T - turn
ST/s - stitch(es)
REP - repeat
YO – yarn over
RS - right side
WS - wrong side
FRONT POST DOUBLE CROCHET AND BACK POST DOUBLE CROCHET STITCHES
front post double crochet (fpdc) and back post double crochet (bpdc)
Front and back post crochet stitches are used to create wonderful texture in crochet. Instead of making your stitch through the loops at the top of the stitch, you make it around the stitch. Everything else stays the same. The most challenging things about crochet post stitches are knowing where and how to insert the hook. There are front post stitches and back post stitches.
For front post double crochet stitches (fpdc): yarn over, insert your hook from front to back then from back to front around post of stitch indicated, yarn over, pull through stitch, then finish your double crochet as normal, yarn over, pull through 2 lps, yarn over, pull through last 2 lps
For back post double crochet stitches (bpdc): yarn over, you insert your hook from back to front then from front to back around post stitch indicated, yarn over, pull through stitch, then finish your double crochet as normal, yarn over, pull through 2 lps, yarn over, pull through last 2 lps
PATTERN NOTES
1) Before you start take a measurement of height of your body and a body measurement (please see the final measurement of the vest below).
2) This pattern is for LARGE Woman size, but you can easily adapt to a smaller size or bigger size just by making the rectangles bigger or smaller.
Make the rectangle bigger or smaller just by reducing or increasing the number of rows.
Remember that when making your poncho bigger you will need more yarn.
3) A ch2/ch3 at beg of the round counts as a stitch throughout.
4) The Vest is made up of one big rectangles
The rectangle for L size measures (width x length): 124 cm / 48.3 inch (front, back, front part) and 100 cm / 40 inch long
*Measurements are taken from the garment lying flat, before the yarn has stretched out/dropped.
5) The vest is worked in one piece, in vertical rows, back and forth, from front edge to front edge

CONSTRUCTION
This vest is made from one big crochet rectangle with two arm holes.
The number of stitches you begin with is the length of your rectangle.
The number of rows you work is the width of your rectangle.
You will continue working the rows until your vest measures the provided width.
There is a crochet braided pattern at waist part.
You crochet and repeat the pattern until you are satisfied with the width of the vest.
We repeat 4 rows of the braided pattern, the crossing is every 4th row.
According to your measurements, crochet a large rectangle.

WRITTEN PATTERN
Grab a 5.0 mm crochet hook and make a slip knot.
Work in rows back and forth.
Start with the foundation chain: 109 ch
Length approx.: 90 cm - 100 cm
FRONT PANEL
R1: ch2 (1dc), 1dc in 4th ch from hook, 1dc in each ch, work in bump, till end of row, turn (109 stitches: 42 dc topper part + 15 dc braided pattern in waist part + 52 dc lower part)
R2 - R4: ch3 (dc), 1dc work between ds from previous row, braided pattern in waist part, 1dc work between ds from previous row, don’t work the last space, 1dc in last st, turn (109 stitches)
R5: ch3 (dc), 1dc work between ds from previous row, braided pattern in waist part (crossing), 1dc work between ds from previous row, don’t work the last space, 1dc in last st, turn (109 stitches)
Repeat 4 rows: R2 and R5, crossing every 4th row, till you are satisfied with the width of the front panel
FRONT PANEL
I made 30 rows = 7times crossing
width: 40 cm
length of topper part 40 cm, length of bottom part 50 cm, braided pattern 9 cm
LET'S MAKE HOLE FOR ARM
topper part 10 cm, ARMHOLE 20 cm
Work: 1 dc in next 12 st, skip 22 st, chain 22 chains, then work dc, braided pattern and dc till end of row. Turn.
In next row work dc, braided pattern, dc till you reach chain, 1dc in each ch, work in bump (22 dc), finish dc till end of row. Turn.
BACK PANEL
Continue and crochet in the same way as on the front panel, till you are satisfied with the width of the back panel.
I made 40 rows = 9times crossing, crossing in each 4th row as on the front panel
width: 44 cm
length is the same as on the front panel: topper part 40 cm, length of bottom part 50 cm, braided pattern 9 cm
LET'S MAKE HOLE FOR ARM: topper part 10 cm, ARMHOLE 20 cm
Work 1 dc in next 12 st, skip 22 st, chain 22 chains, then work dc, braided pattern and dc till end of row. Turn.
In next row work dc, braided pattern, dc till you reach the chain, 1dc in each ch, work in bump (22 dc), finish dc till end of row. Turn.
FRONT PANEL
Continue and crochet in the same way, till you are satisfied with the width of the front panel.
I made 31 rows = 7times crossing
width: 40 cm
length is the same as on the front panel: topper part 40 cm, length of bottom part 50 cm, braided pattern 9 cm
The last row: 1 sl st in each st.
Cut the yarn and hide all loose tails in the wrong side of your work.
BRAIDED PATTERN: 15 stitches
R1 (WS): 1 bpdc in next 3 st, 1hdc in next st, 1 bpdc in next 3 st, 1hdc in next st, 1 bpdc in next 3 st, 1hdc in next st, 1 bpdc in next 3 st (15 st), then work dc till end of row, turn
R2 (RS): skip 3 dc, 1hdc in next st, 1 fptr in next 3 st, then work 1 fptr in 3 skipped st, these 3 stitches go under 3 fptr you made before,
1hdc in next st, skip 3 dc, 1hdc in next st,
1 fptr in next 3 st, then work 1 fptr in 3 skipped st, these 3 stitches go over 3 fptr you made before (15 st), then work dc till end of row, turn
R3 (WS): 1 bpdc in next 3 st, 1hdc in next st, 1 bpdc in next 3 st, 1hdc in next st, 1 bpdc in next 3 st, 1hdc in next st, 1 bpdc in next 3 st (15 st), then work dc till end of row, turn
R4 (RS): 1 fpdc in next 3 st, 1hdc in next st, 1 fpdc in next 3 st, 1hdc in next st, 1 fpdc in next 3 st, 1hdc in next st, 1 fpdc in next 3 st (15 st), then work dc till end of row, turn
R5 (WS): 1 bpdc in next 3 st, 1hdc in next st, 1 bpdc in next 3 st, 1hdc in next st, 1 bpdc in next 3 st, 1hdc in next st, 1 bpdc in next 3 st (15 st), then work dc till end of row, turn
Repeat rows R2 - R5 (4 rows, crossing every 4th row and then 3 rows front and back post stitches)
We have crocheted a beautiful elegant vest with a braided pattern in the waist part.
And whoever wants can crochet a cardigan coat for spring/autumn from the vest.
In the next episode, we'll show you how!
Now that your VEST is assembled you will hide all loose tails in the wrong side of your work and turn it right side facing you and you are all done my friends.
You just created a beautiful COSY NO SEAM VEST!

What’s Next?
Pin this post: Save this tutorial to your Pinterest boards so that you can come back to it later.
Leave a comment: I love to hear your feedback. Tell me in the comments below!
Share on Instagram and Facebook: When you make this project, share it on social media and tag me @sonanebeska. I love to see what you make!
Do you love the COWLS crocheting? COWLS are always good gift ideas. You would may like to try also these patterns:
♥♥♥
Have fun and let me know what you make. I would love to know how your project turns out.
Please don't forget to like and I really appreciate your comments.
If the pattern did not make sense to you, please don’t hesitate to contact me, I am happy to help :)
If you like this pattern, please follow and share my projects on social networks as a THANK YOU and to help me to create new projects and patterns for you.
If you pin my patterns to your Favorites and share it on social media as a link, I will be able to share a lot more free crochet patterns for you all.
Stay in touch at Facebook, Instagram and Pinterest.
Thank you very much once again for your visit and see you soon!
♥♥♥


