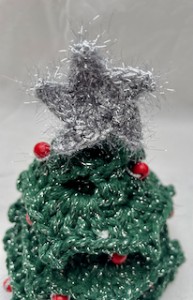
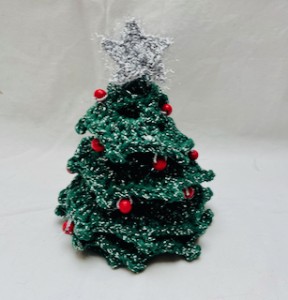
Crochet Christmas tree with Red Balls and Silver Star
Hello My Crochet Friends!
CROCHETED CHRISTMAS TREE is a continuation of crocheting a series of small Christmas ornaments and decorations during the Christmas holidays.
Since autumn I look forward to crocheted Christmas deco, it is fun and joy that I prepare for every year and think and count how many pieces to make to please my family and friends.
A crocheted tree is such a classic, a cute little gift, a little attention for joy.
This pattern is perfect for beginners - it's easy and simple, repeating rows of double crochets and chains.
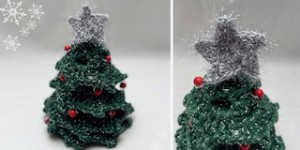
You can crochet a tree of any size, tall or wide - it depends on what you crochet the first part - the conical base. You can decorate the tree nicely so that it matches the Christmas decoration. You can add a bow, bells, beads or a poinsettia.
Instructions for crocheted stars:
If you are looking for a cute holiday mini Christmas Tree, then you’ll love this easy mini Christmas Tree crochet pattern for basic skill level.
This mini Christmas Tree is quick to make, only use a small amount of yarn, and can be made with any weight or type of yarn you like.
It is an easy and free pattern for a mini Christmas Tree that has 2 simple parts.
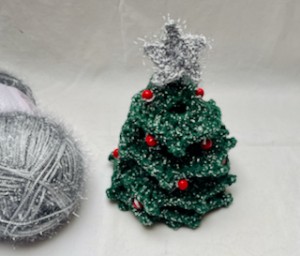
I decorated the Christmas tree with some little red beads!
Crochet some adorable little Trees for your Christmas tree, or as little festive gifts!
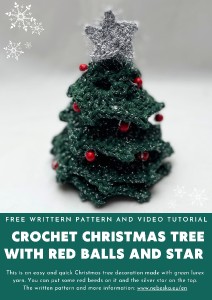
The written pattern is available here below for free. It comes with a video guide as well.
VIDEO TUTORIAL
You can find the step-by-step video tutorials below which will help you along if you prefer to watch video instruction rather than using a written pattern. Don’t forget to subscribe if you like me videos, it’s FREE!
![]()
Let's start or PIN this idea to your Pinterest boards for later.
![]()
How to CROCHET CHRISTMAS TREE WITH RED BALLS AND SILVER STAR
This pattern is made for beginners - only a basic skill level is required to make it. If you don't understand any of my instructions, don't worry I am here for you.
Have questions? Join the Facebook Group!
I hope this article will be useful for you! If you have any additional questions, feel free to join my Facebook Group. I created this group for you to share pictures, ask questions, and help each other out.
This CROCHET CHRISTMAS TREE WITH RED BALLS AND SILVER STAR is an adorable little Christmas decoration, super easy and quick to crochet, great project for beginners.
CROCHET CHRISTMAS TREE WITH RED BALLS AND SILVER STAR - MATERIALS
I have used a macrame yarn you like or any yarn you like but different yarn weights will produce different sized Tree.
![]()
The pattern was made with:
Macrome Lurex Mocha yarn: 250 g / 200 m / 60 % cotton / 40 % polyester / 10 % lurexhttps://www.vlnika.cz/z15302-prize-macrome-lurex-mocha
Simli Kristal: 100 g / 200 m / 75 % polyester + 25 % metalic thread
https://www.vlnika.cz/z11832-prize-simli-kristal
4.5 mm crochet hook
Scissors
Sewing/Embroidery and yarn needle/tapestry needle for sewing pieces together and weaving in ends
Marker
Difficulty Level: Level 1 – Easy, for beginners
US crochet terms:
SlSt – slip stitch
CH/s – chain/s
SC - single crochet
DC - double crochet
SK - skip
T - turn
ST/s - stitch(es)
REP – repeat
CROCHET CHRISTMAS TREE WITH RED BALLS AND SILVER STAR
PATTERN NOTES
1) The tree has 2 parts: cone and fans/twigs
2) Magic ring = the starting point for crocheting. Use which ever method you prefer.
3) Chain 3 at the beginning of the row is a stitch = double crochet
4) Crochet the cone in CLOSED rounds, finish the row with a slip stitch in the 3rd ch from the beginning of the row and start the next row with 3 ch.
5) ( ) – The number of stitches that should be in a completed round/row are placed in brackets at the end of that round’s/row’s instructions
6) The fans are crocheted in rows, this part is sewn onto the cone from the bottom up in spiral rows.
7) If you would like a smaller or larger, narrower or wider Christmas tree, change the size of the cone.
8) After crocheting, you can decorate the tree with e.g. beads
9) Crochet a star for the top of the tree according to the following instructions:
10) This CROCHET CHRISTMAS TREE measures:
4 inch / 10 cm tall
4.5 inch / 12 cm wide
The finished size will depend on what yarn you use, as well as your tension and hook (as with any amigurumi).
11) You can make CROCHET CHRISTMAS TRE bigger with a thicker yarn or a larger hook size.
12) There is just minimal sewing, you will only sew the chain with fans on the cone, this is quick and easy to do, there are no tricks.
CROCHET CHRISTMAS TREE WITH RED BALLS AND SILVER STAR
THE WRITTEN PATTERN
CONE
Ch3 at the beg = ds
Make a magic ring
R1: ch3, 5dc in magic ring (6 dc)
R2: ch3(dc), 2dc in next st *1dc in next st, 2dc in next st* repeat from * to * till end of row, close the row with a sl st in 3rd ch from beg (9 dc)
R3: ch3(dc), 1dc in next st, 2dc in next st *1dc in next 2 st, 2dc in next st* repeat from * to * till end of row, close the row with a sl st in 3rd ch from beg (12 dc)
R4 - R5: ch3(dc), 1dc in each st around, close the row with a sl st in 3rd ch from beg (12 dc)
R6: ch3(dc), 1dc in next 2 st, 2dc in next st *1dc in next 3 st, 2dc in next st* repeat from * to * till end of row, close the row with a sl st in 3rd ch from beg (15 dc)
Cut yarn and fasten off with invisible join and wave all ends in.
CHAIN WITH FANS
Work in rows back and forth
Start with a foundation chain, make the chain long enough to spiral around the crochet cone, the spacing between the turns is one row of double crochet st.
Ch 99 / 80 cm / 31 inch
R1: ch2, 1dc in 4th ch from hook, 1dc in next ch, *(ch1, sk ch1, 1dc in next 2 ch)* repeat from * to * till end of row, 1dc in last st, turn
R2: ch3, (3dc, picot, 3dc) in each ch1sp, 1dc in last st
Cut the yarn, leaving the longer end for sewing the chain with fans onto the cone.
Cut yarn and fasten off with invisible join.
FINISHING INSTRUCTIONS
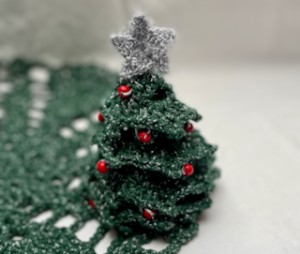
Use a longer tail at the end. Sew a crocheted chain from the bottom up, we sew 1 row of double crochet on the cone with a distance. We will leave the top (the last row) uncovered. We will sew a star on it.
Decorate the tree with some cute little beads
You can sew red beads for decoration or crochet to decorate like this:
magic ring, ch1, 6sc into magic ring, join the row with a sl st. Leave the longer end for sewing.
Cut yarn and fasten off.
And voila! You made a CUTE EASY CHRISTMAS TREE .
IT would make a wonderful handmade gift for kids and adults! He will surely bring smile to all your recipient’s faces.
I hope you’ve enjoyed making this free CROCHET CHRISTMAS TREE crochet pattern.
You can browse through all of my other FREE crochet HOME DECOR and HOLIDAY patterns:
MORE PATTERNS?
You know me, I love making homemade things and creating beautiful gifts for my family and my friends. I also love doing my own crochet Amigurumi.
If you do as well, you may would love to try these patterns as well:
More Crochet HOLIDAYS patterns?
For even more crochet HOLIDAYS patterns, check out my collection.
All of the patterns on that list of beautifully designed, and suitable for both beginners and experienced crocheters.
Explore More Crochet Patterns
If you love to crochet as much as I do, I think you’ll love these other free crochet patterns.
What’s Next?
Pin this post: Save this tutorial to your Pinterest boards so that you can come back to it later.
Leave a comment: I love to hear your feedback. Tell me in the comments below!
Share on Instagram and Facebook: When you make this project, share it on social media and tag me @sonanebeska. I love to see what you make!
♥♥♥
Have fun and let me know what you make. I would love to know how your project turns out.
Please don't forget to like and I really appreciate your comments.
If the pattern did not make sense to you, please don’t hesitate to contact me, I am happy to help :)
If you like this pattern, please follow and share my projects on social networks as a THANK YOU and to help me to create new projects and patterns for you.
Thank you very much once again for your visit and see you soon!
♥♥♥


