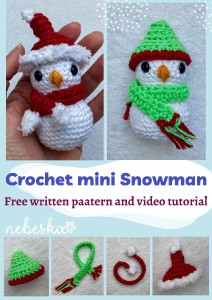
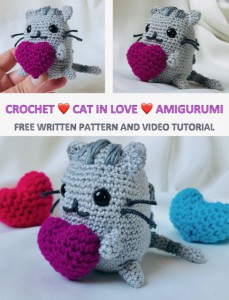
Crochet Little Santa or Elf Snowman Amigurumi
Are looking for a cute holiday mini Snowman and easy to crochet design? If so, then you’ll love this cute mini snowman crochet pattern for basic skill level.
This cute Snowman is quick to make, only use a small amount of yarn, and can be made with any weight or type of yarn you like.
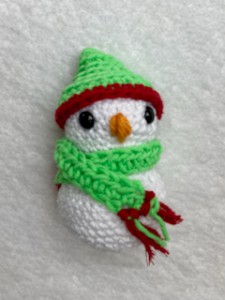
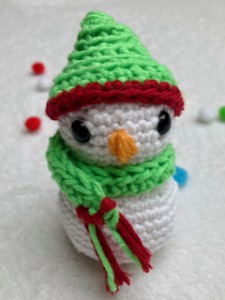
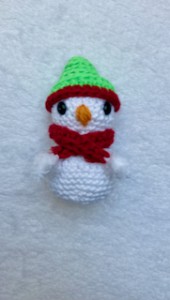
It is an easy and free pattern for a mini Snowman that has a cute little hat and a colorful scarf and button eyes. His body and head are made as one piece.
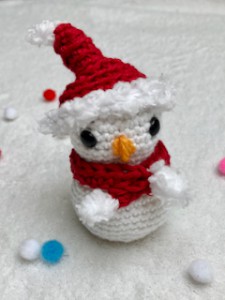
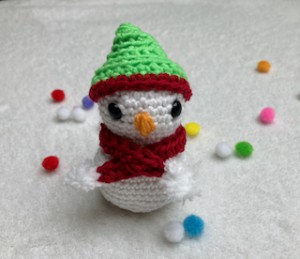
I tried 2 different hats and couldn't decide which one is the best - there is a pattern for both - try Elf style or Santa style hats!
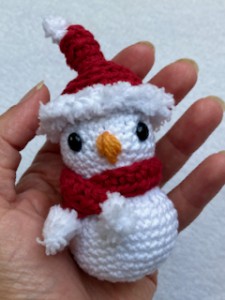
He is so sweet with his Santa hat and little carrot nose. This snowman is perfect for the Christmas spirit.
I have used an amigurumi yarn, but different yarn weights will produce different sized snowmen.
Your holiday decorating won’t be complete without this crochet cozy mini snowman amigurumi!
Crochet some adorable little Snowman for your Christmas tree, or as little festive gifts!
The written pattern is available here below for free. It comes with a video guide as well.
VIDEO TUTORIAL
You can find the step-by-step video tutorials below which will help you along if you prefer to watch video instruction rather than using a written pattern. Don’t forget to subscribe if you like me videos, it’s FREE!
![]()
A huge thanks to everyone who want to support my blog and download PDF paid pattern. Thank you very much, I really appreciate it and it helps me create more new video tutorials and patterns for you. Love you!
![]()
If you pin my patterns to your Favorites and share it on social media as a link, I will be able to share a lot more free crochet patterns for you all.
Stay in touch at Facebook, Instagram and Pinterest.
Let's start or PIN this idea to your Pinterest boards for later.
![]()
MORE PATTERNS?
You know me, I love making homemade things and creating beautiful gifts for my family and my friends. I also love doing my own crochet Amigurumi.
If you do as well, you may would love to try these patterns as well:
How to CROCHET MINI SNOWMAN Amigurumi
This pattern is made for beginners - only a basic skill level is required to make it. If you don't understand any of my instructions, don't worry I am here for you.
Have questions? Join the Facebook Group!
I hope this article will be useful for you! If you have any additional questions, feel free to join my Facebook Group. I created this group for you to share pictures, ask questions, and help each other out.
This CROCHET MINI SNOWMAN is an adorable little Amigurumi Toy, easy and quick to crochet, great project for beginners. This little CROCHET MINI SNOWMAN will give your own little one lots of fun at playtime.
CROCHET MINI SNOWMAN MATERIALS
Amigurumi Cotton Yarn, the color you like for:
Head, Body - white color (color A)
Hat - green / red (color B)
Scarf - green / red (color C)
![]()
The pattern was made with:
Johanka yarn: 1 skein / ball, 55% cotton + 45% acrylic, 50 g / 160 m and
YarnArt Jeans: 1 Skein / Ball, 55% Cotton 45% Acrylic Sport (12 wpi) yarn
Rachel yarn: 1 skein / ball, 100 % polyester, 50 g / 100 m, chenille/velvet yarn
3 mm crochet hook
8 mm plastic safety eyes - 2 pieces
Scissors
Stuffings
Sewing/Embroidery and yarn needle/tapestry needle for sewing pieces together and weaving in ends
Markers
Pins
Difficulty Level: Level 1 – Easy, for beginners
US crochet terms:
SlSt – slip stitch
CH/s – chain/s
SC - single crochet
HDC - half double crochet
DS - double crochet
SK - skip
T - turn
ST/s - stitch(es)
REP – repeat
SC2TOG = 2 single crochets together
Special stitches used:
Single Crochet Decrease (sc2tog)
A crochet decrease makes the current row or round that you are working on shorter than the one previous to it.
1. Insert hook into the first stitch.
2. Yarn over and draw through the loop.
3. Do not complete the stitch as normal.
4. Instead, insert the hook into the next stitch.
5. Yarn over and draw through the loop.
6. There should now be three loops on your hook
7. Yarn over and draw through all three loops on the hook
8. You should now have two single crochet stitches side-by-side, joined together into one stitch at the top.
This pattern requires familiarity with stitches used, attaching yarn, changing yarn colors, sewing parts together with a sewing needle.
CROCHET MINI SNOWMAN PATTERN NOTES
1) A ch1 at beg of the row DOESN'T count as a stitch
2) Magic ring = the starting point for crocheting in a spiral. Use which ever method you prefer.
3) Continuous rounds - HEAD + BODY, HAT parts are worked up in continuous rounds, which means that you will not be joining the last stitch of the round with the first one. Instead you will need to keep track of where each round started and how many stitches you have made because after each round you will continue right on to the stitches of the next round (with no join). It is useful to use a stitch marker or piece of yarn to mark the start or end of each round.
4) Working in rows - SCARF part is worked in rows. When you reach the end of row, chain, turn your work and continue working in stitches from the previous row.
4) ( ) – The number of stitches that should be in a completed round/row are placed in brackets at the end of that round’s/row’s instructions.
5) This CROCHET MINI SNOWMAN Amigurumi measures:
3 inch / 7.5 cm tall
2.5 inch / 6.5 cm wide
The finished size will depend on what yarn you use, as well as your tension and hook (as with any amigurumi).
6) You can make the CROCHET MINI SNOWMAN Amigurumi bigger with a thicker yarn or a larger hook size.
7) There is just minimal sewing, you will only sew the nose on the head, the hat on top of head - this is quick and easy to do, there are no tricks.
CROCHET MINI SNOWMAN
THE WRITTEN PATTERN
Color A
Ch1 at the beginning of round don't count as a stitch.
This part is worked in spiral rounds, without joining rounds. Do not join rounds.
Make a magic ring
R1: ch1, 6sc in magic ring (6sc)
R2: *2sc in each st around* repeat from * to * till end of round (12 sc)
R3: *2sc in next st, 1sc in next st* repeat from * to * till end of round (18 sc)
R4: *2sc in next st, 1sc in next 2 st* repeat from * to * till end of round (24 sc)
R5: *2sc in next st, 1sc in next 7 st* repeat from * to * till end of round (27 sc)
R6-R9: 1sc in each st around (27 sc)
R10: *sc2tog, 1sc in next 7 st* repeat from * to * till end of round (24 sc)
Add crocheted eyes or safety plastic eyes size 8 mm between row R7 and R8, skip 7 stitches apart.
R11: *sc2tog, 1sc in next 6 st* repeat from * to * till end of round (21 sc)
R12: *sc2tog, 1sc in next 5 st* repeat from * to * till end of round (18 sc)
R13: 1sc in each st around (18 sc)
Stuff the HEAD well.
R14: *2sc in next st, 1sc in next 2 st* repeat from * to * till end of round (24 sc)
R15: *2sc in next st, 1sc in next 3 st* repeat from * to * till end of round (30 sc)
R16: *2sc in next st, 1sc in next 4 st* repeat from * to * till end of round (36 sc)
R17-R21: 1sc in each st around (36 sc)
R22: *sc2tog, 1sc in next 4 st* repeat from * to * till end of round (30 sc)
R23: *sc2tog, 1sc in next 3 st* repeat from * to * till end of round (24 sc)
Stuff the body well.
R24: *sc2tog, 1sc in next 2 st* repeat from * to * till end of round (18 sc)
Stuff more if needed before finishing round R26
R25: *sc2tog in next st, 1sc in next st* repeat from * to * till end of round (12 sc)
R26: *sc2tog* repeat from * to * till end of round (6 sc)
R27: join all stitches together
Cut yarn colour A and fasten off and wave all ends in.
STUFFING
The exact moment for starting filling and stuffing the toy depends on every single person. I prefer filling the toy with the work almost finished. It’s a bit more difficult to fill, but more comfortable to crochet. You should make proofs until finding the more suitable moment of filling for you.
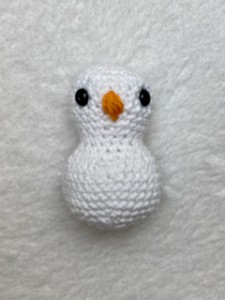
NOSE
colour D
With a tapestry needle, embroider the nose on the head, embroider the nose as a triangle shape or heart shape around 3 crochet st. Start with the yarn between eyes across the 3 stitches in the rows below. Wrap yarn 3 times so the nose puffs out from the head.
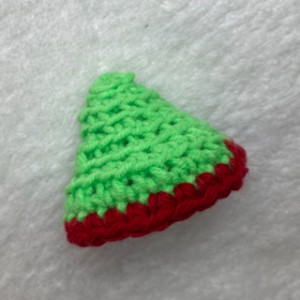
HAT – ELF STYLE
Color B
Ch1 at the beginning of round don't count as a stitch.
This part is worked in spiral rounds, without joining rounds. Do not join rounds.
Make a magic ring
R1: ch1, 6sc in magic ring (6sc)
From R2 till R8 work in BLO.
R2: 1sc in each st around (6sc)
R3: *2sc in each st around* repeat from * to * till end of round (12 sc)
R4: 1sc in each st around (12 sc)
R5: *2sc in next st, 1sc in next st* repeat from * to * till end of round (18 sc)
R6: 1sc in each st around (18 sc)
R7: *2sc in next st, 1sc in next 2 st* repeat from * to * till end of round (24 sc)
R8: 1sc in each st around (24 sc)
Close round with sl st.
Color C
R9: 1sc in each st around (24 sc)
Weave in all ends.
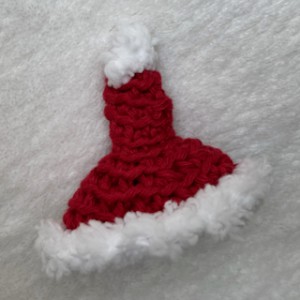
HAT – SANTA STYLE
Color C
Ch1 at the beginning of round don't count as a stitch.
This part is worked in spiral rounds, without joining rounds. Do not join rounds.
From R2 till R13 work in BLO.
Make a magic ring
R1: ch1, 6sc in magic ring (6sc)
R2-R5: 1sc in each st around (6 sc)
R6: *2sc in each st around* repeat from * to * till end of round (12 sc)
R7: 1sc in each st around (12 sc)
R8: *2sc in next st, 1sc in next st* repeat from * to * till end of round (18 sc)
R9: 1sc in each st around (12 sc)
R10: *2sc in next st, 1sc in next 2 st* repeat from * to * till end of round (24 sc)
R11: 1sc in each st around (24 sc)
Close round with sl st.
Color A
R12: 1sc in each st around (24 sc)
Weave in all ends.

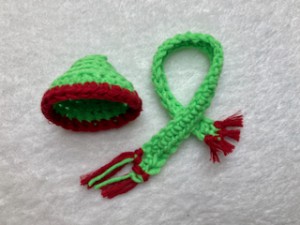
SCAF
Color B
Foundation chain: ch25
R1: ch1, 1hdc in 2nd ch from hoko, 1hdc in next st till end of round (26 hdc)
You can colorful pompoms or tassels.
Weave in all ends.
FINISHING INSTRUCTIONS
Make sure the head and the body is stuffed well before sewing, but not so firm that you can see the stuffing through the stitches.
Sew the HAT to the HEAD on the position on top of the HEAD.
Sew the SCARF on the neck.
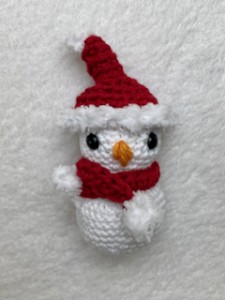
And voila! You made a CUTE LITTLE SNOWMAN.
IT would make a wonderful handmade gift for kids and adults! He will surely bring smile to all your recipient’s faces.
I hope you’ve enjoyed making this free CROCHET CUTE LITTLE SNOWMAN crochet pattern.
You can browse through all of my other FREE crochet HOME DECOR and HOLIDAY patterns:
More Crochet HOLIDAYS patterns?
For even more crochet HOLIDAYS patterns, check out my collection.
All of the patterns on that list of beautifully designed, and suitable for both beginners and experienced crocheters.
Explore More Crochet Patterns
If you love to crochet as much as I do, I think you’ll love these other free crochet patterns.
What’s Next?
Pin this post: Save this tutorial to your Pinterest boards so that you can come back to it later.
Leave a comment: I love to hear your feedback. Tell me in the comments below!
Share on Instagram and Facebook: When you make this project, share it on social media and tag me @sonanebeska. I love to see what you make!
♥♥♥
Have fun and let me know what you make. I would love to know how your project turns out.
Please don't forget to like and I really appreciate your comments.
If the pattern did not make sense to you, please don’t hesitate to contact me, I am happy to help :)
If you like this pattern, please follow and share my projects on social networks as a THANK YOU and to help me to create new projects and patterns for you.
Thank you very much once again for your visit and see you soon!
♥♥♥


