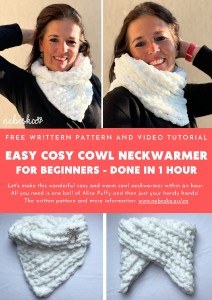
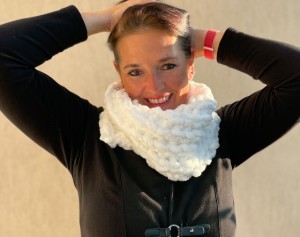
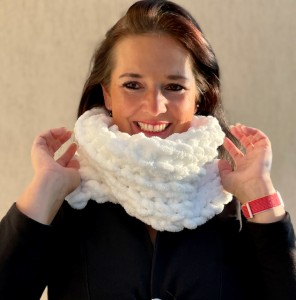
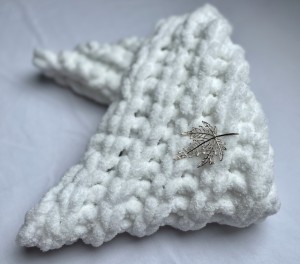
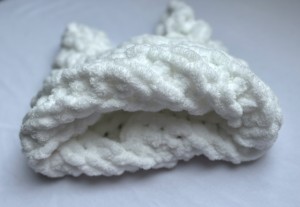
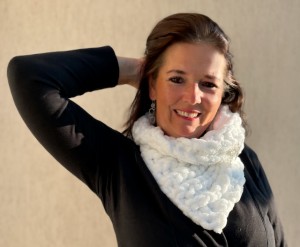
Crochet cosy and warm ribbed cowl neckwarmer done in one hour
Hello My Crochet Friends!
You know me, I love loop yarns, they are so soft and fun to work with!
Fall is already here and sometimes it's chilly in the morning, I don't know how about you, but I like my neck snuggling up in a warm cowl neckwarmer.
So for today's tutorial I prepared instructions for a quick and easy ribbed cowl neckwarmer that you can make in an hour! The project is super easy and very quick - perfect project for beginners. No knowledge of crochet or knitting is necessary, everything is explained and shown in detail in the video tutorial and explained in the written pattern below.
The cowl is nice so soft and warm, I believe it will keep you good company from fall to spring.
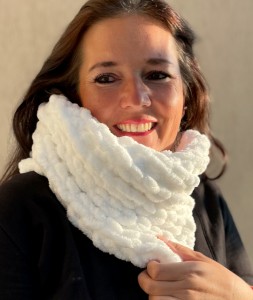
For this project I chose ALIZE PUFFY yarn! I chose a snow-white color that goes well with different coats and jackets, there are a large number of different colors available - one color balls and "rainbow" ones, you will definitely choose the one that suits you.
You can easily adjust the cowl to bigger or smaller, use any colors you like and make a wonderful piece for your fall wardrobe!
The cowl is also a great gift - whether for children, grandchildren, friends or colleagues. It can be a nice idea for Christmas to give to the family.
This pattern is made for beginners - NO crocheting skill level is required to make it. If you don't understand any of my instructions, don't worry I am here for you.
Have questions? Join the Facebook Group OR my Youtube Community!
I hope this article will be useful for you! If you have any additional questions, feel free to join my Facebook Group or Youtube Community. I created these groups for you to share pictures, ask questions, and help each other out.
You can find the step-by-step video tutorials below which will help you along if you prefer to watch video instruction rather than using a written pattern.
Don’t forget to subscribe if you like me videos, it’s FREE!
![]()
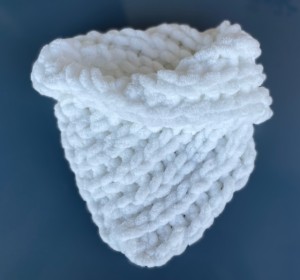
SO COSY AND SOFT RIBBED COWL NECKWARMER
MATERIAL
ALIZE PUFFY
1 BALL: 100g / 9 m
https://www.vlnika.cz/z11642-prize-puffy
For the COWL you will need: ONE skein
Scissors
Sewing/Embroidery and yarn needle/tapestry needle
![]()
Let's start or PIN this idea to your Pinterest boards for later.
![]()
PATTERN NOTES:
The rectangle sides : sides = 2:1
KIDS SIZE:
24 cm / 9.4 inch
48 cm / 18 inch
WOMAN VELIKOST:
29 cm / 11.5 inch
60 cm / 23.5 inch
If you want the COWL to be wider or narrower, adjust the number of loops in the basic chain and/or the number of rows.
We will knit the cowl as 1 rectangle in rows.
We do not turn the work, we always work so that the front, right side is towards us.
Make sure that your loops are not twisted and that they always go in one direction.
WOMAN SIZE
We have 15 loops in each row.
We will knit a rectangle of 25 rows in total
STEP 1) COUNT FOUNDATION CHAIN
For this COWL, start with 15 loops.
If you would like to have a COWL bigger you can start with more loops and then have more loops in each row.
We knit with our hands, no hook or needle is needed, it is quick and easy.
STEP 2) FOUNDATION CHAIN
Start working at beginning of yarn, make a knot, take the second loop from the knot and putt it in the first loop from back to front and pull it down.
Continue this way: working across the foundation loops, take the next loop in your working yarn and pass it through previous / just finished stitch from back to front. Continue with the next loop in the working yarn and the next loop in the foundation loop chain. Work your way all the way across.
Make 15 loops foundation chain of one color.
STEP 3) STOCKING STITCH FIRST ROW and NEXT ROWS
We work in rows.
Start stocking in just finished stitch/ last stitch in foundation chain, take the next loop in the working yarn and pull it through the previous / just finished st, then continue by taking the next loop in your working yarn and putting it through the previous stitch/loop from back to front and pulling up.
Make sure you have 15 loops in each row.
We return to the beginning (to the "knot").
Do not forget that we have to always start to pass the first to the last stitch in the previous row.
LP we always start the next row by knitting again to the last stitch from the previous row.
We now have 15 loops in a row.
Make sure you have 15 loops in each row.
STEP 4) SHAPE THE RIBBING PATTERN
We knit a loop into a loop, there are 15 loops in each row.
Abbreviations:
BF - we PULL the loop from BACK to FRONT
FB - we PULL the loop from FRONT to BACK
LP – loop / chain
R1: ALTERNATE 1 LP BF, 1 LP FB till end of row
R1 = R2: ALTERNATE 1 LP BF, 1 LP FB till end of row
Repeat row R1, the pattern will be nice and ribbed on front and on back side.
Make 25 rows.
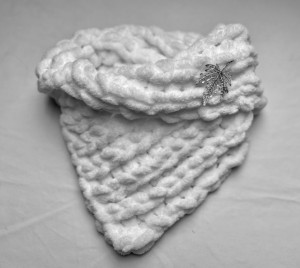
R26: brink the lower left corner and the upper right corner of the rectangle together and join them.
The seam will have a length of approx. 10 cm, i.e. 5 rows and a circumference is approx. 34 cm / 13.3 inches
Weave the loops on the chain on both sides, first we gradually pull the loop through the last stitch in the 1st row, the next loop through the last stitch in the 2nd row, the next loop through the last stitch in the 3rd row, etc., until we have 5 loops pulled through in this way.
Pull these loops through the last stitches in row 1 - 5 on the other side.
We have 5 loops that are pulled through both sides.
Join the loops in a chain from the bottom up. Start knitting from the bottom loop up loop to loop, we knit the second loop to the first, the third to the second, etc.
STEP 5 - FINISHING
Join loops, loop to loop, start kniting from last loop of the seam, work from right to left. Hide all ends and fasten off.
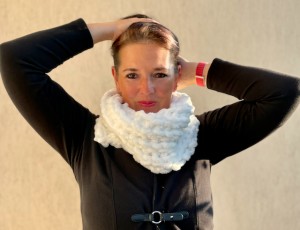
WE'RE DONE! HURRAH! FABULOUS COSY SOFT RIBBED COWL IS READY FOR FALL!
What’s Next?
Pin this post: Save this tutorial to your Pinterest boards so that you can come back to it later.
Leave a comment: I love to hear your feedback. Tell me in the comments below!
Share on Instagram and Facebook: When you make this project, share it on social media and tag me @sonanebeska. I love to see what you make!
MORE LOOPS YARN PATTERNS? TRY THESE POPULAR VIDEO TUTORIALS:
Explore More Crochet COWLS or NECKWARMERS Patterns
If you love to crochet as much as I do, I think you’ll love these other free crochet patterns. ❤️
MORE PATTERNS?
You know me, I love HATS AND BEANIES in fall and winter time.
You may would love to try these patterns as well:
I think you’ll love these other free crochet patterns for kids. ❤️
Show your love any day of the year and make lovely and sweet little things for your loved ones:
♥♥♥
Have fun and let me know what you make. I would love to know how your project turns out.
Please don't forget to like and I really appreciate your comments.
If the pattern did not make sense to you, please don’t hesitate to contact me, I am happy to help :)
If you like this pattern, please follow and share my projects on social networks as a THANK YOU and to help me to create new projects and patterns for you.
Thank you very much once again for your visit and see you soon!
♥♥♥


