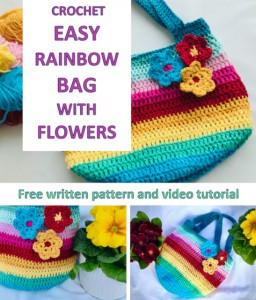
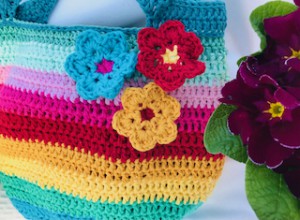
Crochet EASY Rainbow Bag with Flowers
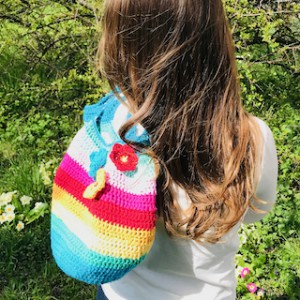
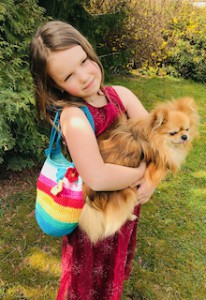
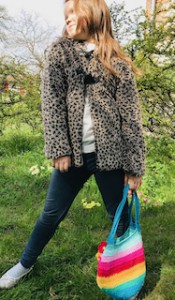
You'll definitely get noticed when you tote this wonderful rainbow bag with flowers. With these bright colors and a perfect shape, this free crochet Spring bag pattern will definitely come in handy. This brightly colored bag will bring sun and happiness to your day. Toss in your favorite magazines, a bottle of water and maybe some treats for your dog and get ready to enjoy the sunshine.
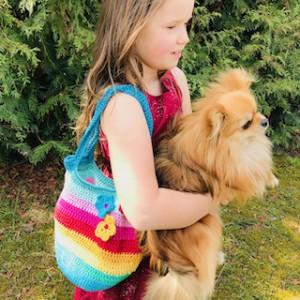
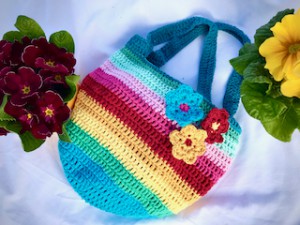
It has a very classic rainbow-style pattern, have fun choosing the color options for your bag. I am absolutely in love with it!
There is a crochet video tutorial to show you this wonderful pattern.
VIDEO TUTORIAL
You can find the step-by-step video tutorials below which will help you along if you prefer to watch video instruction rather than using a written pattern. Don’t forget to subscribe if you like me videos, it’s FREE!
![]()
A huge thanks to everyone who want to support my blog and download PDF paid pattern. Thank you very much, I really appreciate it and it helps me create more new video tutorials and patterns for you. Love you!
![]()
If you pin my patterns to your Favorites and share it on social media as a link, I will be able to share a lot more free crochet patterns for you all.
Stay in touch at Facebook, Instagram and Pinterest.
Please show your support and help me share this free pattern by simply pinning a PIN, or sharing a link with your crochet friends!
Let's start or PIN this idea to your Pinterest boards for later.
![]()
You may would love this simple mini handbag or lovely summer beach bag as well:
You might would like to match your rainbow bag with these Dresses or Tunics or Crop Tops. They are different levels of difficulties and techniques that you might have never seen before ones below. Just click on them and you can find the free pattern, each of the patterns comes with a video tutorial.
This pattern is made for beginners. If you don't understand any of my instructions, don't worry I am here for you - enter the comments at the end of this post.
You need only the basic crochet stitches - single and double crochets!
This crochet bag pattern comes in one size, but you can easily adapt the size and can create the perfect bag for your Spring adventures. You can very easily choose width and height you like and create bags of many versions and various sizes.
This is the very basic pattern, this bag is actually much easier to crochet than you might think and you will love it as it works up very quickly. I simply fall in love with crocheting this easy Rainbow bag. Perfect for using up scraps of yarn too.
MATERIALS NEEDED FOR RAINBOW BAG
Stripes - Colors :
A = blue
B = green
C = yellow
D = orange
E = dark red
F = pink
G = light pink
H = mint
I = petrol green
J = dark blue
You can use any yarn you like - for this project is great to use up scrap yarns!
Small amounts of any worsted weight yarn.
The pattern was made with SpagoYarn Cottonel, YarnArt Begonia, Alize Bella and Drops yarns.
Hook: Size 4.00 mm
Scissors
Tapestry Needle
The pattern uses the following basic US crochet stitches:
ch = chain
sc = single crochet
ds = double crochet
tr = treble
sl st = slip stich
Special technic: Changing color
when changing colors work the final slip stitch on the round as follows: Insert the hook in the 3rd chain stitch from the beginning of the round, change to the next color and pull the strand through the loop on the hook.
1) A ch3 at begging of round counts as a stitch (double crochet) throughout.
2) The project is crochet as a circle. Finish the round with 1 sl s in the 3rd chain from beginning
WRITTEN PATTERN
BAG
Colour A
Use crochet hook 4.0 mm
Work in rounds.
BAG BASEMENT
Make a magic ring
R1: ch3 (1dc), 9 dc in the magic ring, 1sl st in 3rd ch at beg to close round (10 dc)
R2: ch3 (1dc), 1dc in the same st, 2dc in each st around, 1sl st in 3rd ch at beg to close round (20 dc)
R3: ch3 (1dc), 1dc in the same st, 1dc in next st, * 2dc in next st, 1dc in next st * repeat from * to * till end of round, 1sl st in 3rd ch at beg to close round (30 dc)
Continue to increase and work pattern as before: each subsequent round work 1 more double crochet between each increase. Make the basement as wide as you wish.
R4: ch3 (1dc), 1dc in the same st, 1dc in next 2 st, * 2dc in next st, 1dc in next 2 st * repeat from * to * till end of round, 1sl st in 3rd ch at beg to close round (40 dc)
R5: ch3 (1dc), 1dc in the same st, 1dc in next 3 st, * 2dc in next st, 1dc in next 3 st * repeat from * to * till end of round, 1sl st in 3rd ch at beg to close round (50 dc)
R6: ch3 (1dc), 1dc in the same st, 1dc in next 4 st, * 2dc in next st, 1dc in next 4 st * repeat from * to * till end of round, 1sl st in 3rd ch at beg to close round (60 dc)
R7: ch3 (1dc), 1dc in the same st, 1dc in next 5 st, * 2dc in next st, 1dc in next 5 st * repeat from * to * till end of round, 1sl st in 3rd ch at beg to close round (70 dc)
R8: ch3 (1dc), 1dc in the same st, 1dc in next 6 st, * 2dc in next st, 1dc in next 6 st * repeat from * to * till end of round, 1sl st in 3rd ch at beg to close round (80 dc)
R9: ch3 (1dc), 1dc in the same st, 1dc in next 7 st, * 2dc in next st, 1dc in next 7 st * repeat from * to * till end of round, 1sl st in 3rd ch at beg to close round (90 dc)
R10: ch3 (1dc), 1dc in the same st, 1dc in next 8 st, * 2dc in next st, 1dc in next 8 st * repeat from * to * till end of round, 1sl st in 3rd ch at beg to close round (100 dc)
R11: ch3 (1dc), 1dc in each st around, 1sl st in 3rd ch at beg to close round (100 dc)
Then work STRIPES – see description above. Change color every second round.
Make sure you have the same number of stitches in each round.
Make your bag as long as you wish.
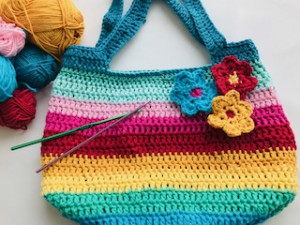
I made 7 stripes.
HANDLE
We will create the handle in next round.
Colour J
Use crochet hook 4.0 mm
Work in rounds.
Centre your bag, make sure handles on each side are centered in the middle, you may have to adjust in case you have different number of stitches.
I would recommend to you use 4 markers, place 2 markers on front side (skip 26 stitches between markers) and also 2 markers on back side, make sure the markers are on the same positions on each side.
R1: 1sl st in each st around
R2: ch3 (1dc), 1dc in next 23 st (24 dc) or till you reach the marker. Chain 55 ch, skip 26 st (or skip stitches to next marker), work 1 dc in next 24 st, chain 55 ch, 1sl st in 3rd ch at beg to close round
R3: ch3 (1dc), 1dc in each st (in each st and in each chain around), 1sl st in 3rd ch at beg to close round
R4: 1sl st in next 22 st, skip 2 st, 1dc in next 55 st, skip 2 st, 1sl st in next 20, skip 2 st, 1dc in next 55 st, skip 2 st, join the round with a slip st.
Cut the yarn, fasten off, weave in all end.
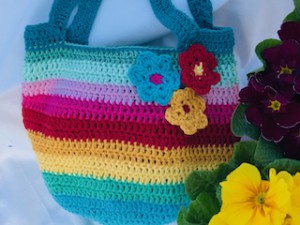
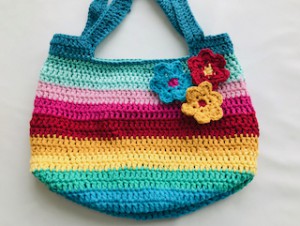
Now you can add flowers or a label or you can use some buttons on your wonderful Rainbow bag!
Feel free to add some decoration to make your bag just perfect!
FLOWER
We will crochet the flower right on the bag.
Use crochet hook 4.0 mm
Work in rounds.
Choose 2 colors.
Choose any color combination you like.
Chose the place on your bag you like for the position of your flower.
Color E
R1: Start working around 1 dc from bottom up. ch1, 3sc around the stitch, turn your work, work from top down, place 3 sc around next dc, join the round with a slip st (6 sc)
Color C
R2: work in one st: (1sc, ch3, 1sc), repeat this group in each st around, at the end you will 6 repetitions = 6 groups (1sc, ch3, 1sc), join the round with a slip st
R3: work in ch3 space: (1sc, 2dc, 1tr, 2dc, 1sc), repeat this group in each ch3 sp around, at the end you will 6 repetitions = 6 groups (1sc, 2dc, 1tr, 2dc, 1sc), join the round with a slip st
Cut the yarn, fasten off, weave in all ends.
That’s it – you’re done! Grab your favorite sunglasses and a bottle of water and head to walk in style. And don’t be surprised if someone asks you where you got your gorgeous Rainbow bag!
♥♥♥
Have fun and let me know what you make. I would love to know how your project turns out.
Please don't forget to like and I really appreciate your comments.
If the pattern did not make sense to you, please don’t hesitate to contact me, I am happy to help :)
If you like this pattern, please follow and share my projects on social networks as a THANK YOU and to help me to create new projects and patterns for you.
Thank you very much once again for your visit and see you soon!
♥♥♥


