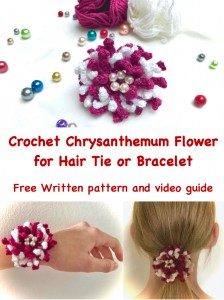
Crochet Flower Chrysanthemum Hair Tie
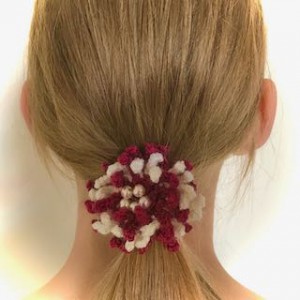
Crochet hair accessories are a fantastic anytime project. They’re quick, don’t take a ton of yarn, are great for on the go, and help keep your hair back and neck cool!
As you probably know by now I like quick little projects which are satisfyingly easy, plus they are so cute!
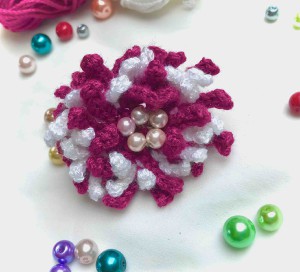
I admit it, I love crochet hair ties. This frilly little flowery Chrysanthemum tie is quick and easy, not to mention a lovely burst of colour.
The pattern is available here below for free. It comes with a video guide as well.
VIDEO TUTORIAL
You can find the step-by-step video tutorials below which will help you along if you prefer to watch video instruction rather than using a written pattern.
Don’t forget to subscribe if you like me videos, it’s FREE!
A huge thanks to everyone who want to support my blog and download PDF paid pattern. Thank you very much, I really appreciate it and it helps me create more new video tutorials and patterns for you. Love you!
Let's start or PIN this idea to your Pinterest boards for later.
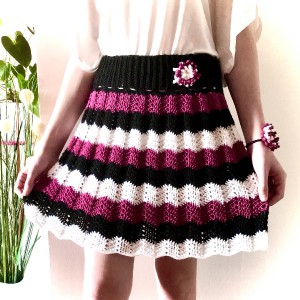
I used also this crochet flower as a decoration for this lovely skirt:
This pattern is made for beginners - only a basic skill level is required to make it. If you don't understand any of my instructions, don't worry I am here for you - enter the comments at the end of this post.
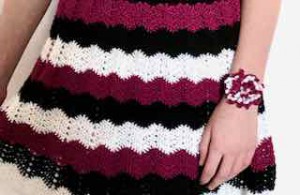
Crochet Flower Chrysanthemum Directions
This lovely flower is easy to make.
The pattern uses only basic crochet stitches - slip stitches and double crochets.
This flower is crochet is rounds.
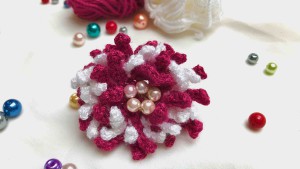
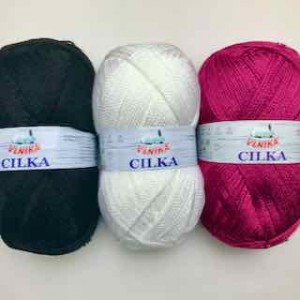
The pattern was made with yarn Cilka Vlnika.
Cilka: 100% acrylic, 100g / 280m, cotton
For this pattern you will need 3.0 mm crochet hook.
Difficulty Level: Level 1 – Easy, for beginners
US crochet term:
SlSt – slip stitch
CH/s – chain/s
DC - double crochet
SK - skip
T - turn
ST/s - stitch(es)
REP - repeat
PATTERN
colour A
Make a magic ring
R1: ch3 (1dc), 9dc in magic ring
R2: make 10 petals, one petal in each double crochet
Repeat 10 times: ch6, miss 1ch, sl st in each next 5ch, sl st, sl st to move to next dc
Finish round by sl st
R3: change colour, colour B
Turn your work towards yourself a bit.
Bending petals from R2 in order to work into strands of R2
Repeat 10 times: ch2, skip one petal, sl st between 2 petals from previous round R2
Make 10 ch2 loops. Loops are hidden under petals.
Finish round by sl st
R4: make 2 white petals in each loop.
Turn your work towards yourself a bit.
Bending petals from R2 in order to work into strands of R3
Repeat 10 times: sl st to move to next ch2 sp, ch6, miss 1ch, sl st in each next 5ch, sl st in ch2 sp, ch6, miss 1 ch, sl st in each next 5ch, sl st in ch2 sp
Make 20 petals around. White petals are under petals from R2
Finish round by sl st
R5: change colour, colour A
Turn your work towards yourself a bit.
Bending petals from R4 in order to work into strands of R4
Make one petal between 2 petals from R4.
Make 20 petals around.
Repeat 20 time: ch6, miss 1ch, sl st in each next 5ch, sl st, skip one petal from R4, sl st to move between 2 petals
Finish round by sl st
End off yarns, weave in all ends.
THE FINAL SIZE MEASUREMENT:
For bigger flower, you will need to add more rounds of round 5 (R5) until you reach the measurement you desire.
You can decorate your skirt with a cute little flower - this flower will be perfect also as a bracelet.
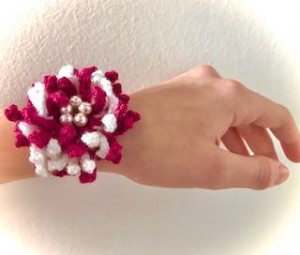
Have fun and let me know what you make. I would love to know how your project turns out.
Please don't forget to like and I really appreciate your comments.
If the pattern did not make sense to you, please don’t hesitate to contact me, I am happy to help :)
If you like this pattern, please follow and share my projects on social networks as a THANK YOU and to help me to create new projects and patterns for you.
Thank you very much once again for your visit and see you soon!
♥♥♥

