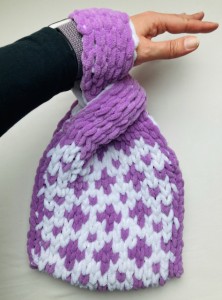
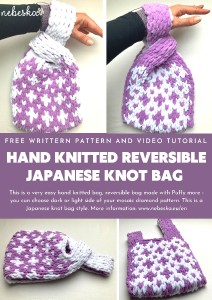
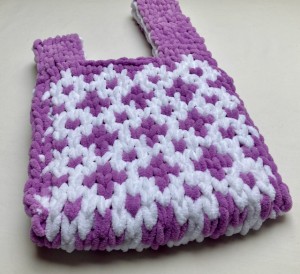
Hand Knitted Japanese Knot Bag with Diamond Mosaic Pattern
Hello My Crochet Friends!
You know me, I love loop yarns, they are so soft and fun to work with! There are many different style and brands and so many colors!
For this project I chose ALIZE PUFFY MORE yarn!
In this my new video tutorial I will teach you how to make a mosaic diamond pattern.
You can use this beautiful diamond pattern for a small bag and create an amazing Japanese knot bag as a gift for your Mums! Mother's day is coming soon!
This pattern is made for beginners - NO crocheting skill level is required to make it. If you don't understand any of my instructions, don't worry I am here for you.
Have questions? Join the Facebook Group OR my Youtube Community!
I hope this article will be useful for you! If you have any additional questions, feel free to join my Facebook Group or Youtube Community. I created these groups for you to share pictures, ask questions, and help each other out.
You can find the step-by-step video tutorials below which will help you along if you prefer to watch video instruction rather than using a written pattern.
Don’t forget to subscribe if you like me videos, it’s FREE!
![]()
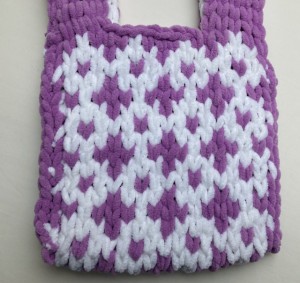
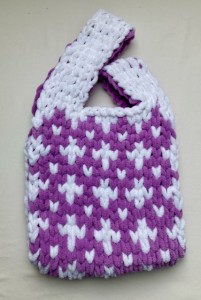
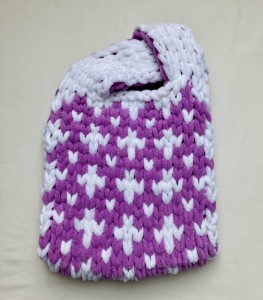
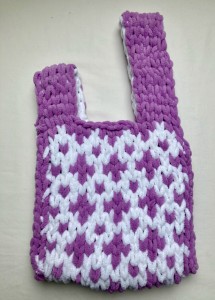
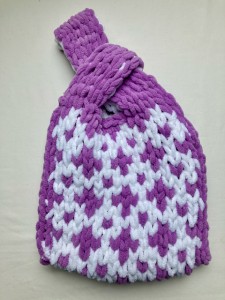
HAND KNITTED JAPANESE KNOT BAG WITH MOSAIC DIAMOND PATTERN
ALIZE PUFFY MORE
https://www.vlnika.cz/z17040-prize-puffy-more
Alize puffy more - no needles, no hooks, 150 g / 5.29 Oz, 11,5 mt / 12.58 yds, 100% micropolyester, machine washable at 30°C
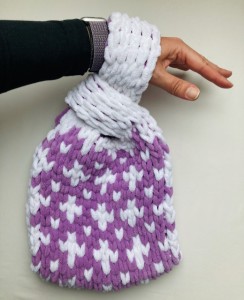
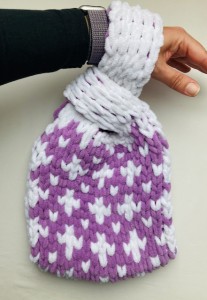
This soft, chenille yarn differs from ALIZE PUFFY in that it always has 2 colored loops at the position of one loop.
So one works with two colored loops, which create an original double-sided effect.
This yarn allows you to apply various mosaic and pixel patterns to your projects, which you can either create by yourself or be inspired by the many already designed patterns.
Applications for Alize Puffy More Yarn Patterns:
https://puffymore.com/dashboard
1 skein for one SMALL BAG
Scissors
Sewing/Embroidery and yarn needle/tapestry needle
![]()
In the video tutorial, we will show you the entire process from the beginning, from the basic chain to the mosaic diamond pattern up to joining the bag together.
We will create a beautiful bag from ONE BALL!
Let's start or PIN this idea to your Pinterest boards for later.
![]()
HAND KNITTED JAPANESE KNOT BAG WITH MOSAIC DIAMOND PATTERN
The size: 22 cm / 8.5 inch wide // 24.5 cm / 9.5 inch high
The strap shorter: 10 cm / 4 inch
The strap longer: 18 cm / 7 inch
If you want the bag to be wider or longer, adjust the number of stitches in the basic chain and/or the number of rows.
We will knit 1 large rectangle in rows and after knitting the rectangle we will knit 2 straps - one shorter and one longer. We join the bag on the sides.
We do not rotate the work, we work first on one side and then on the other side.
At first we will knit 1 side of the panel - we mosaic diamond pattern.
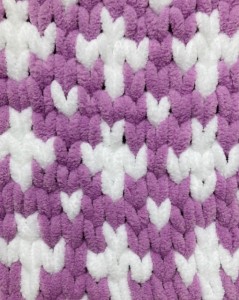
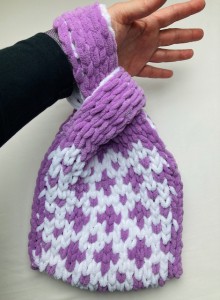
As soon as we are done with one side, we will turn the work over and knit the other side - it is turned, the pattern is the same, only the colors are reversed.
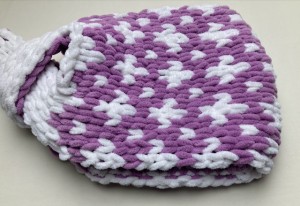
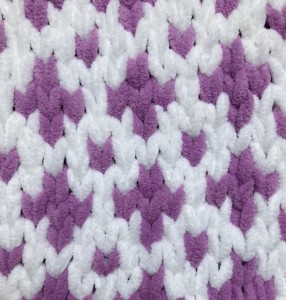
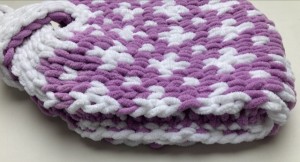
We will make this diamond pattern from the loops:
We have 17 loops in each row.
For the diamond pattern, we have a multiple of 4 + 1 in the row.
In this tutorial, 4x4 + 1 loop, 17 loops.
We knit a rectangle of 34 rows in total (8 repeats of the pattern and 1 row at the beginning and 1 row of the same color at the end of the pattern) + 1 chain at the beginning and 1 chain at the end.
See below the instructions STEP 1 till STEP 6.
STEP 1) COUNT FOUNDATION LOOPS
For this bag, start with 17 loops.
If you would like to have a larger bag, you can start with more loops and then have more loops in each row.
We knit with our hands, no hook or needle is needed, it is quick and easy.
STEP 2) FOUNDATION CHAIN
This bag uses all stocking stitches.
Start working at beginning of yarn, make a knot, take the second loop from the knot and putt it in the first loop from back to front and pull it down.
Continue this way: working across the foundation loops, take the next loop in your working yarn and pass it through previous / just finished stitch from back to front. Continue with the next loop in the working yarn and the next loop in the foundation loop chain. Work your way all the way across.
Make 17 loops foundation chain of one color.
Repeat STEP 2 for the second color as well.
STEP 3) STOCKING STITCH FIRST ROW and NEXT ROWS
We work in rows.
Start stocking in just finished stitch/ last stitch in foundation chain, take the next loop in the working yarn and pull it through the previous / just finished st, then continue by taking the next loop in your working yarn and putting it through the previous stitch/loop from back to front and pulling up.
Make sure you have 17 loops in each row.
We return to the beginning (to the "knot").
Do not forget that we have to always start to pass the first to the last stitch in the previous row.
So we always start the next row by knitting again to the last stitch from the previous row.
We now have 17 loops in a row.
Make sure you have 17 loops in each row.
We do not pay attention to the loops on the other side yet, we will leave them loose now and we will join them once the right side is done.
 .
. 
STEP 4) SHAPE DIAMOND PATTERN
The second row starts the DIAMOND pattern.
Turn your loops yarn toward yourself, take the next loop and work as normal, put it in the previous / just finished stitch from back to front and pull it down. When you change colors, using another color on the looped yarn, always leave the other color loop on the wrong side. So, the main color is always in the front, on right side.
Continue finishing the pattern below. The pattern repeats in 4 rows and 4 columns, is symmetrical and easy to remember.
Follow the instructions and the pattern until you are satisfied with the length and have a diamond pattern finished.
Continue stocking rows as per directions above. Follow the pattern and make the remainder of the diamond pattern. Once you finish last row of the diamond pattern, continue stitching one more row with just the one color yarn.
Make sure that your loops are not twisted and that they always go in one direction.
Make sure in each row there are 17 stitches.
I knitted the pattern with 8 repetitions, total of 32 rows of the pattern.
STEP 5) MAKE THE BACK SIDE
Start with the first loop on left side from the first row and pull this loop into the first loop from foundation chain, the same color. Then take the loop one row above just finished loop and pull this loop in the loop one row below. Pull loop always from back to front. Make sure loops are not twisted. Repeat these instructions.
Pull loop always from back to front. Make sure loops are not twisted.
STEP 6) STRAPS OF THE PURSE
After finishing knitting the pattern, we add one more row in the same color as the color we started with.
And we start knitting the STRAP - we continue to knit loops in rows, this time only with one color on one side, we do not make a diamond pattern on strap.
The STRAP has 5 loops in a row and the longer STRAP has 26 rows.
We do not bind off the last row 27, we leave the loops loosely and use them to join the strap to the bag body.
We cut the yarn, leaving one extra loop, cut it and use the tail end to sew the last end loop later.
Repeat the instructions for the second color.
After knitting the longer strap, we join / bind off the loops in the middle between the straps in the last row of the bag body.
We start binding off the loops from the already knitted strap towards the opposite side. Bind off the middle loops by taking the 2nd loop and passing it through the first loop and pull. Then take the 3rd loop and pass it through the 2nd loop. Continue across the row slipping the next loop into the previous loop.
We bind off 7 middle loops, we have 5 loops left at the end of the row.
We start a new yarn, pull the loops into these last 5 loops in a row.
We continue in rows, row by row, again one color on one side and 5 loops in each row.
The shorter strap has 11 rows.
Do not bind off the last loop row, leave the loops loosely and use them to join the strap to the bag body later.
Repeat the instructions for the second color.
STEP 7) JOIN THE STRAPS TO THE BAG BODY
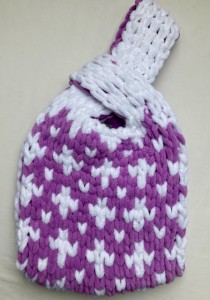
Fold the BAG body / the long rectangle in half, thus creating a handbag not yet sewn on the sides.
The FOUNDATION CHAIN is now at the top of the bag and we simply pull the loose loops of the strap into the chain. We always pull one loop into one chain stitch, the same color loop into the same color chain.
At first on one side.
Repeat the instructions for the second color on the opposite side.
We bind off the loops pulled through the chain as in the classic end of the row.
Bind off the loops by taking the 2nd loop and passing it through the first loop and pull. Then take the 3rd loop and pass it through the 2nd loop. Continue across the row slipping the next loop into the previous loop always towards the end tail of the yarn.
We cut the yarn, leaving one extra loop, cut it and use the tail end to sew the last end loop.
We pull the tail end through the last end loop and sew the tail end.
Repeat the instructions for the second color on the opposite side.
In the same way, we connect the longer strap of the handbag to the body.
We pull the loosely loops of the strap into a chain.
We always pull one loop into one chain stitch, the same color loop into the same color chain.
First on one side and then repeat the instructions for the second color on the opposite side.
We bind off the lose loops through the chain as in the classic end of the row.
Bind off the loops by taking the 2nd loop and passing it through the first loop and pull. Then take the 3rd loop and pass it through the 2nd loop. Continue across the row slipping the next loop into the previous loop always towards the end tail of the yarn.
We pull the tail end through the last end loop and sew the tail end.
Repeat the instructions for the second color on the opposite side.
STEP 8) JOIN THE BAGS SIDES
You can sew the sides together or connect them with loops yarn.
If you're going to join as I did, start the new loop yarn from the bottom of the side up to the bag's strap.
We pull the loops of the same color as the body of the handbag on one side through the end loops on the side of the handbag. One loop into one loop, we skip the last 2 loops on the side from the top so that the top of the bag is not too tight.
We bind off the pulled loops into a chain in the same way as we connected the straps. We bind off the loops from top to bottom towards the tail end. We pull the tail end through the last end loop and sew the end.
We turn the purse over to the wrong side and repeat the instruction STEP 8 with loops of the opposite color that we have not joined yet.
Repeat the instruction and connect the other side of the handbag in the same way.
Sew all loose ends and we're done!
What’s Next?
Pin this post: Save this tutorial to your Pinterest boards so that you can come back to it later.
Leave a comment: I love to hear your feedback. Tell me in the comments below!
Share on Instagram and Facebook: When you make this project, share it on social media and tag me @sonanebeska. I love to see what you make!
Explore More BAG Crochet Patterns
If you love to crochet as much as I do, I think you’ll love these other free crochet patterns. ❤️
You can browse through all of my other FREE crochet HOME and DECO patterns:
https://www.nebeska.eu/en/articles/crochet-patterns-and-tutorials/home-decoration-and-holidays/
I think you’ll love these other free crochet patterns for kids. ❤️
Show your love any day of the year and make lovely and sweet little things for your loved ones:
MORE PATTERNS?
You know me, I love making homemade things and creating beautiful gifts for my family and my friends. I also love TABLE PLACE MATS! If you do as well, you may would love to try these patterns as well:
♥♥♥
Have fun and let me know what you make. I would love to know how your project turns out.
Please don't forget to like and I really appreciate your comments.
If the pattern did not make sense to you, please don’t hesitate to contact me, I am happy to help :)
If you like this pattern, please follow and share my projects on social networks as a THANK YOU and to help me to create new projects and patterns for you.
Thank you very much once again for your visit and see you soon!
♥♥♥


