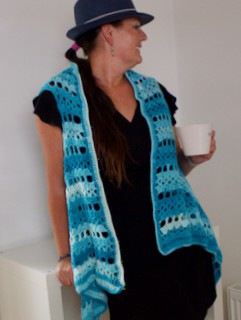
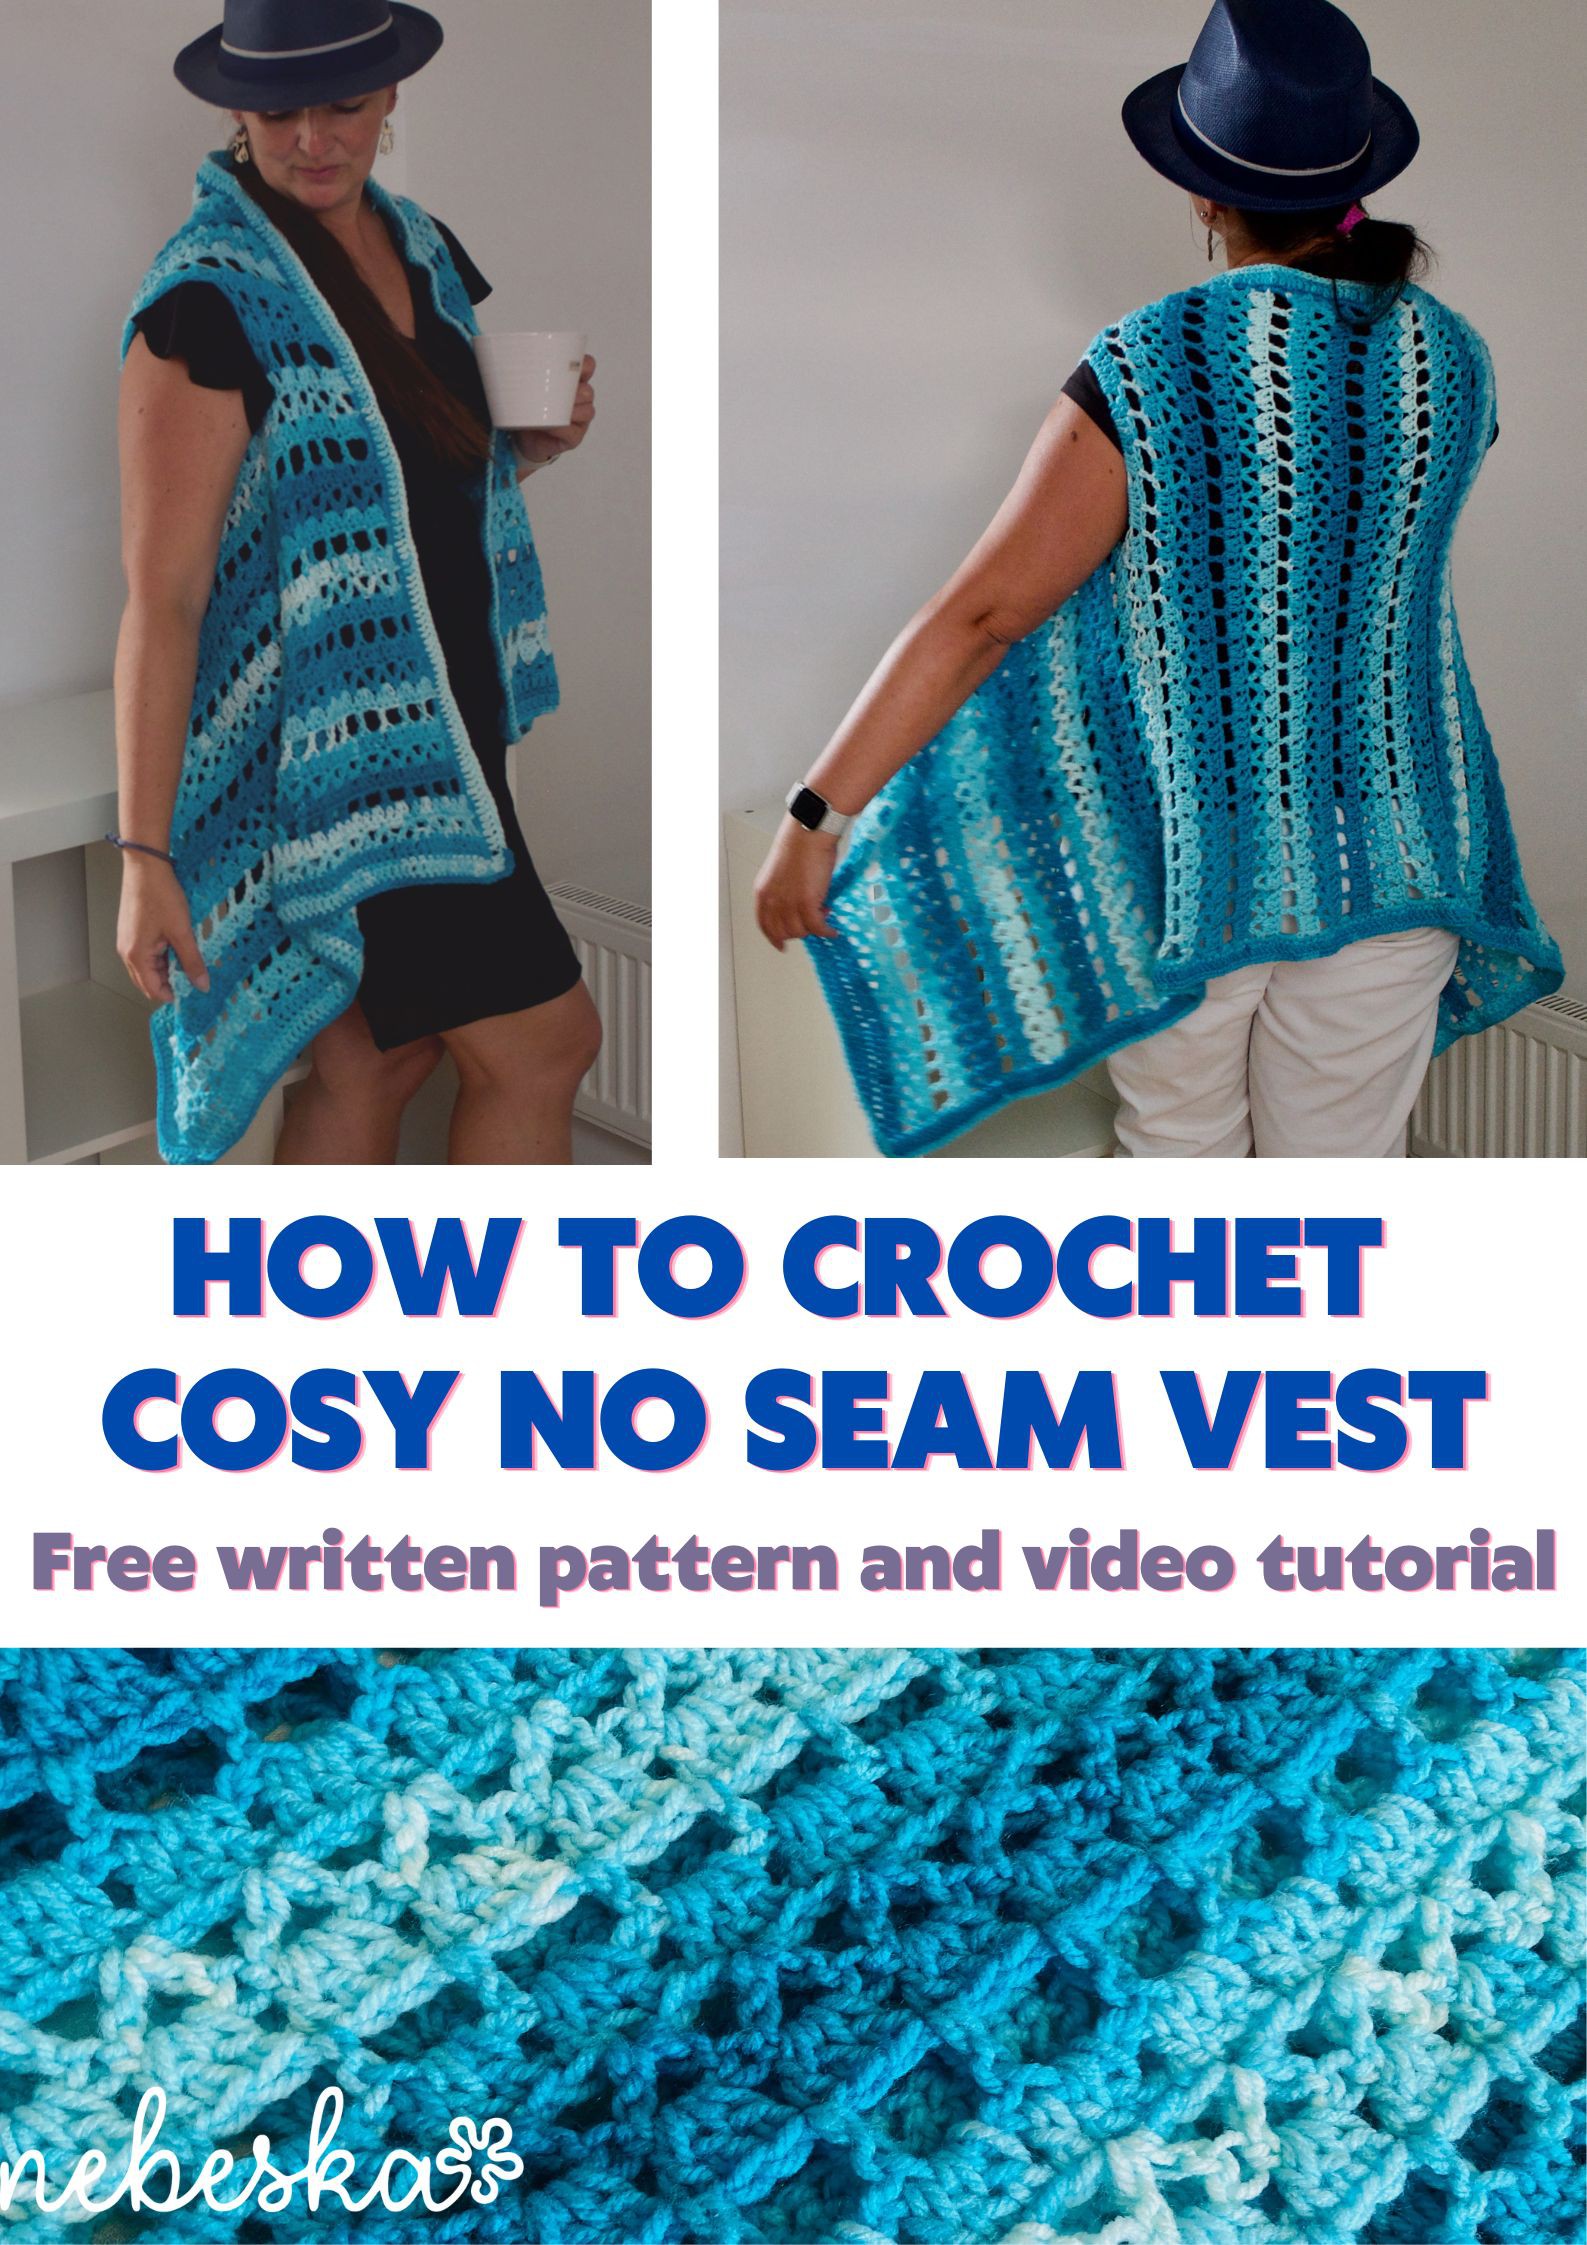
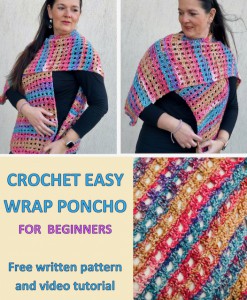
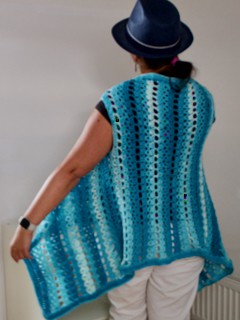
Crochet Cosy Super Easy Vest No seam
While this vest could be used any time of year, I love to wear it for this transition period between summer and fall time.
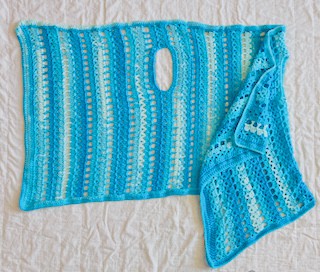
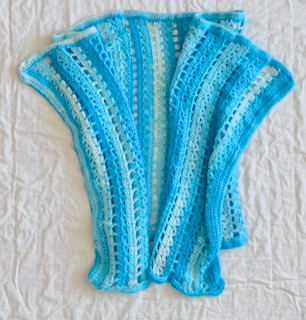
The vest is made as one big rectangular pieces with 2 armholes. No shaping is required on this easy cosy crochet vest. You’ll crochet one big panel from the side to side, working double crochets stitches and chains only. Easy, easy!
There is no complicated increasing, decreasing or shaping. The no seam VEST is worked in rows, back and forth.
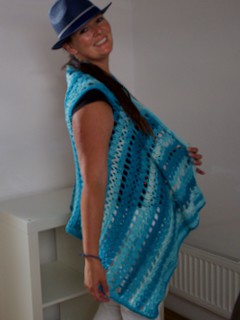
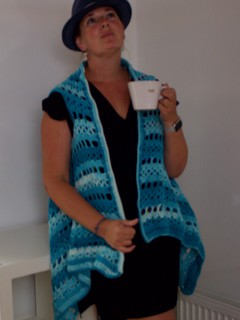
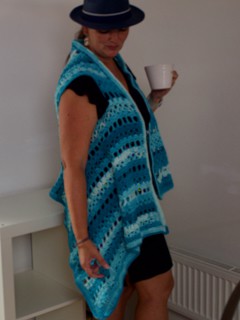
The perfect bit of comfort and length come together to make this blue cosy no seam vest. Simple enough for new crocheters and easy to make.
It's a fantastic garment for yourself or as a gift. Try this wonderful design for cosy VEST to make a great piece for yourself or for your friends & family!
VIDEO TUTORIAL
You can find the step-by-step video tutorials below which will help you along if you prefer to watch video instruction rather than using a written pattern. Don’t forget to subscribe if you like me videos, it’s FREE!![]()
This pattern is made for very beginners and with my video tutorials everyone will manage to crochet this amazing pattern. If you don't understand any of my instructions, don't worry I am here for you - enter the comments at the end of this post.
A huge thanks to everyone who want to support my blog and download PDF paid pattern. Thank you very much, I really appreciate it and it helps me create more new video tutorials and patterns for you. Love you!
![]()
If you pin my patterns to your Favorites and share it on social media as a link, I will be able to share a lot more free crochet patterns for you all.
Stay in touch at Facebook, Instagram and Pinterest.
Let's start or PIN this idea to your Pinterest boards for later.
![]()
MORE PATTERN?
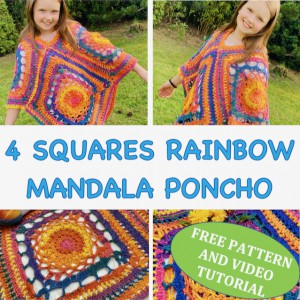
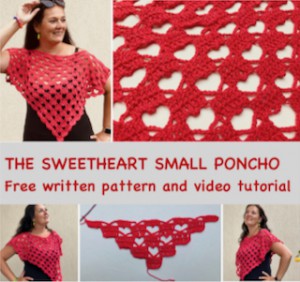
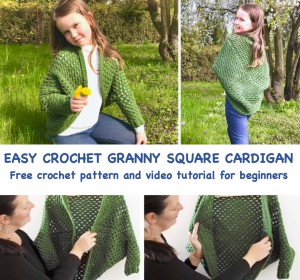
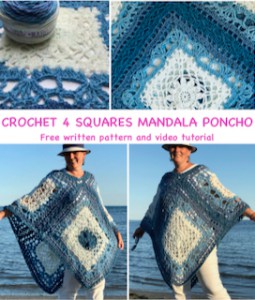
You know me, I love making VESTS, PONCHOS and CARDIGANS for you or for your friends and family. If you do as well, you may would love to try these patterns as well. They are different levels of difficulties and techniques that you might have never seen before.
Just click on them and you can find the free pattern, each of the patterns comes with a video tutorial.
How to CROCHET COSY NO SEAM VEST
This pattern is made for beginners - only a basic skill level is required to make it. If you don't understand any of my instructions, don't worry I am here for you.
Have questions? Join the Facebook Group!
I hope this article will be useful for you! If you have any additional questions, feel free to join my Facebook Group. I created this group for you to share pictures, ask questions, and help each other out.
CROCHET COSY NO SEAM VEST DIRECTIONS
So let me now get started and tell you what you will need in order to crochet this amazing CROCHET COSY NO SEAM VEST.
This CROCHET COSY NO SEAM VEST is very fun and quick to make.
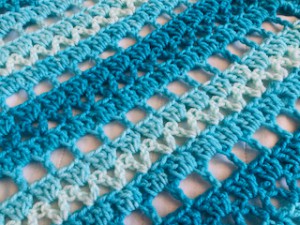
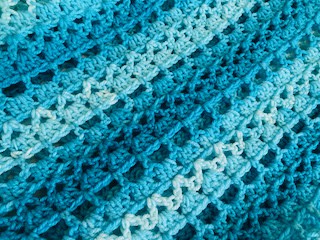
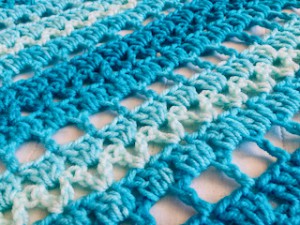
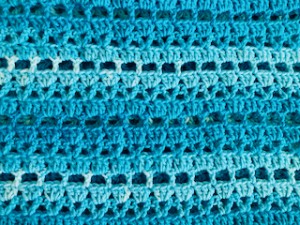
The pattern uses only basic crochet stitches - single and double crochets and chains.
This easy-to-fit vest is a crocheter's dream, made flat without the need for shaping. The pretty stitch pattern with double crochet stitches is smartly designed as a rectangle with 2 holes for arms. The no seam VEST is worked in rows, back and forth.
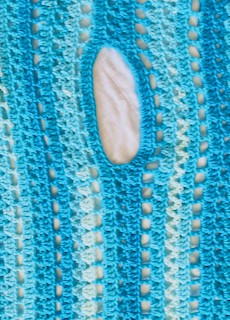
It’s crocheted with only double crochet stitches and chains. The entire vest is crocheted with amazing blue yarn Pryia.
The pattern was made with yarn PRYIA Vlnika
This yarn made from 100% acrylic, so it’s soft, affordable, and really easy to care for. Plus, this yarn comes in more than 20 gorgeous colors.
For this M size you will need 4,5 skeins of PRYIA yarn.
Scissors and tapestry needle
Crochet hook: 7.0 mm

Difficulty Level: Level 1 – Easy, for beginners
US crochet terms:
SlSt – slip stitch
CH/s – chain/s
SC - single crochet
DS - double crochet
SK - skip
T - turn
ST/s - stitch(es)
REP - repeat
YO – yarn over
PATTERN NOTES
1) Before you start take a measurement of height of your body and a body measurement (please see the final measurement of the vest below).
2) This pattern is for Medium Woman size, but you can easily adapt to a smaller size or bigger size just by making the rectangles bigger or smaller.
Make the rectangle bigger or smaller just by reducing or increasing the number of rows.
Remember that when making your poncho bigger you will need more yarn.
3) A ch2 at beg of the round counts as a stitch throughout.
4) The Vest is made up of one big rectangles
The rectangle for M size measures (width x length): 154 cm / 60.5 inch // 90 cm / 35.5 inch
*Measurements are taken from the garment lying flat, before the yarn has stretched out/dropped.
5) The vest is worked in one piece, in vertical rows, back and forth, from front edge to front edge
CONSTRUCTION
This vest is made from one big crochet rectangle with two arm holes.
The number of stitches you begin with is the length of your rectangle.
The number of rows you work is the width of your rectangle.
You will continue working the rows until your vest measures the provided width.
SIZE
The crochet VEST can easily be adapted to a smaller size or bigger size.
The pattern is easy to adjust to fit different sizes from XS to XXL Adult sizes.
See a chart how to make sizes that really fit.
XS size: 133 cm / 52.5 inch // 83 cm // 33.5 inch
S size: 143 cm / 56 inch // 86 cm / 34 inch
M size: 154 cm / 60.5 inch // 90 cm / 35.5 inch
L size: 153 cm / 60 inch // 94 cm / 37 inch
XL size 164 cm / 64.5 inch // 98 cm / 38.5 inch
XXL size 175 cm / 69 inch // 100 cm / 40 inch
COSY NO SEAM VEST
THE WRITTEN PATTERN
Foundation Chain - a multiple of 3 + 1 (27 x 3) 81 + 1 = 82 chains
R1: ch2 (1dc), 1dc 3rd ch from hook, 1dc in each ch, till end of row, 1dc in last st, turn (82 dc)
R2: ch2(1dc), sk 1st, (1dc + ch1 + 1dc) in next st, *skip 2 st, (1dc + ch1 + 1dc) in next st * repeat from * to * till end of row, 1dc in last st, turn (1dc at beg and 1dc at end, 27 repetitions of (dc+ch1+dc))
R3: ch2(1dc), 3dc in first ch1sp, *3dc in each ch1sp* repeat from * to * till end of row, 1dc in last st, turn, (1dc at beg and 1dc at end, 27 groups of 3dc)
R4: ch2(1dc), ch2, sk 2 st, *1dc in next dc, sk 2 st, ch2 * repeat from * to * till end of row, 1dc in last st, turn (1dc at beg and 1dc at end, 27 groups of ch2sp)
R5: ch2(1dc), 2 dc in first ch2sp, *1dc in next dc, 2dc in next ch2sp* repeat from * to * till end of row, 1dc in last st, turn (82 dc)
Repeat R2 - R5 until you reach the desired width of your FRONT rectangle.
For Medium Woman size I made 25 rows.
LET'S MAKE HOLE FOR ARM
R26: ch2(1dc), sk 1 st, (1dc + ch1 + 1dc) in next st, *skip 2 st, (1dc + ch1 + 1dc) in next st * repeat from * to * 4 times,
ARM HOLE: 1dc in next st, ch20, sk 20 st, 1dc in next st
*skip 2 st, (1dc + ch1 + 1dc) in next st * repeat from * to * till end of row, 1dc in last st, turn
R27: ch2(1dc), 3dc in first ch1sp *3dc in each ch1sp* repeat from * to * till you reach ch20sp,
ARM HOLE: work 20 dc in ch20sp,
*3dc in each next ch1sp* repeat from * to * till end of row, 1dc in last st, turn
R28: ch2(1dc), ch2, sk 2 st, *1dc in next dc, sk 2 st, ch2 * repeat from * to * till end of row, 1dc in last st, turn
R29: ch2(1dc), 2 dc in first ch2sp, *1dc in next dc, 2dc in next ch2sp* repeat from * to * till end of row, 1dc in last st, turn
Repeat R2 - R5 until you reach the desired width of your BACK rectangle.
For Medium Woman size I made 27 rows.
LET'S MAKE HOLE FOR ARM
R54: ch2(1dc), sk 1 st, (1dc + ch1 + 1dc) in next st, *skip 2 st, (1dc + ch1 + 1dc) in next st * repeat from * to * 4 times,
ARM HOLE: 1dc in next st, ch20, sk 20 st, 1dc in next st
*skip 2 st, (1dc + ch1 + 1dc) in next st * repeat from * to * till end of row, 1dc in last st, turn
R55: ch2(1dc), 3dc in first ch1sp *3dc in each ch1sp* repeat from * to * till you reach ch20sp,
ARM HOLE: work 20 dc in ch20sp,
*3dc in each next ch1sp* repeat from * to * till end of row, 1dc in last st, turn
R56: ch2(1dc), ch2, sk 2 st, *1dc in next dc, sk 2 st, ch2 * repeat from * to * till end of row, 1dc in last st, turn
R57: ch2(1dc), 2 dc in first ch2sp, *1dc in next dc, 2dc in next ch2sp* repeat from * to * till end of row, 1dc in last st, turn
Repeat R2 - R5 until you reach the desired width of your FRONT rectangle.
For Medium Woman size I made 25 rows.
BORDER:
Lay the rectangle out in front of you. Place rectangle with right side up, right side facing you.
With your yarn and hook you will now make a border around, making sure the right side up.
Remember not to make your stitches too tight and not too loose.
R1: ch1 (1sc), working in ends of rows, 3sc in each dc / ch2 space to next corner. 3sc in last st (corner st)
working in opposite side of foundation chain, 1sc in each chain to next corner. 3sc in last st (corner st)
working in ends of rows, 3sc in each dc / ch2 space to next corner. 3sc in last st (corner st)
1sc in each dc to next corner. 3sc in last st (corner st)
join row with sl st in 1st ch at beg of row

R2: ch2 (1dc), 1dc in each sc around, working 3dc in corner sc. Join row with sl st in 3rd ch at beg of row
R3: ch1 (1sc), 1sc in each dc around, working 3sc in corner sc. Join row with sl st in 1st ch at beg of row
Now that your VEST is assembled you will hide all loose tails in the wrong side of your work and turn it right side facing you and you are all done my friends.
You just created a beautiful COSY NO SEAM VEST!
I hope you’ve enjoyed making this free CROCHET COSY NO SEAM VEST crochet pattern.
You can browse through all of my other FREE crochet VEST, WRAPS OR CARDIGANS patterns:
More Crochet FALL patterns?
For even more crochet VESTS and PONCHOS patterns, check out my collection.
All of the patterns on that list of beautifully designed, and suitable for both beginners and experienced crocheters. They are different levels of difficulties and techniques that you might have never seen before. Just click on them and you can find the free pattern, each of the patterns comes with a video tutorial.
Explore More Crochet Patterns
If you love to crochet as much as I do, I think you’ll love these other free crochet patterns.
What’s Next?
Pin this post: Save this tutorial to your Pinterest boards so that you can come back to it later.
Leave a comment: I love to hear your feedback. Tell me in the comments below!
Share on Instagram and Facebook: When you make this project, share it on social media and tag me @sonanebeska. I love to see what you make!
Have fun and let me know what you make. I would love to know how your project turns out.
Please don't forget to like and I really appreciate your comments.
If the pattern did not make sense to you, please don’t hesitate to contact me, I am happy to help :)
If you like this pattern, please follow and share my projects on social networks as a THANK YOU and to help me to create new projects and patterns for you.
If you pin my patterns to your Favorites and share it on social media as a link, I will be able to share a lot more free crochet patterns for you all.
Stay in touch at Facebook, Instagram and Pinterest.
Thank you very much once again for your visit and see you soon!
♥♥♥


