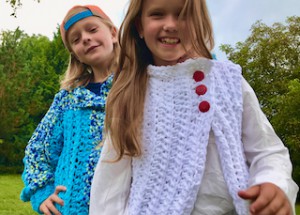
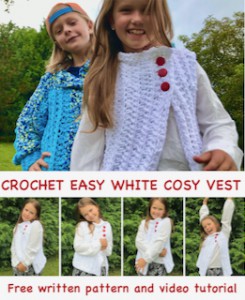
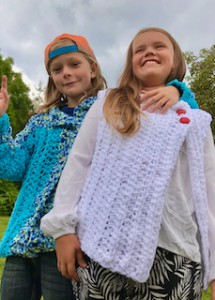
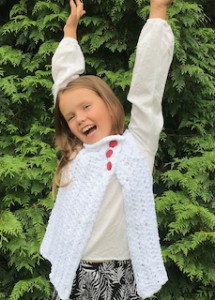
EASY Crochet Cosy White Vest
This Simple White Crochet vest pattern is not only fun to make, but this works up pretty quickly, which is perfect if you’re looking for a quick crochet wearable project. This Simple White Vest is perfect for spring and summer and fall time.
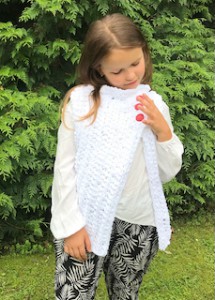
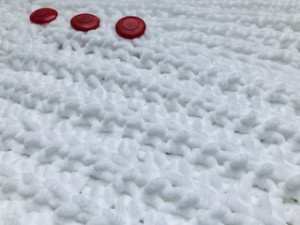
I love the Buttons uniqueness of this crochet vest.
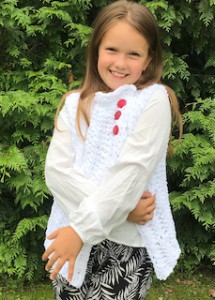
Believe it or not, this gorgeous White vest can be made in just half day. If you’re looking for a quick and easy crochet vest, this is the pattern for you
When trying to decide on a yarn for this wonderful vest, I knew I wanted something really soft and romantic. I chose Soft Samet yarn! The colour choice was also easy – I picked a white colour – it looks so nice! The pattern is available here below for free. It comes with a video guide as well.
VIDEO TUTORIAL
You can find the step-by-step video tutorials below which will help you along if you prefer to watch video instruction rather than using a written pattern. Don’t forget to subscribe if you like me videos, it’s FREE!![]()
A huge thanks to everyone who want to support my blog and download PDF paid pattern. Thank you very much, I really appreciate it and it helps me create more new video tutorials and patterns for you. Love you!
![]()
This pattern is made for very beginners - only a basic skill level is required to make it. If you don't understand any of my instructions, don't worry I am here for you - enter the comments at the end of this post.
Let's start or PIN this idea to your Pinterest boards for later.
![]()
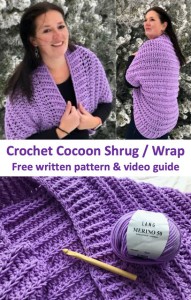
If you like this EASY VEST, you may would like to try this amazing lovely and romantic scarfs and cowls:

It’s end of Summer, my friends – let’s grab a cup of hot drink, cozy up and let’s get started to make this perfect FALL VEST pattern!
EASY and SIMPLE VEST DIRECTIONS
For this girls size you will need:
SAMET SOFT COLOR, 100% polyester, super soft, net weight 100g, 100m, 2 skeins
https://www.vlnika.com/z14602-samet-softyarn
For this pattern you will need 8.00 mm crochet hook.
3 red buttons or any color you love - approx: 1.5 inch each
This Cosy Vest is made as one panel, one rectangle (crocheted as a one part) – it is crocheted together.
Size: Girls size can easily be adapted to a smaller size or bigger size just by reducing or increasing the number of chains and rows for the VEST and as well as making less or more chains in the basic chain.

Difficulty Level: Level 1 – Easy, for beginners
US crochet term:
SlSt – slip stitch
CH/s – chain/s
SC – single crochet
HDC - half double crochet
SK - skip
T - turn
ST/s - stitch(es)
REP - repeat
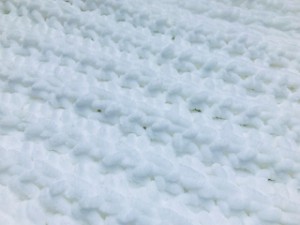
Special stitches used: hdc in the 3rd loop only - the 3rd loop is hidden under the back loop.
Pattern Notes
1) The direction shown are for girls size but can be easily converted into bigger size or smaller size – just measure your starting chain shorter or longer.
2) a ch1 at the beg row DOESN'T count as hdc
3) work in rows – from left to right side, start with the left front panel, then the back panel and the right front panel as the last part.

THE PATTERN
Start to make Left Front Panel
Pick up the 8.00 mm crochet hook and let’s make a chain crochet foundation.
Ch35
R1: Ch1, 1hdc in the 2rd ch from the hook, 1hdc in each ch across, turn (35 hdc)
R2: ch1 (don't count as a st), 1 hdc in each st across in 3rd loop only, turn (35 hdc)
R3: ch1 (don't count as a st), 1 hdc in each st across in 3rd loop only, turn (35 hdc)
Repeat R2 and R3, make 9 rows in total or as many as you wish for the left front panel.
Don't fasten off, leave a longer tail for sewing/joining the Front panel with the Back panel.
Or continue crocheting and just finished left front panel with the panel directly when crocheting the back panel.
R10: ch1 (don't count as a st), 1 hdc in next 23 st, ch12, skip 11 st, slip stitch in the last st to the top of R9 (left front panel)
R11: st sl to join R10 with the left front panel R9, sl st on top of R8, 1hdc in next 12 chains, 1hdc in 3rd loop only in next 23 st, turn (35 hdc)
R12: ch1 (don't count as a st), 1 hdc in each st across in 3rd loop only till you reach the top of vest, sl st on top of R8, turn (35 hdc)
R13: st sl to join R12 with the left front panel R7, sl st on top of R7, 1hdc in each st accross in 3rd loop only, turn (35 hdc)
R14: ch1 (don't count as a st), 1 hdc in each st across in 3rd loop only till you reach the top of vest, sl st on top of R6, turn (35 hdc)
R15: st sl to join R14 with the left front panel R6, sl st on top of R5, 1hdc in each st accross in 3rd loop only, turn (35 hdc)
You just joined the left shoulder: R5 - R9 is joined with R10 - R15
R16 - R27: ch1 (don't count as a st), 1 hdc in each st across in 3rd loop only, turn (35 hdc)
Repeat R2 and R3, make 17 rows in total of the back panel or as many as you wish for the back panel.
Don't fasten off, leave a longer tail for sewing/joining the Back panel with the Front panel.
Or continue crocheting and just finished back panel with the right front panel directly when crocheting the right front panel.

R28: ch1 (don't count as a st), 1 hdc in next 23 st in 3rd loop only, ch12, skip 21 st, slip stitch in last st to the top of R27 (back panel)
R29: st sl to join R28 with the back panel R27, sl st on top of R26, 1hdc in next 12 chains, 1hdc in 3rd loop only in next 23 st, turn (35 hdc)
R30: ch1 (don't count as a st), 1 hdc in each st across in 3rd loop only till you reach the top of vest, sl st on top of R26, turn (35 hdc)
R31: st sl to join R30 with the back panel R25, sl st on top of R25, 1hdc in each st accross in 3rd loop only, turn (35 hdc)
R32: ch1 (don't count as a st), 1 hdc in each st across in 3rd loop only till you reach the top of vest, sl st on top of R24, turn (35 hdc)
R33: st sl to join R32 with the back panel R24, sl st on top of R23, 1hdc in each st accross in 3rd loop only, turn (35 hdc)
You just joined the right shoulder: R23 - R7 is joined with R28 - R33
R34 – R43: ch1 (don't count as a st), 1 hdc in each st across in 3rd loop only, turn (35 hdc)
Repeat R2 and R3, make 14 rows in total of the right front panel or as many as you wish for the right front panel.
NECKLINE BORDER
Use the same yarn and the crochet hook, continue crocheting from just finished the right font panel cross the back panel to the end of the left front panel.
R1: ch1, 1sc evenly all the way around the neckline, turn (I made 22 sc around in total).
R2 - R3: ch1, 1sc in each sc till end of row, turn
Fasten off, hide all loose tails in the back of your work and you are all done my friends.
You just created a beautiful cosy white vest!
Attached the buttons: Arrange the buttons in a way that makes you happy and hand sew them to the left front panel.
Or use this guide: use stitch markers as a guide where to add 3 buttons - place a markers on the R2 from top down. Start placing from beginning of R2: skip 2st, place the 1st button on the R2, skip 2 st place 2nd button on the R2, skip 2 st, place 3rd button on the R2. Use tapestry needle to fasten buttons into desired places.
THE FINAL SIZE MEASUREMENT:
Right Front Panel: 12 inch / 30 cm width
Back Panel: 13.4 inch / 34 cm width
Left Front Panel: 7 inch / 18 cm width
Vest is 21.6 inch / 55 cm long
Have fun and let me know what you make. I would love to know how your project turns out.
Please don't forget to like and I really appreciate your comments.
If the pattern did not make sense to you, please don’t hesitate to contact me, I am happy to help :)
If you like this pattern, please follow and share my projects on social networks as a THANK YOU and to help me to create new projects and patterns for you.
If you pin my patterns to your Favorites and share it on social media as a link, I will be able to share a lot more free crochet patterns for you all.
Stay in touch at Facebook, Instagram and Pinterest.
Thank you very much once again for your visit and see you soon!
♥♥♥


