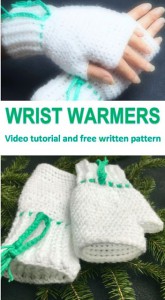
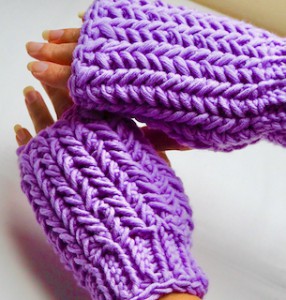
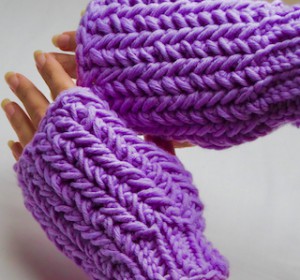
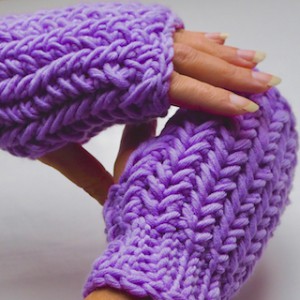
Crochet Herringbone Wrist Warmers
How to crochet a pair of amazing merino wrist warmers
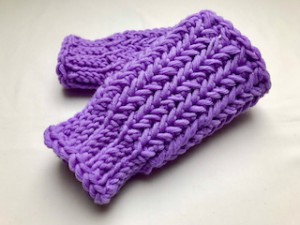
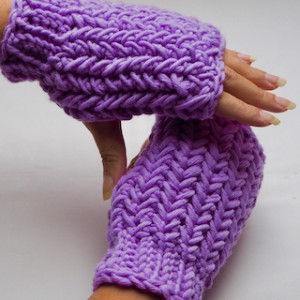
This crochet pattern creates amazing HERRINGBONE wrist warmers suitable for keeping your hands warm during the cooler months from fall to spring.
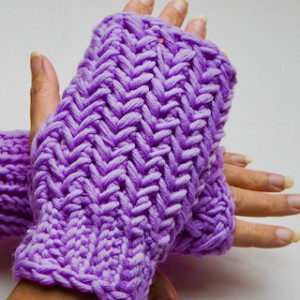
When temperatures start to drop, there's nothing more satisfying than wearing lovely cozy HERRINGBONE wrist warmers! In this tutorial you'll learn how to crochet your very own pair of amazing herringbone wrist warmers.
Keep warm in these modern herringbone stitch crochet wrist warmers!
The amazing chevron effect is achieved by working single crochet stitches in a unique way.
In my pattern and tutorial I will show you how to crochet herringbone stitch in rows back and forth.
It’s a two row repeat so it’s fairly easy to memorize once you’re a few rows in.
The written pattern is available here below for free.
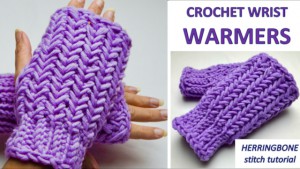
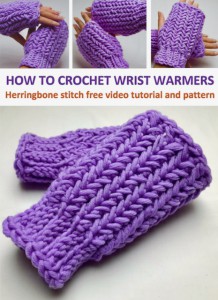
VIDEO TUTORIAL
You can find the step-by-step video tutorials below which will help you along if you prefer to watch video instruction rather than using a written pattern. Don’t forget to subscribe if you like me videos, it’s FREE!![]()
VIDEO TUTORIAL:
I hope you enjoy these crochet HERRINGBONE Wrist Warmers pattern and I hope they keep you busy right through the holidays :) Fingerless mittens enable you to keep your hands and wrists warm, while still being able to type, check your phone, or do whatever else you need to do during the day. They offer the comfort, coziness, and warmth of gloves without the inconvenience of them.

A huge thanks to everyone who want to support my blog and download PDF paid pattern. Thank you very much, I really appreciate it and it helps me create more new video tutorials and patterns for you. Love you!
![]()
Let's start or PIN this idea to your Pinterest boards for later.
![]()
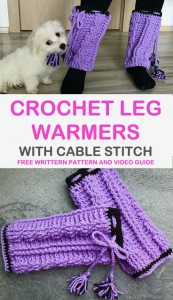
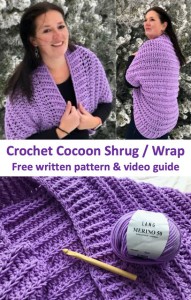
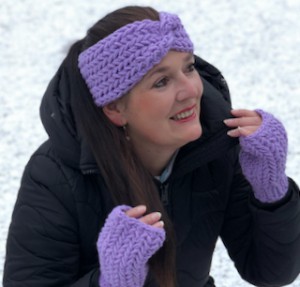
You may would like to try these simple and sweet wrist warmers and mittens as well:


These wrist warmers would be perfect with these crochet LEG WARMERS and this lovely COCOON SHRUG CARDIGAN - they are both made with violet merino yarn MERINO 50 from LANG YARNS. Enjoy the free video tutorials and written patterns:
This pattern is made for beginners - only a basic skill level is required to make it. If you don't understand any of my instructions, don't worry I am here for you - enter the comments at the end of this post.
WRIST WARMERS DIRECTIONS
These wrist warmers are easy to make.
The pattern uses only basic crochet stitches and herringbone stitch is required.
The wrist warmers work up really quickly thanks to MERINO 50 from LANG YARNS. It’s thick and SO soft!
For this M size you will need:
LANG YARNS, Merino 50 – 100% virgin wool, merino extrafine, super-wash, 90m/100g – 1 skein
Crochet hook 7.0 mm.
Difficulty Level: Level 1 – Easy, for beginners
US crochet terms:
R - row/round
CH/s – chain/s
SC – single crochet
HSC - herringbone single crochet
SK - skip
T - turn
ST/s - stitch(es)
REP - repeat
BLO - back loop only
Special technik:
Herringbone Single Crochet Stitch:
RIGHT SIDE
STEP 1: Start with a chain any length. Work first single crochet in the second chain from the hook working in the back bump of the chain.
STEP2: Next, insert your hook into left leg of sc just made.Insert the hook into the back bump of the next chain and pull up a loop, yarn over and pull through all three loops on the hook.
STEP 3: Continue working herringbone single crochet to end. First, insert your hook into left leg of previous stitch, then insert the hook into the back bump of the next chain. Pull up a loop, yarn over and pull through all three loops on the hook. Turn.
WRONG SIDE
STEP 4: Chain 1 (turning chain, do not count as a stitch). Work single crochet in first stitch from the back to the front.
STEP 5: To work a next stitch, insert the hook into left strand of the previous stitch (from right to left) and then insert the hook into the next stitch working from back to front. Yarn over, pull up a loop, yarn over and pull through all three loops on the hook. Work in the same manner to the end of the row.
RIGHT SIDE
STEP 6: Chain 1 (turning chain, do not count as a stitch). Work single crochet in first stitch from the front to back.
STEP 7: To work a next stitch, insert the hook into left strand of the previous stitch (from right to left) and then insert the hook into the next stitch working from front to back. Yarn over, pull up a loop, yarn over and pull through all three loops on the hook. Work in the same manner to the end of the row.
Next, repeat instruction for STEP 4 – STEP 7
The Herringbone Crochet Stitch is a fun way to add texture to your work. This crochet stitch is great for hats, cowls, scarfs and mittens and more and more!

Pattern Notes
1) A ch1 at beg of the row doesn't count as a stitch.
2) The project is crocheted in rows. Turn your work when you finish the row and start next one with ch1.
3) The wrist warmers are worked from side to side and crocheted together by slip stiching.
4) Bellow, there is a pattern for women size "M" wrist warmers - this one fits also to teenage girls. You can always adjust this pattern by making more or less rows of your project. You can make toddler, kids, or adult size wrist warmers with these instructions.
I love making homemade things, particularly around the holidays. There’s just something about relaxing on cold evenings with my crochet hooks in hand and creating beautiful gifts for my family and my friends. Crochet wrist warmers also add style to your wardrobe, serving as a terrific accessory to give your outfit a finished look, especially during the fall and spring months.
HOW TO MAKE WRIST WARMERS
WRITTEN PATTERN
Make a slip knot and ch20.
R1: ch1, Loosely 1 sc in 2nd ch from hook BLO, 1 hsc in next 13 st BLO.
Slip stitch in next 6 chains till end of the row. Turn
R2: ch1, 1 sl st in next 6 st, BLO.
Working from back to front. Loosely sc in next stitch and ‘back bar’,
1 hsc into next 13 st and ‘back bar’ till end of the row, turn
R3: ch1, 1 loosely sc in the first and ‘back bar’,
1 hsc into next 13 st .
sl st in next 6 st, BLO, till end of the row, turn.
R4 - R18: repeat row R2 adn row R3 until you have completed 18 rows.
HOW TO JOIN THE WRIST WARMERS
Turn your work, the wrong side facing up, the right side - herringbone design - facing inward. Bring the foundation row edge near the last row - brig both ends of the wrist warmer together. It should have the edges lined up. Using the long tail from above make slip stitches - one slip stitch into each stitch - slip stitch both sides together, work in back loop only.
Make 1 sl st in next 6 sl stitches (BLO) and then 1 sl st in next 3 sc (work in front and back loop).
MAKE A THUMB HOLE: work slip stitches on one side only! Make sl st in next 3 sc, skip 3 stitches on the opposite side.
Then continue joining as before: one slip stitch into each stitch - slip stitch both sides together, work in back and front loops.
End off yarn, weave in all the tails. Turn your wrist warmer the right side out and smooth down.
BORDERS
Make a slip stitch border around the top and bottom, making 18 sl stitches evenly, work around the entire round. End up with an invisible join.

REPEAT ALL STEPS AND MAKE A SECOND WRIST WARMER
Fasten off your work and hide all loose tails and and you are all done with your amazing WRIST WARMERS!
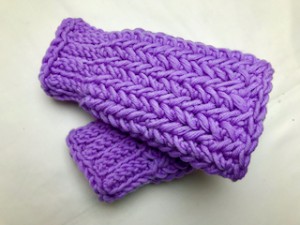
THE FINAL SIZE MEASUREMENT:
Wrist Warmers topper part (Herringbone stitches): 16 cm / 6.3 inch long
Wrist Warmers bottom part (border): 5 cm / 2 inch long
Top Width: 21 cm / 8.3 inch
Bottom Width: 16 cm / 6.3 inch
♥♥♥
Have fun and let me know what you make. I would love to know how your project turns out.
Please don't forget to like and I really appreciate your comments.
If the pattern did not make sense to you, please don’t hesitate to contact me, I am happy to help :)
If you like this pattern, please follow and share my projects on social networks as a THANK YOU and to help me to create new projects and patterns for you.
Thank you very much once again for your visit and see you soon!
♥♥♥


