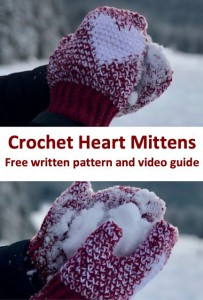
SweetHeart Mittens
This pattern creates original and cute mittens suitable for keeping your hands really warm during the cooler months in winter and perfect to celebrate Valentine day with them. These warm sweetheart mittens could be a perfect handmade gift for those you love! Especially when they actually wear them!

In this tutorial you'll learn how to crochet your own amazing pair of original mittens with heart. The written pattern is available here below for free.
VIDEO TUTORIAL
You can find the step-by-step video tutorials below which will help you along if you prefer to watch video instruction rather than using a written pattern. Don’t forget to subscribe if you like me videos, it’s FREE!![]()
I hope you enjoy these crochet Mittens with Heart pattern and I hope they keep you busy right before Valentine day.
A huge thanks to everyone who want to support my blog and download PDF paid pattern. Thank you very much, I really appreciate it and it helps me create more new video tutorials and patterns for you. Love you!
Let's start or PIN this idea to your Pinterest boards for later.

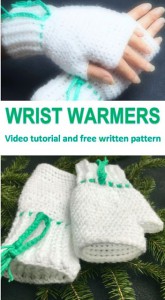
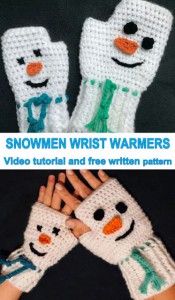
You may would like to try these simple and sweet wrist warmers as well:
This pattern is made for beginners - only a basic skill level is required to make it. If you don't understand any of my instructions, don't worry I am here for you - enter the comments at the end of this post.
The heart is universally accepted as a symbol of love and warm feelings. Crochet these mittens for anyone you love!
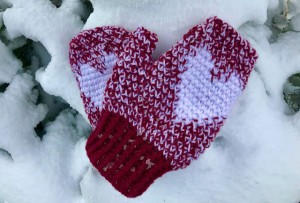
Crochet mittens also add style to your wardrobe, serving as a terrific accessory to give your outfit a finished look, especially during the winter months. I love working up quick little crochet things. They’re so fast and it’s fun to make them.

MITTENS DIRECTIONS
These mittens are easy to make.
The pattern uses only basic crochet stitches - double and simple crochets.
The pattern was made with:
Palma Fibre Freedom – 75 % baby alpaca, 25% polyamide, 50g/120m – 1.5 skein
and Red Heart Bella or any other white yarn.
Crochet hooks: 3.5mm and 5mm.
Difficulty Level: Level 1 – Easy, for beginners

US crochet term:
SlSt – slip stitch
CH/s – chain/s
SC – single crochet
DC - double crochet
T - turn
ST/s - stitch(es)
REP - repeat
Special stitches used:
FPDC = front post double crochet
BPDC = back post double crochet
SC2TOG = single 2 together
Front and back post crochet stitches are used to create wonderful texture in crochet. Instead of making your stitch through the loops at the top of the stitch, you make it around the stitch. Everything else stays the same. The most challenging things about crochet post stitches are knowing where and how to insert the hook. There are front post stitches and back post stitches.
For front post double crochet stitches (fpdc): yarn over, insert your hook from front to back then from back to front around post of stitch indicated, yarn over, pull through stitch, then finish your double crochet as normal, yarn over, pull through 2 lps, yarn over, pull through last 2 lps
For back post double crochet stitches (bpdc): yarn over, you insert your hook from back to front then from front to back around post stitch indicated, yarn over, pull through stitch, then finish your double crochet as normal, yarn over, pull through 2 lps, yarn over, pull through last 2 lps
SC2TOG instructions: The TOG crochet abbreviation is simply shorthand for “together,” while the beginning determines the type of stitch. In this case, SC2 stands for “single crochet two.”
How to decrease with sc2tog: Insert hook in next stitch, yarn over and pull yarn through loop (2 loops on hook). Insert hook in next stitch, yarn over and pull yarn through loop (3 loops on hook), yarn over and pull yarn through all 3 loops on hook

Pattern Notes
1) A ch3 at beg of the row counts as dc throughout.
2) The project is crocheted in rounds. Rounds are finished with sl st.
3) Below, there is a pattern for women size "M" mittens. You can always adjust this pattern by making the starting chain longer or shorter.
PATTERN:
3.5 mm crochet hook.
Make a slip knot and ch36, join to first chain to make a circle.
Be sure not to twist your chain.
R1: ch3 (counts as 1 dc), 1dc into each st around till end of the row, sl st into the 3rd ch from the beg.
You will have 36 dc
R2: ch3 (counts as 1 bpdc), 1fpdc in next st, *1bpdc in next st, 1fpdc in next st* repeat from * to * around till end of the row, sl st into the 3rd ch from the beg
You will have 36 stitches
R3 - R11 = repeat R2
Make sure you have 36 stitches in each row.
The first part is ready!
The measurement of this part: 4.3inch/11cm wide, 2.8inch/7cm high.
Now we will add white colour yarn and create the heart!
The second part:
Add white colour yarn, use both yarns together.
Use 5mm crochet hook.
R12: ch1 (counts as 1 sc), 1sc in each st around
You will have 36 sc, continue crocheting sc around.
R13 - R15: 1sc in each st around
Make sure you have 36 stitches in each row.
In next row we will start to create "white heart"
R16: 1sc in each next 6 st, change the colour - use 2 white yarns only, 1 sc (white) in next st, change the colour - use red and white together, 1 sc in each next 29 st
R17: 1sc in each next 5 st, change the colour - use 2 white yarns only, 1 sc (white) in next 3 st, change the colour - use red and white together, 1 sc in each next 28 st
R18: 1sc in each next 4 st, change the colour - use 2 white yarns only, 1 sc (white) in next 5 st, change the colour - use red and white together, 1 sc in each next 27 st
Make sure you have 36 stitches in each row.
R19: 1sc in each next 3 st, change the colour - use 2 white yarns only, 1 sc (white) in next 7 st, change the colour - use red and white together, 1 sc in next 5 st
We will make the thumb hole now.
Skip 8 st, join the work by sl st, work 1sc in next 13 sc till end of row
You will have 28 sc in this row (we skipped 8 st)
R20: 1sc in each next 2 st, change the colour - use 2 white yarns only, 1 sc (white) in next 9 st, change the colour - use red and white together, 1 sc in next 17 st
R21: 1sc in next st, change the colour - use 2 white yarns only, 1 sc (white) in next 11 st, change the colour - use red and white together, 1 sc in next 16 st
R22-R23: repeat R21
R24: 1sc in next st, change the colour - use 2 white yarns only, 1 sc (white) in next 5 st, change the colour - use red and white together, 1 sc in next 1 st, change the colour - use 2 white yarns only, 1 sc (white) in next 5 st, change the colour - use red and white together, 1 sc in next 16 st
R25: 2sc in next st, change the colour - use 2 white yarns only, 1 sc (white) in next 4 st, change the colour - use red and white together, 1 sc in next 3 st, change the colour - use 2 white yarns only, 1 sc (white) in next 4 st, change the colour - use red and white together, 1 sc in next 17 st
R26: 1sc in next 3 st, change the colour - use 2 white yarns only, 1 sc (white) in next 3 st, change the colour - use red and white together, 1 sc in next 5 st, change the colour - use 2 white yarns only, 1 sc (white) in next 3 st, change the colour - use red and white together, 1 sc in next 18 st
R27: use red and white yarn together, 28 sc around
R8: repeat R27
R29: 2sc together, 1 sc in next 5 st, 2sc together, 1 sc in next 5 st, 2sc together, 1sc in next 5st, 2sc together, 1sc in next 5 st (24st)
R30: 2sc together, 1sc in next 5 st, 2sc together, 1sc in next 5 st, 2sc together, 1 sc in next 6 st, 2sc together (20st)
R31: 2sc together, 1sc in next 5 st, 2sc together, 1sc in next 5 st, 2sc together, 1 sc in next 5 st, 2sc together (16st)
R32-R33: 16 sc around
You can add more rows if you need your mitten to be longer.
Turn the work upside down, fold in half, make sure the heart is in the middle, join the top of mitten (join the row 33) by sl st, work 8 sl st across.
Cut the yarn and fasten off.
We will finish the thumb now.
Turn the work to right side.
Re-join the white and red yarn at the R19, where we join the mitten. There is a thumb hole.
R1: Ch1, 1 sc in each st around
R2: 1 sc in each st around
R3-R8: repeat R2 or till your desired length of thumb.
Fold the work in half, sew the row stitch to stitch.
Cut the yarn and fasten off.
REPEAT THE PATTERN FOR THE SECOND MITTEN, LEFT HAND
IMPORTANT NOTE: the position of thumbhole is on the opposite side.
REPEAT R1-R18
R19: 1sc in each next 3 st, change the colour - use 2 white yarns only, 1 sc (white) in next 7 st, change the colour - use red and white together, 1 sc in next 15 st
We will make the thumb hole now.
Skip 8 st, join the work by sl st, work 1sc in next 3 sc till end of row
You will have 28 sc in this row (we skipped 8 st)
REPEAT R20-R33
REPEAT THE PATTERN FOR THE THUMB AS WELL.

Want a printable copy of this pattern? Why not visit my Etsy shop and purchase the PDF with photo instructions. Not only does it mean you get your own copy of the pattern to print, you also support a small business and help me to keep making free patterns!
Have fun and let me know what you make. I would love to know how your project turns out.
Please don't forget to like and I really appreciate your comments.
If the pattern did not make sense to you, please don’t hesitate to contact me, I am happy to help :)
If you like this pattern, please follow and share my projects on social networks as a THANK YOU and to help me to create new projects and patterns for you.
Thank you very much once again for your visit and see you soon!

