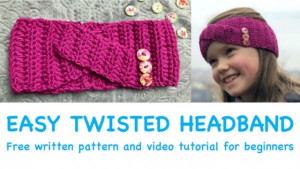
Crochet Super EASY TWISTED headband
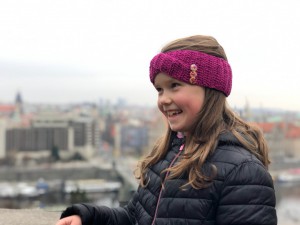
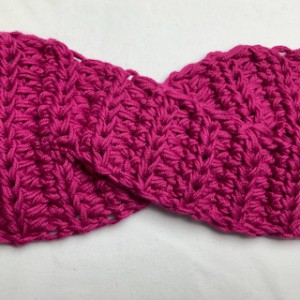
You know me, I love headbands and I love to created some interesting texture patterns on them. I have a super easy pattern for you, working with half double crochet only. I really love this effect! And you can have this headband in one evening done and ready to wear. Attach some cheerful buttons and you will create the eyes-catching piece of wardrobe.
VIDEO TUTORIAL
You can find the step-by-step video tutorials below which will help you along if you prefer to watch video instruction rather than using a written pattern. Don’t forget to subscribe if you like me videos, it’s FREE!![]()
A huge thanks to everyone who want to support my blog and download PDF paid pattern. Thank you very much, I really appreciate it and it helps me create more new video tutorials and patterns for you. Love you!
![]()
Let's start or PIN this idea to your Pinterest boards for later.
![]()
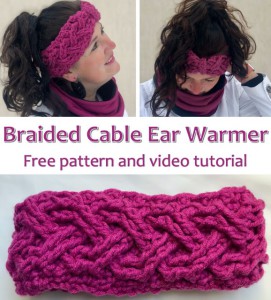
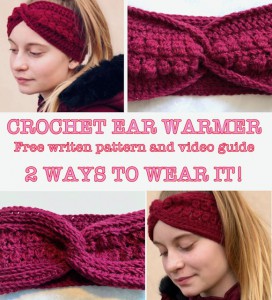
I have more Headbands and Ear Warmers free crochet patterns. You might like these ones below. Just click on them and you can find the free pattern, each of the patterns comes with a video tutorial.

This pattern is made for very beginners and it is super easy.
If you don't understand any of my instructions, don't worry I am here for you - enter the comments at the end of this post.
How long will this Easy Twisted Ear Warmer take to make?
In about 1 or 2 hours, with one skein, you could have completed this wonderful headband. And it could be as a perfect gift!
Let’s get started to make this perfect pattern!
EASY TWISTED HEADBAND DIRECTIONS
For girls or women/teenage size you will need:
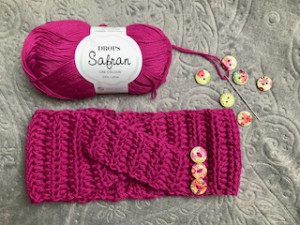
Drops Safran – 1 skein, 100% cotton, 50g = 160m
The crochet hook 4.00 mm.
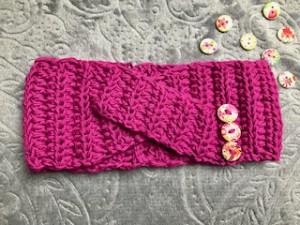
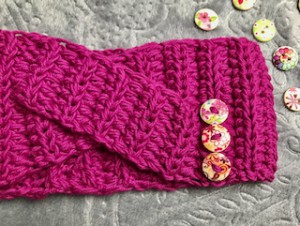
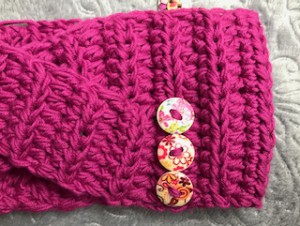
And some buttons - I used 3 buttons with flowers, about 0.4 inch.
This Headband is made as a one panel (crocheted as a one part), joined with slip stitching.
Size: bellow there is a pattern for girls, the head measurement 20 inch / 50 cm and women sizes the head measurement 22.05 inch / 56 cm.
Size can easily be adapted to a smaller size or bigger size just by reducing or increasing the number of rows.
Difficulty Level: Level 1
SlSt – slip stitch
CH/s – chain/s
HDC - half double crochet
SK - skip
T - turn
ST/s - stitch(es)
REP - repeat
YO – yarn over
LP/S - loop(s)
Special stitches used: hdc in the 3rd loop only - the 3rd loop is hidden under the back loop.
Pattern notes:
1) Before you start take a measurement of your head. Crochet the number of rows until you reach the measurement taken.
2) Each row of the headband always has the same number of stitches, the stripes have a half number of stitches.
3) The direction shown are for girls and women M sizes but can be easily converted into bigger size or smaller size – just by reducing or increasing the number of rows.
4) Each row starts with a ch1, a ch 1 at beg of every row doesn't count as sc
5) work with 2 yarns together (you can use both ends from one ball, or use 2 balls)
GIRLS SIZE
Pick up the 4.0 mm crochet hook and let’s make a slip knock.
Make a slip knot and ch14
R1: ch1, 1hdc in 2nd ch from hook, 1hdc in each ch till end of row, turn (14hdc)
R2: ch1, 1hdc in each st till end of row, work in 3rd loop, turn (14hdc)
R3 - R13 Repeat R2
Make 13 rows
Now let's make the first strip for twist.
R14: ch1, 1hdc in next 7 st, work in 3rd loop, turn (7hdc)
R15 - R25 repeat R14
Make 12 rows
Cut the yarn and fasten off
With the same yarn and crochet hook, make the second strip.
Make a slip knot
R14: Join the yarn at the R14, ch1, 7st st from beg, 1hdc in next 7 st till end of row, turn (7hdc)
R15 - R25 repeat row R14
Make 12 rows
Don’t cut the yarn.
Continue crocheting with the same yarn and crochet hook.
Lay your work work. Cross the first strip on top over the second one to form an "X".
Now, your working yarn is at the outer edge of your strip and you can continue crocheting with it. If your yarn is in the middle after crossing, you will have to fasten off and join new yarn at the outer edge of your strip.
R26: jch1, 1 hdc in next 7 st on one strip and 1 hdc in next 7 st on second strip, work in 3rd loop, turn (7hdc + 7hdc)
R27: ch1, 1 hdc in next 14st, work in 3rd loop, turn (14hdc)
R27-R42: repeat R2
Make 17 rows or as many you wish to have your headband long and to fit around your head.
I made 42 rows in total.
WOMAN SIZE
Pick up the 4.0 mm crochet hook and let’s make a slip knock.
Make a slip knot and ch16
R1: ch1, 1hdc in 2nd ch from hook, 1hdc in each ch till end of row, turn (16hdc)
R2: ch1, 1hdc in each st till end of row, work in 3rd loop, turn (16hdc)
R3 - R13 Repeat R2
Make 15 rows
Now let's make the first strip for twist.
R16: ch1, 1hdc in next 8 st, work in 3rd loop, turn (8hdc)
R17 - R29 repeat R16
Make 14 rows
Cut the yarn and fasten off
With the same yarn and crochet hook, make the second strip.
Make a slip knot
R16: Join the yarn at the R16 8st st from beg, ch1, 1hdc in next 8 st till end of row, turn (8 hdc)
R17 - R29 repeat row R16
Make 14 rows
Don’t cut the yarn.
Continue crocheting with the same yarn and crochet hook.
Lay your work down. Cross the first strip on top over the second one to form an "X".
Now, your working yarn is at the outer edge of your strip and you can continue crocheting with it. If your yarn is in the middle after crossing, you will have to fasten off and join new yarn at the outer edge of your strip.
R30: joining row 8 hdc + 8 hdc: ch1, 1 hdc in next 8 st, 1hdc in next 8 st, work in 3rd loop, turn (8 + 8 = 16 hdc)
R31: ch1, 1 hdc in next 16 st, work in 3rd loop, turn (16hdc)
R32 - R48: repeat R2
Make 17 rows or as many you wish to have your headband long and to fit around your head.
I made 46 rows in total.
Turn your work, the wrong side facing up. Bring the foundation row edge near the last row - brig both ends of the headband together. It should have the edges lined up. Using the long tail from above make slip stitches - one slip stitch into each stitch - slip stitch both sides together. End off yarn, weave in all the tails. Turn your headband the right side out and smooth down.
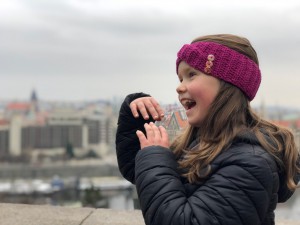
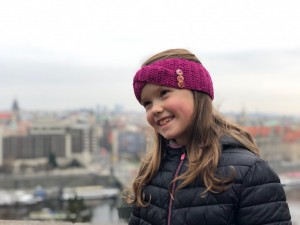
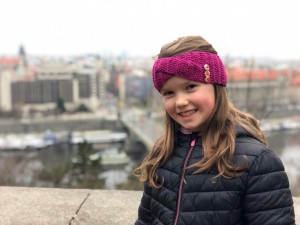
Enjoy wearing your new twisted Headband!
THE FINAL SIZE MEASUREMENT:
GIRLS SIZE: The headband 3,94 inch / 10 cm high, 19 inch / 48 cm long around the head.
WOMEN SIZE: The headband 4,49 inch / 11,4 cm high, 20.87 inch / 53 cm long around the head.
Have fun and let me know what you make. I would love to know how your project turns out.
Please don't forget to like and I really appreciate your comments.
If the pattern did not make sense to you, please don’t hesitate to contact me, I am happy to help :)
If you like this pattern, please follow and share my projects on social networks as a THANK YOU and to help me to create new projects and patterns for you.
If you pin my patterns to your Favorites and share it on social media as a link, I will be able to share a lot more free crochet patterns for you all.
Stay in touch at Facebook, Instagram and Pinterest.
Thank you very much once again for your visit and see you soon!
♥♥♥


