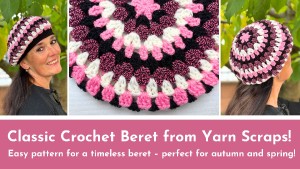
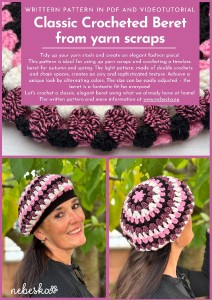
Crochet with Elegance: The Classic Beret, Made from Yarn Scraps!
Hey everyone! Welcome to my Blog! Your support is what directly allows me to keep creating more free video tutorials and patterns for our amazing crochet community!
Want to contribute? Here are three ways you can show your support:
-
Tip me: https://paypal.me/nebeskacrochetlove
-
Buy patterns: https://payhip.com/NebeskaCrochetwithLove
-
Become a Patron and unlock even more content: https://herohero.co/crochetwithlove
Thanks a million, my crochet friends! Wishing you joy and color through yarn.
I truly believe in the magic of creativity.
----
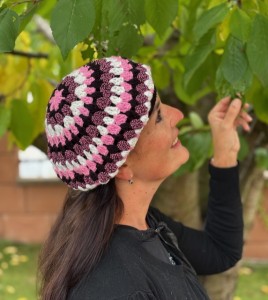
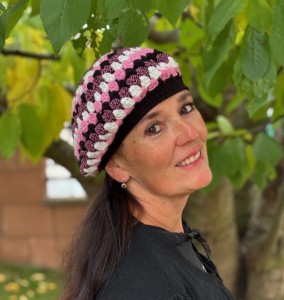
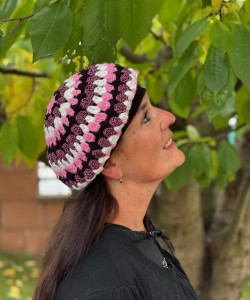
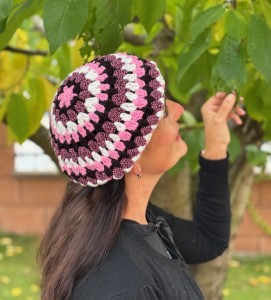
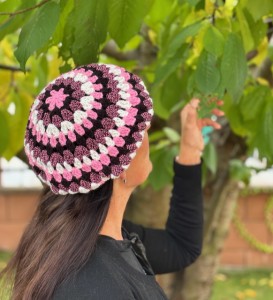
Organize your stash and create an elegant fashion piece! This pattern is ideal for those who want to use up yarn scraps while crocheting a timeless beret suitable for both autumn and spring days. The lightweight design, using double crochet and chain stitches, creates an airy and sophisticated texture. The beret is crocheted from the top down in closed rounds, ensuring a smooth and regular shape. Although the stitch pattern is simple, the color changes will achieve a vibrant and unique look that perfectly complements any outfit.
The size is easily adaptable to your exact needs—simply by adding or removing rounds in the increasing and brim phases. This makes the beret flexible and perfect for everyone!
The pattern provides a detailed description for a classic, elegant cut that should be a staple in every wardrobe. Let's create beauty from what we already have!
I wish you much joy with your crocheting, and I look forward to seeing photos of your colorful, elegant beret!
Video tutorials on HeroHero: https://herohero.co/crochetwithlove
Crocheting this hat is suitable for absolute beginners. The construction and fit allow you to easily adjust the size and length.
Are you ready to enjoy the perfect beret hat?
Download the pattern today and let your creativity shine with color!
Download the pattern HERE today and start creating!
Why You Will Love This Pattern:
- Perfect for Yarn Scraps: This project is ideal for using up yarn scraps. You'll transform small amounts of yarn into an original and sophisticated fashion accessory, helping you organize your yarn stash.
- Timeless and Elegant Design: You will create a classic beret, which is a truly timeless fashion piece. The light and airy pattern of double crochets and chain stitches gives it a sophisticated texture.
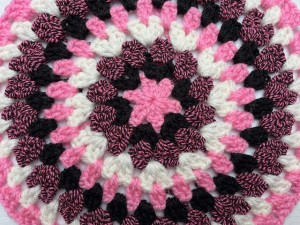
- Excellent for Color Play: Even with a simple stitch, you can achieve a vibrant and unique look by alternating colors. Every beret will be an original work of art.
- Easy Size Customization: The pattern is flexible and allows for easy size adjustment by adding or subtracting rows, ensuring the beret will fit everyone perfectly.
- Great for Beginners: Although the result is elegant, the basic pattern is simple (double crochets and chain stitches), making it a great project even for beginner crocheters.
- Clean, Professional Shape: Crocheting in joined rounds from the top down ensures a smooth, regular, and professional-looking shape.
- Detailed written instructions with clear directions and tips specific to crocheting a beret.
- Row-by-row instructions for smooth, in-the-round beret construction (worked top-down).
- Descriptions of stitches and joining techniques to achieve the smooth, consistent shape of your beret.
- Precise guide to the increase phase to reach the required diameter, and the correct reduction for the brim to ensure the beret fits perfectly.
- Helpful photographs to guide you through every key step of creating the beret.
Ready to crochet your new favorite piece?
Design and Materials:
Yarn - any yarn you like and prefer.
In my pattern:
Tera = 100 g / 310 m, 100 % acrylic
Zebra: 100 g / 195 m / 100 % polyacrylic
Size: women's, classic
- Hook Size: 4.0 mm
Additional Tools
- Scissors
- Yarn needle
- Stitch markers (essential for spiral rounds!)
The Video tutorials and also the written pattern is on HeroHero:
https://herohero.co/crochetwithlove
A huge thanks to everyone who want to support my blog and download PDF paid pattern. Thank you very much, I really appreciate it and it helps me create more new video tutorials and patterns for you. Love you!
![]()
If you pin my patterns to your Favorites and share it on social media as a link, I will be able to share a lot more free crochet patterns for you all.
Stay in touch at Facebook, Instagram and Pinterest.
Let's start or PIN this idea to your Pinterest boards for later.
![]()
US crochet terms:
SlSt – slip stitch
CH/s – chain/s
SC - single crochet
SK - skip
T - turn
ST/s - stitch(es)
REP - repeat
YO – yarn over
Construction: BERET CROCHETED AS ONE PIECE FROM THE TOP DOWN IN ROUNDS
Size and Customization
This pattern is primarily written for a classic women's size.
However, thanks to the simple cut and construction, it is easy to adjust the beret to any size, from child to adult. Simply adjust the number of increase rounds (the crown/disc) and the number of straight rounds (the body of the beret). Detailed instructions on increasing and measuring can be found directly in the pattern.
Design and Construction
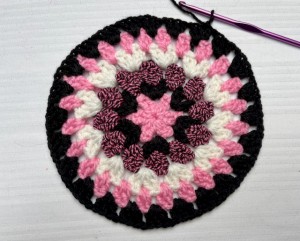
The beret is crocheted as one piece from the top down.
Technique: We crochet in joined rounds (closing each round with a slip stitch into the first stitch) and without turning (always working on the right side).
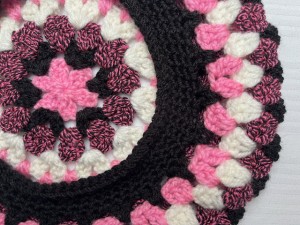
Process: We start at the crown, gradually increasing until the desired width is reached. This is followed by several straight rounds for the body of the beret, and then a sharp decrease to create the brim.
Brim and Finishing
Brim: At the bottom, I crocheted a solid-colored brim using single crochet (sc). You may optionally work these in spiral rounds (without joining the round with a slip stitch).
Finishing: The entire beret is finished by edging with slip stitches (sl st) to strengthen the brim.
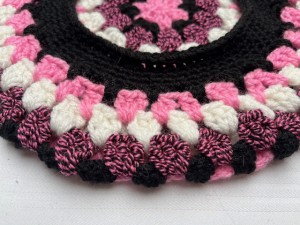
Important Note: Remember that the beret must first be a flat disc that is larger than your head circumference so that it can "slouch" and create the typical beret shape.
Color Change: Creating Stripes
If you are alternating colors to create stripes, I recommend using this clean method:
Closing the Round: Finish the round with a slip stitch (sl st). Cut the yarn.
Starting the New Round: Begin the next round with the new color in any chain space.
Weaving in Ends: Crochet according to the pattern until the end of the round, making sure to tuck in (crochet over) the cut end of the original yarn and the free end of the newly attached yarn as you go.
Final Finish: Finish the last round, or each color section, with an invisible join for a clean transition.
TIPS and Recommendations
Stitch Marker for Spiral Rounds and Crocheting Tips
Stitch Marker: The lower brim is crocheted in spiral rounds (without a fixed join at the end of the round), so I recommend using a stitch marker. Use it to regularly mark the first stitch of every new round. This ensures you maintain the correct number of rounds and achieve a smooth transition.
Tension Control: Try to crochet with moderately firm stitches (neither too tight nor too loose). This ensures the brim will be comfortable and breathable. A pattern that is too loose could create a shapeless, twisted appearance, while a pattern that is too tight might be stiff and inflexible.
Before You Start: Before you begin, I recommend planning your color palette (e.g., 4 colors) and how you will alternate the colored rounds regularly.
Customization: The desired length and width of the beret can be easily adjusted during the crocheting process by modifying the number of stitches in the rounds and the number of rounds in the beret body. Keep in mind that you will need more yarn for a larger size.
Measuring and Consistency = The Key to a Perfect Beret
Regular Measuring:
Measure regularly throughout the crocheting process to ensure you maintain the correct size and proportions. Thanks to the double crochet and chain stitch pattern, the beret will be flexible and airy.
Circumference Measurement:
Remember that the beret should be looser and wider than a classic beanie. Use the advice in the pattern to adjust the circumference size so that the beret fits casually rather than snugly.
Consistency (Yarn Tension):
Maintaining even tension (consistent yarn tension) throughout the entire project is crucial for a neat and well-finished result. Strive to keep your yarn tension consistent to prevent any deformation.
Trying It On:
Because the stitch pattern is airy, it often stretches easily. After each phase (increasing, body), try the beret on your head to see how loosely it wears and when the right time is to begin decreasing.
Color Transition Logic, Blocking, and Reinforcement
Color Transition Logic:
Use the darkest color (black) for the brim and perhaps also for the very beginning of the crown to give the beret a grounded look.
Using a variegated/melange yarn (black-pink) right next to black or pink will create a softer and smoother transition between sections.
Blocking:
Both acrylic yarn and Merino wool (if you use any wool) respond excellently to blocking. After finishing, wet the beret, gently squeeze out the excess water, and lay it flat to obtain a perfect circular shape and ensure it flattens evenly. For acrylic, gently steaming with an iron can also help (be careful not to burn the yarn!).
Brim Reinforcement:
Since the beret is designed to be loose, you can reinforce the brim by edging it with slip stitches (sl st), or by crocheting the single crochet rows into the back loop only with a slightly smaller hook (e.g., 3.0 mm instead of 4.0 mm).
Alternatively, an elastic band can be woven into the brim. This will help the brim hold its shape better and hug the head more firmly without the beret slipping.
Size and Dimensions (Women's S/M)
- Head Circumference: 54 cm (21.25 in)
- Crown Disc Diameter (Max. Width): 26 cm (10.25 in)
- Straight Body Section (Depth): 5 cm (2.0 in)
- Inner Crown Diameter: 16 cm (6.3 in)
- Beret Circumference (Finished): 56 cm (22.0 in)
- Lower Single Crochet Brim: 3 cm (1.2 in)
Thank you very much once again for choosing my pattern for your project and for your purchase.
For even more crochet patterns, check out my e-book.
More pattern? CROCHET WITH LOVE AND NEBESKA
I'm thrilled to present my 2024 e-book, CROCHET WITH LOVE AND NEBESKA!
Inside, you'll discover over 60 projects with patterns and video tutorials to inspire you all year long.
You can download the e-book as a PDF, complete with clickable links to easily find the patterns you're looking for. Perhaps you missed a pattern and are now happy to find it here.
Or maybe you're just looking for inspiration for your next project – I hope my ideas spark your creativity! The e-book is FREE and you can share it with your friends.

Have questions? Join the Facebook Group OR my Youtube Community!
I hope this article will be useful for you! If you have any additional questions, feel free to join my Facebook Group or Youtube Community. I created these groups for you to share pictures, ask questions, and help each other out.
What’s Next?
Pin this post: Save this tutorial to your Pinterest boards so that you can come back to it later.
Leave a comment: I love to hear your feedback. Tell me in the comments below!
Share on Instagram and Facebook: When you make this project, share it on social media and tag me @sonanebeska. I love to see what you make!
Explore More Crochet Patterns
MOST POPULAR VIDEO TUTORIALS
All of the patterns on that list are beautifully designed, and suitable for both beginners and experienced crocheters. They are different levels of difficulties and techniques that you might have never seen before. Just click on them and you can find the free pattern, each of the patterns comes with a video tutorial.
Have fun and let me know what you make. I would love to know how your project turns out.
Please don't forget to like and I really appreciate your comments.
If the pattern did not make sense to you, please don’t hesitate to contact me, I am happy to help :)
If you like this pattern, please follow and share my projects on social networks as a THANK YOU and to help me to create new projects and patterns for you.
If you pin my patterns to your Favorites and share it on social media as a link, I will be able to share a lot more free crochet patterns for you all.
Stay in touch at Facebook, Instagram and Pinterest.
Thank you very much once again for your visit and see you soon!
♥♥♥


