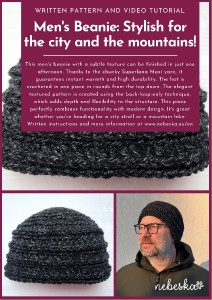
Men's HAT: Stylish in the City and the Mountains!
Hey everyone! Welcome to my Blog! Your support is what directly allows me to keep creating more free video tutorials and patterns for our amazing crochet community!
Want to contribute? Here are three ways you can show your support:
-
Tip me: https://paypal.me/nebeskacrochetlove
-
Buy patterns: https://payhip.com/NebeskaCrochetwithLove
-
Become a Patron and unlock even more content: https://herohero.co/crochetwithlove
Thanks a million, my crochet friends! Wishing you joy and color through yarn.
I truly believe in the magic of creativity.
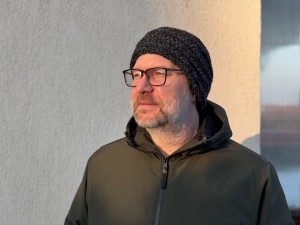
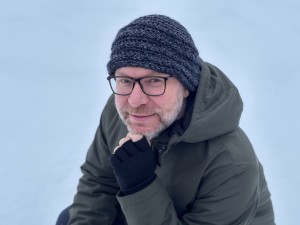
Are you looking for a pattern for a hat that you can finish in a single evening and that looks absolutely professional? This men's hat with a subtle texture is exactly what you need! Thanks to the chunky yarn and simple pattern, you will create a piece that is stretchy, warm, and has a modern look.
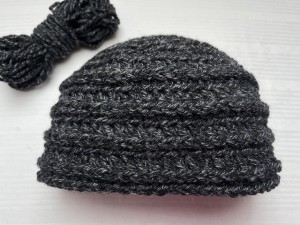
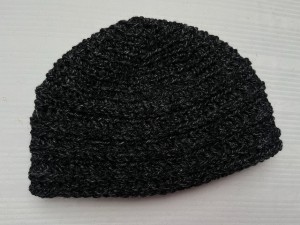
This pattern describes the steps for a classic men's hat suitable for everyday wear. The hat is constructed in one piece and crocheted in rounds from the top down. The subtle textured pattern is created using the back-loop-only technique, which adds depth and elasticity to the structure.
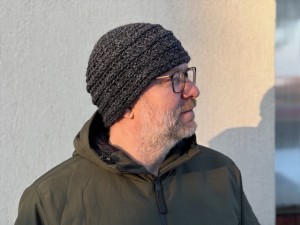
This hat combines functionality with modern design. For this pattern, I chose the popular Superlana Maxi yarn. Thanks to its composition and weight, it guarantees instant warmth and high durability. Its style perfectly matches the colors of the autumn and winter seasons, whether you are going for a walk in the city or a mountain hike.
Why you will love this pattern:
Beginner friendly: Uses basic stitches, making it a perfect project for those just starting out.
Modern look: The unique texture creates a stylish, high-quality "knit-look" finish.
Seamless design: Working in continuous rounds means no visible seams or messy transitions.
Quick to make: Thanks to the half double crochet stitches, the beanie grows very fast.
Universal fit: The stretchy ribbing ensures a comfortable fit for any standard men’s size.
Easy to follow: Step-by-step instructions that guide you clearly from the magic ring to the final stitch.
What’s included in this pattern:
· Step-by-step instructions: Clear and detailed row-by-row guide.
· Material list: Recommended yarn type and hook size for the best results.
· Abbreviations guide: A complete list of all crochet terms used in the pattern.
· Close-up photos: Visual aids for key steps and pattern texture.
· Pro tips: How to achieve a perfect circular shape and smooth transitions.
· Finishing instructions: How to weave in ends for a professional look.

Video tutorials on HeroHero: https://herohero.co/crochetwithlove
Download the pattern today and let your creativity shine with color!
Download the pattern HERE today and start creating!
Design and Materials:
Size: Men's Universal (easily adjustable by changing the number of rounds or increases).
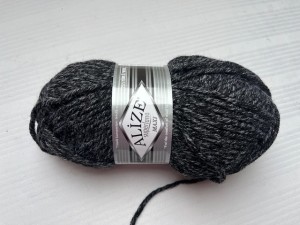
Yardage / Consumption: 1 skein (100 g).
Yarn: Alize Superlana Maxi (25% Wool, 75% Acrylic; 100 g / 100 m).
Hook: 6 mm (US J/10 or J-4 depending on the brand).
Other Tools:
Scissors
Yarn needle (for weaving in ends)
Stitch markers
The Video tutorials and also the written pattern is on HeroHero:
https://herohero.co/crochetwithlove
A huge thanks to everyone who want to support my blog and download PDF paid pattern. Thank you very much, I really appreciate it and it helps me create more new video tutorials and patterns for you. Love you!
![]()
If you pin my patterns to your Favorites and share it on social media as a link, I will be able to share a lot more free crochet patterns for you all.
Stay in touch at Facebook, Instagram and Pinterest.
Let's start or PIN this idea to your Pinterest boards for later.
![]()
Size and Customization
This pattern is primarily designed for a classic men's size. However, thanks to the simple top-down construction, it is very easy to adjust the hat to any size, from children to adults. Simply adjust the number of increase rounds (diameter of the flat circle) and the total number of rounds for the length of the hat.
Detailed instructions for increasing and measuring the ideal size can be found directly in the pattern.
Design and Construction
The hat is crocheted in one piece in rounds, which means there is no seam and no sewing required.
Technique
We work in continuous rounds, closing each round with a slip stitch. The key to the texture is the back-loop-only (BLO) technique, which creates a stretchy, textured surface that resembles ribbing.

Construction and Workflow
We start at the crown (top) of the hat and work in rounds down toward the bottom edge. The process consists of these phases:
- The Crown (Top): We create a flat circle by gradually adding increases using back-loop-only (BLO) single crochet (sc). This phase defines the final circumference of the hat.
- The Body: Once the required circumference is reached, we continue with the main pattern without further increases. This is where we build the height of the hat and let the texture stand out.
- Finishing: We finish with a brim that reinforces the edge, ensuring the hat fits perfectly and doesn't stretch out.
Pattern Repetition
The pattern on the body of the hat is formed by alternating two types of rounds to create a distinct texture:
- Half Double Crochet Round: Crochet hdc in the back loop only (BLO).
- Single Crochet Round: Crochet sc in the third loop (the loop just below the back loop). This specific technique pushes the stitch forward, giving the hat its characteristic 3D textured look.
Using Stitch Markers: When crocheting in rounds, I highly recommend using a stitch marker to mark the first stitch of each round. With a chunky yarn like Superlana Maxi, it is very easy to lose track of where the round starts. Marking your place ensures you have the correct stitch count in every round and that your increases remain smooth and symmetrical.
Yarn Tension: Finding the right balance in tension is crucial for hats. Aim for consistent, slightly relaxed tension:
- Looser tension ensures the hat remains stretchy and the texture (created by BLO and third-loop stitches) stays soft and pliable.
- Tight tension could result in a hat that is too stiff and won't comfortably conform to the shape of the head.

Before You Start: Before you make your first stitch, consider the following:
- Hat Depth: Do you want a classic "skull cap" fit, or a longer, slouchy style? This will determine how many rounds you work for the body of the hat.
- How to Wear It: Decide if you want a simple finished edge or if you want to make the hat longer to allow for a folded brim.
- Pompom: If you plan to add a pompom, remember to leave a long enough yarn tail at the beginning (crown) to securely attach it.
Adjusting the Size
You can easily check the required circumference of the hat once you finish the first stage (the crown). If you see that the flat circle is too small or too large, simply add or remove one increase round. Keep in mind that with chunky yarn, the project grows very quickly, so even a single extra round can significantly change the final circumference.
Recommendations for Measuring and Technique
Measuring as You Go: I recommend regularly measuring and trying on the hat while you work. This ensures correct proportions and allows you to catch any sizing issues early on.
Checking the Fit: Since the back-loop and third-loop patterns are very stretchy, they adapt easily to the head. Once you finish the increase phase (the crown), place the work on your head. This will help you determine if the circumference is sufficient before you begin the body of the hat.
Circumference and Elasticity: Keep in mind that the hat should be slightly narrower when at rest than the actual circumference of the head. This "negative ease" ensures that once stretched, it stays in place and won't slip over your eyes or fall off during movement.
Yarn Characteristics: Superlana Maxi is thick and warm, but thanks to the chosen stitch pattern, the hat remains elastic. Expect the hat to mold to the shape of the head after a few wears.
Consistent Tension: Maintaining consistent yarn tension throughout the entire project is key to a professional look. This is especially important for the third-loop texture so that the raised ridges remain neat and perfectly aligned.
Uniform Texture: Try not to pull too tight during the single crochet rounds, and conversely, avoid being too loose during the half double crochet rounds. Consistent work ensures the texture remains even across the entire circumference and length of the hat.
Congratulations! Your new hat is finished and ready to bring joy during cold days – whether it’s for you or someone you decide to gift. I hope you enjoyed crocheting with this pattern and that the third-loop technique excited you as much as it did me.
Remember, every handmade item carries a piece of your patience and heart. Now, all that’s left is to put it on, head outside, and enjoy the cozy warmth!
For even more crochet patterns, check out my e-book.
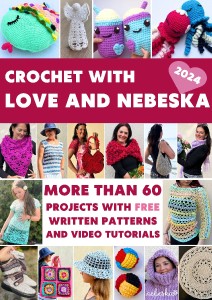
More pattern? CROCHET WITH LOVE AND NEBESKA
I'm thrilled to present my 2024 e-book, CROCHET WITH LOVE AND NEBESKA!
Inside, you'll discover over 60 projects with patterns and video tutorials to inspire you all year long.
You can download the e-book as a PDF, complete with clickable links to easily find the patterns you're looking for. Perhaps you missed a pattern and are now happy to find it here.
Or maybe you're just looking for inspiration for your next project – I hope my ideas spark your creativity! The e-book is FREE and you can share it with your friends.
Have questions? Join the Facebook Group OR my Youtube Community!
I hope this article will be useful for you! If you have any additional questions, feel free to join my Facebook Group or Youtube Community. I created these groups for you to share pictures, ask questions, and help each other out.
What’s Next?
Pin this post: Save this tutorial to your Pinterest boards so that you can come back to it later.
Leave a comment: I love to hear your feedback. Tell me in the comments below!
Share on Instagram and Facebook: When you make this project, share it on social media and tag me @sonanebeska. I love to see what you make!
All of the patterns on that list are beautifully designed, and suitable for both beginners and experienced crocheters. They are different levels of difficulties and techniques that you might have never seen before. Just click on them and you can find the free pattern, each of the patterns comes with a video tutorial.
Have fun and let me know what you make. I would love to know how your project turns out.
Please don't forget to like and I really appreciate your comments.
If the pattern did not make sense to you, please don’t hesitate to contact me, I am happy to help :)
If you like this pattern, please follow and share my projects on social networks as a THANK YOU and to help me to create new projects and patterns for you.
If you pin my patterns to your Favorites and share it on social media as a link, I will be able to share a lot more free crochet patterns for you all.
Stay in touch at Facebook, Instagram and Pinterest.
Thank you very much once again for your visit and see you soon!
♥♥♥


