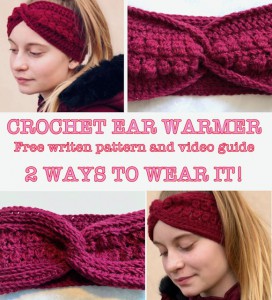
X-Twisted Headband Freedom - this will make cozy ear warmer!
X-Twisted Headband Freedom - this will make cozy ear warmer!
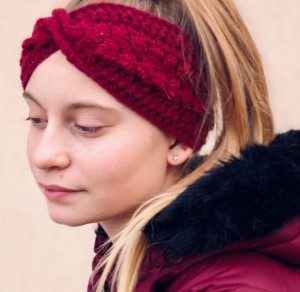
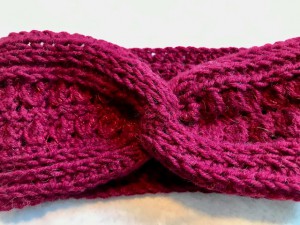
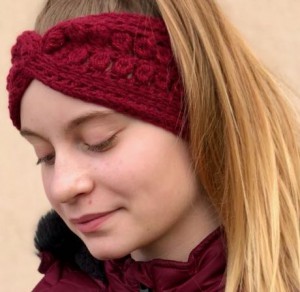
My favorite technique for headbands is the x-twist on the front. I really love this effect and it so easy to create it. This eyes-catching twist is made by sewing the two edges together which is actually the seam.
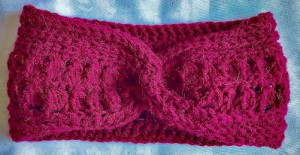
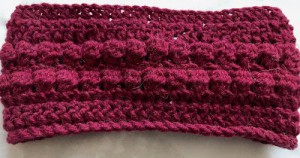
When I chose the pattern for these headbands I knew I had to make a headband with simple pattern but add something extras. I decided to use knit-like effect and the bobble stitch - they together are perfect to create a wonderful pattern!
The X-Twisted Headband Freedom is a crochet pattern that will keep your ears really warm. There is a crochet video tutorial to show you this wonderful pattern.
VIDEO TUTORIAL
You can find the step-by-step video tutorials below which will help you along if you prefer to watch video instruction rather than using a written pattern. Don’t forget to subscribe if you like me videos, it’s FREE!![]()
A huge thanks to everyone who want to support my blog and download PDF paid pattern. Thank you very much, I really appreciate it and it helps me create more new video tutorials and patterns for you. Love you!
![]()
Let's start or PIN this idea to your Pinterest boards for later.
![]()
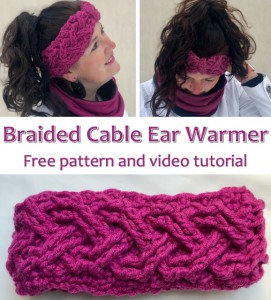
I have more Headbands and Ear Warmers free crochet patterns. You might like these ones below. Just click on them and you can find the free pattern, each of the patterns comes with a video tutorial.

This is a great way to learn a new pattern and make a wonderful item while you practice. I hope you love it as much as I do!
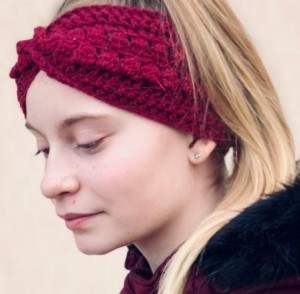
I can’t even tell you how happy I am to be sharing this pattern with you! And how happy I am to give this amazing headband to my girl.
How long will this X-Twisted Headband Freedom take to make?
In about 1 hour, with one skein, you could have completed this wonderful headband with this amazing knit-like pattern and x-twist effect. And it could be as a perfect gift!
The colour choice was also easy – I picked a burgundy colour ball to match it with the jacket. And they look gorgeous together, aren't they?
Let’s get started to make this perfect pattern!
Headband Freedom Directions
For this women/teenage size you will need:
Palma Fibre Freedom – 75 % baby alpaca, 25% polyamide, 50g/120m – 1 skein
Optional: some sparkling thread. I used Drops GLITTER
The crochet hook 4.0 mm.
This Headband is made as a one panel (crocheted as a one part) – twisted and sew in the middle
Size: bellow there is a pattern for teenage girl size, the head measurement 21.2 inch / 54 cm, this one fits also to me. The headband can easily be adapted to a smaller size or bigger size just by making the starting chain longer or shorter.
Difficulty Level: Level 1 – Easy, for beginners
US crochet term:
SlSt – slip stitch
CH/s – chain/s
SC – single crochet
HDC - half double crochet
DC - double crochet
SK - skip
T - turn
ST/s - stitch(es)
REP - repeat
YO – yarn over
Special stitches used – see video tutorial: a bobble stitch = 5dc cluster
Pattern Notes
1) Before you start take a measurement of your head. Crochet the number of chains until you reach the measurement taken.
2) The direction shown are for woman/teenage size 21.2 inch head measurement but can be easily converted into bigger size or smaller size – just by making the starting chain longer or shorter.
3) A Ch 3 at beg of the row counts as dc throughout.
TEENAGE GIRLS / WOMAN SIZE
Pick up the 4.0 mm crochet hook and let’s make a slip knock.
Ch65
R1: ch1, hdc into the 3rd ch from your crochet hook. 64 hdc across to the end.
You will have 65 hdc in the row. Turn your work.
R2: ch1, hdc into the 1st st.
Now you will place hdc in the 3rd loop only! The 3rd loop is hidden under the back loop.
1hdc into each st across, each hdc is placed to 3rd st.
You will have 65 hdc in the row. Turn your work.
You make a lovely knit-like effect!
R3: ch1, hdc into the 1st st.
Place hdc in the 3rd loop only! As you turn your work, the 3rd loop is in front of the front loop now.
1hdc into each st across, each hdc is placed to 3rd loop.
You will have 65 hdc in the row. Turn your work.
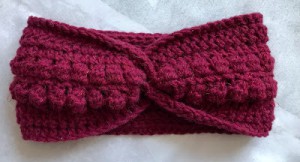
R4: in this row you will make a bobbles.
Optional: you can add some shiny thread to make a lovely sparkling effect (this is what my daughter loves :))
Make sure you work in the 3rd loop only.
ch3 (it counts as 1dc), skip 1st, work a bobble into next st = 5dc cluster, ch2
rep: *skip 1 st, 5dc cluster into next st, ch2* repeat from * to * around till end of the row, 1 dc into the last st (into the 3ch from beg of R3), turn
R5: ch1, 1sc into each st across, turn (65 sc)
R6: the row with bobbles
ch3 (it counts as 1dc), skip 1st, work a bobble into next st = 5dc cluster, ch2
rep: *skip 1 st, 5dc cluster into next st, ch2* repeat from * to * around till end of the row, 1 dc into the last st (into the 3ch from beg of R3), turn
R7: ch2, 1hdc into each st across, turn (65 hdc)
R8: ch1, hdc into the 1st st.
Now you will place hdc in the 3rd loop only! The 3rd loop is hidden under the back loop.
1hdc into each st across, each hdc is placed to 3rd st.
You will have 65 hdc in the row. Turn your work.
R9: ch1, hdc into the 1st st.
Place hdc in the 3rd loop only! As you turn your work, the 3rd loop is in front of the front loop now.
1hdc into each st across, each hdc is placed to 3rd loop.
You will have 65 hdc in the row. Turn your work.
R10: ch1, sc into the 1st st.
Place sc in the 3rd loop only!
1sc into each st across, each sc is placed to 3rd loop.
You will have 65 sc in the row.
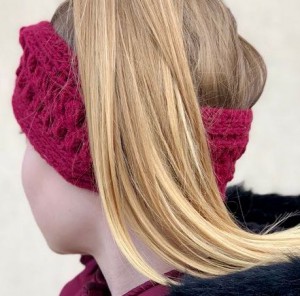
The right side:

I also like the wrong side - what do you think? Isn't it also perfect to wear? You can easily use this headband as a reversible:
HOW TO MAKE X-TWIST
To make this simple x-twist, you’ll first crochet a rectangle and then fold it and sew to secure the ends together. The way you fold the ends together is what creates the twist.
Lay your headband the right side facing up. Bring the ends of the headband together so half of one end is against half of the other end.
Wrap each side around the other side of the headband: fold each end towards the center of the work. Then fold one end in half and next, fold the other end in half. Slide the two folded ends together and even out the stitches.
It should have four edges lined up. Using the long tail from above, thread it on the large yarn needle. Sew the four edges together, weave yarn back and forth through all four layers. End off yarn, weave in ends. Turn your headband the right side out and smooth down.
THE FINAL SIZE MEASUREMENT:
The headband 3,94 inch / 10 cm high, 17,32 inch / 44 cm long around the head
Want a printable copy of this pattern? Why not visit my Etsy shop and purchase the PDF with photo instructions. Not only does it mean you get your own copy of the pattern to print, you also support a small business and help me to keep making free patterns!
Have fun and let me know what you make. I would love to know how your project turns out.
Please don't forget to like and I really appreciate your comments.
If the pattern did not make sense to you, please don’t hesitate to contact me, I am happy to help :)
If you like this pattern, please follow and share my projects on social networks as a THANK YOU and to help me to create new projects and patterns for you.
Thank you very much once again for your visit and see you soon!


