Crochet Simple Table Placements AYAZ Macreme
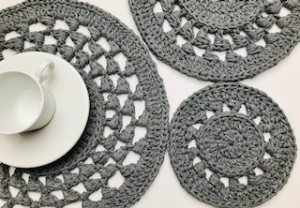
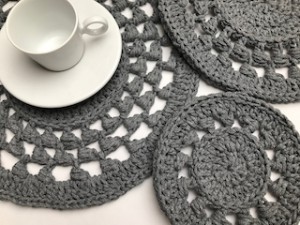
The table placemats crocheting is perfect for any season and any time of the year! You can gift them to your loved ones and I think anyone would love to receive them as everyone owns a dining table, and everyone likes to make their house look pretty.
Sometimes, you just want something simple and easy to do. So this pattern is perfect for you and it is ideal for beginners - really easy, simply and stylish!
These crochet placemat patterns are so much fun to make!
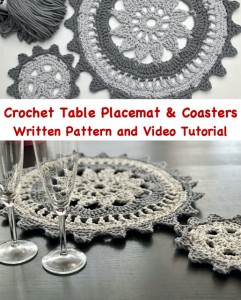
VIDEO TUTORIAL
You can find the step-by-step video tutorials below which will help you along if you prefer to watch video instruction rather than using a written pattern. Don’t forget to subscribe if you like me videos, it’s FREE!![]()
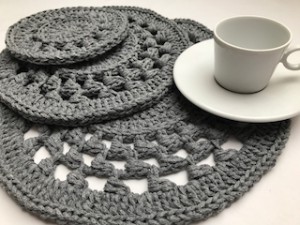
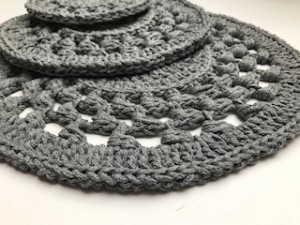
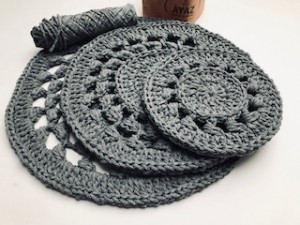
These Table Placemats and coasters are so fast to make, all you need is a free evening to make them for your dining table. You will need to know a few basic stitches like double crochet, slip stitch and puff stitch. This project is started by making a magic ring.
A huge thanks to everyone who want to support my blog and download PDF paid pattern. Thank you very much, I really appreciate it and it helps me create more new video tutorials and patterns for you. Love you!
![]()
If you pin my patterns to your Favorites and share it on social media as a link, I will be able to share a lot more free crochet patterns for you all.
Stay in touch at Facebook, Instagram and Pinterest.
Let's start or PIN this idea to your Pinterest boards for later.
![]()
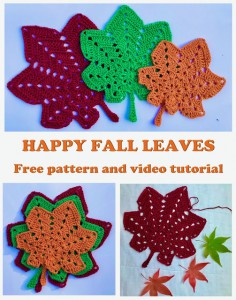
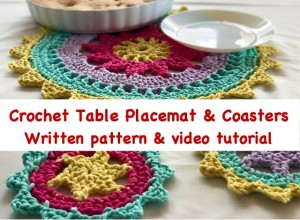
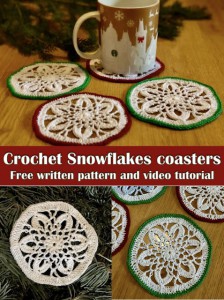
If you like home decoration you would may love to create these projects as well:


This pattern is made for beginners - only a basic skill level is required to make it. If you don't understand any of my instructions, don't worry I am here for you - enter the comments at the end of this post.
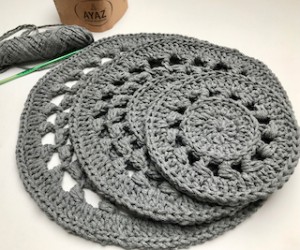
I used: AYAZ Macreme
100% Cotton, 250g = 150m
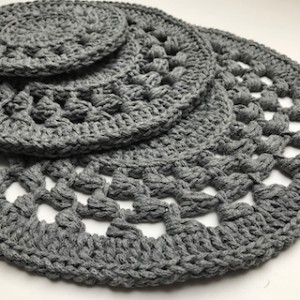
1 skein = 3 table placemats, 3 sizes
![]()
For this pattern you will need 4.00 mm crochet hook
Difficulty Level: Level 1 – very easy for ultimate beginners
US crochet term:
SlSt – slip stitch
CH/s – chain/s
SC – single crochet
DC - double crochet
ST/s - stitch(es)
REP - repeat
Special Stitches used: horizontal puff stitch
The horizontal puff stitch is made by doing a double crochet, and then yarn around the post of that double crochet stitch a few times. Horizontal Puff stitches which I think add a really pretty texture and detail to the pattern.
Steps:
1) Make a double crochet (or when you start the row make a ch3)
2) Yarn over, insert your hook to go behind the post of the double crochet you just did.
3) Yarn over again, and pull yarn through.
4) Pull yarn up a bit
5) Yarn over again and repeat steps 2 - 4
6) you’ll now have 5 loops on your hook. Yarn over again and this time pull the yarn through all of the loops on your hook.
7) You’ll now have your first horizontal puff stitch. Now we’ll chain 1 again to start another one.
8) Skip 1 stitch, and double crochet 1 in the stitch after the one you skipped.
9) Then begin doing steps 2 - 7 till you have your next horizontal puff stitch. Keep doing the pattern of chain 1, skip 1, horizontal puff stitch till you’ve gone all the way across your row.

Pattern Notes
1) A Ch 3 at beg of the row DOESN'T count as dc throughout.
2) The end of each round is attached to the first stitch of the round using a sl st - place a slip stitch in the 1st st from beg
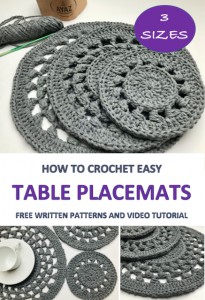
3) These Table Placemats are crochet in the rounds. It's really a wonderful design - you can create smaller or larger Placemat that would make a great coasters, doilies or wall art. If you will work with bulky yarn and a larger hook and use the pattern to create a floor rug.
4) Instructions between two asterisks should be repeated for the remainder of the round
PATTERN I - THE BIGGEST SIZE - TABLE PLACEMAT
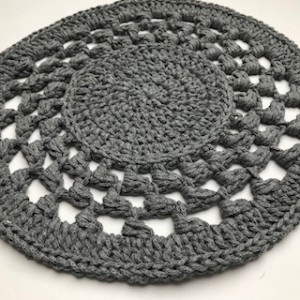
TABLE PLACEMAT
Make a magic ring
R1: ch1 (don't count it as a st), 12 dc into magic ring, join round with sl st in 1st st from beg
R2: ch1, 1 dc in 1st st, 2 dc in each next st till end of row, 1dc in 1st st, join round with sl st in 1st st from beg (24 dc)
R3: ch1 * 1 dc in 1st st, * 1 dc in next st, 2 dc in next st* repeat from * to * till end of round, 1dc in 1st st, join round with sl st in 1st st from beg (36 dc)
R4: ch1 * 1 dc in 1st st, * 1 dc in next 2 st, 2 dc in next st* repeat from * to * till end of round, 1dc in 1st st, join round with sl st in 1st st from beg (42 dc)
R5: sl st in each st around to make a nice around the row 4.
New pattern: puff stitches
R6: ch3 (counts as a dc), horizontal puff st, ch1, sk 1 st
Work in double crochet stitches made in row R4.
Keep doing the pattern of chain 1, skip 1, horizontal puff stitch till end of round, join round with sl st in 1st st from beg (24 puff stitches and ch1 between them)
R7: ch3 (counts as a dc), horizontal puff st, ch2, 1 horizontal puff st between 2 puff st from previous round.
Keep doing the pattern of chain 2, 1 horizontal puff stitch till end of round, join round with sl st in 1st st from beg (24 puff stitches and ch2 between them)
R8: ch3 (counts as a dc), horizontal puff st, ch3, 1 horizontal puff st between 2 puff st from previous round.
Keep doing the pattern of chain 3, 1 horizontal puff stitch till end of round, join round with sl st in 1st st from beg (24 puff stitches and ch3 between them)
R9: ch3, *1 dc in each st on top of puff st (3dc), 3 dc in ch3 space* repeat from * to * till end of round, join round with sl st in 1st st from beg ( dc)
R10: 1 sl st in each st around
PATTERN II - THE MID SIZE - TABLE PLACEMAT
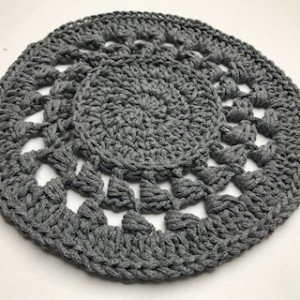
TABLE PLACEMAT
Make a magic ring
R1: ch1 (don't count it as a st), 12 dc into magic ring, join round with sl st in 1st st from beg
R2: ch1, 1 dc in 1st st, 2 dc in each next st till end of row, 1dc in 1st st, join round with sl st in 1st st from beg (24 dc)
R3: ch1 * 1 dc in 1st st, * 1 dc in next st, 2 dc in next st* repeat from * to * till end of round, 1dc in 1st st, join round with sl st in 1st st from beg (36 dc)
R4: sl st in each st around to make a nice around the row 4.
New pattern: puff stitches
R5: ch3 (counts as a dc), horizontal puff st, ch1, sk 1 st
Work in double crochet stitches made in row R4.
Keep doing the pattern of chain 1, skip 1, horizontal puff stitch till end of round, join round with sl st in 1st st from beg (18 puff stitches and ch1 between them)
R7: ch3 (counts as a dc), horizontal puff st, ch2, 1 horizontal puff st between 2 puff st from previous round.
Keep doing the pattern of chain 2, 1 horizontal puff stitch till end of round, join round with sl st in 1st st from beg (18 puff stitches and ch2 between them)
R8: ch3, *1 dc in each st on top of puff st (3dc), 2 dc in ch2 space* repeat from * to * till end of round, join round with sl st in 1st st from beg ( dc)
R9: 1 sl st in each st around
PATTERN III - THE SMALLER SIZE - TABLE PLACEMAT

TABLE PLACEMAT
Make a magic ring
R1: ch1 (don't count it as a st), 12 dc into magic ring, join round with sl st in 1st st from beg
R2: ch1, 1 dc in 1st st, 2 dc in each next st till end of row, 1dc in 1st st, join round with sl st in 1st st from beg (24 dc)
R3: sl st in each st around to make a nice around the row 4.
New pattern: puff stitches
R4: ch3 (counts as a dc), horizontal puff st, ch1, sk 1 st
Work in double crochet stitches made in row R2.
Keep doing the pattern of chain 1, skip 1, horizontal puff stitch till end of round, join round with sl st in 1st st from beg (12 puff stitches and ch1 between them)
R5: ch3, *1 dc in each st on top of puff st (3dc), 1 dc in ch1 space* repeat from * to * till end of round, join round with sl st in 1st st from beg ( dc)
R6: 1 sl st in each st around
♥♥♥
Have fun and let me know what you make. I would love to know how your project turns out.
Please don't forget to like and I really appreciate your comments.
If the pattern did not make sense to you, please don’t hesitate to contact me, I am happy to help :)
If you like this pattern, please follow and share my projects on social networks as a THANK YOU and to help me to create new projects and patterns for you.
Thank you very much once again for your visit and see you soon!
♥♥♥


