Crochet Waistcoat Stitch Basket with Wooden Bottom for very beginners
Hello My Crochet Friends!
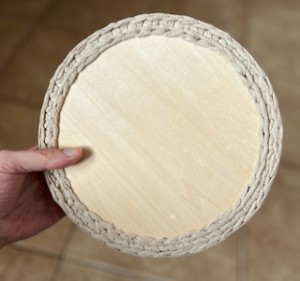
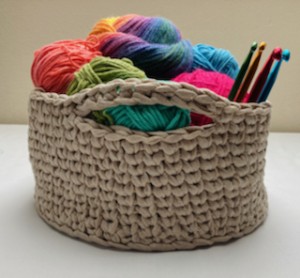
As I promised in my last post today I will show you how to crochet a perfect waistcoat stitch basket with wooden base.
If you don't want to use a wooden bottom, don't worry, in my collection there are many more crochet baskets, you will definitely find a pattern that you’ll love.
Please find the playlist „HOME DECORATIONS“ on my YouTube Channel.
https://youtube.com/playlist?list=PLgX-CoVfCjlOUidoRGm7jwW6ZrA_gPDwS
Or visit a chapter „HOME DECORATIONS“ on my blog.
And if you are worried about whether you can handle a flat bottom, you can try this tutorial for a basket with a wooden bottom base.
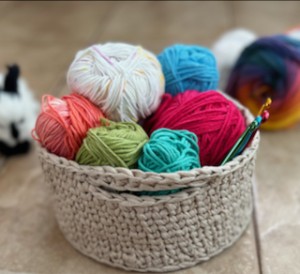
For this basket with a wooden bottom, I chose a beautiful cotton yarn: AYAZ Cotton Lace
This yarn has beautiful colors, but I chose the light beige color to correspond with a light wooden base.
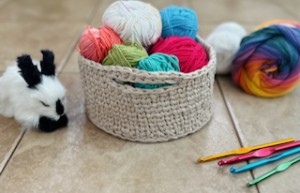
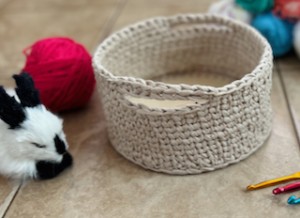
As I used a wooden bottom, the basket has a perfect circular shape and holds its shape beautifully.
Crochet Baskets Are Perfect for Home Storage
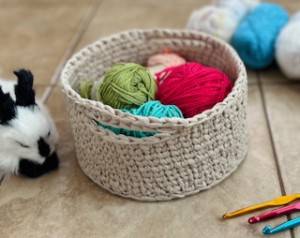
I love making crochet baskets to store all my little items lying around. We all require storage options in our home!
The pattern is available here below for free. It comes with a video guide as well.
Let’s get started to make this perfect pattern!
You can find the step-by-step video tutorials below which will help you along if you prefer to watch video instruction rather than using a written pattern.
Don’t forget to subscribe if you like me videos, it’s FREE!
Feel free to write a comment below the video! I look forward to all your notes!
A huge thanks to everyone who want to support my blog and download PDF paid pattern. Thank you very much, I really appreciate it and it helps me create more new video tutorials and patterns for you. Love you!
Let's start or PIN this idea to your Pinterest boards for later.

Stay in touch at Facebook, Instagram and Pinterest.
Have questions? Join the Facebook Group OR my Youtube Community!
I hope this article will be useful for you! If you have any additional questions, feel free to join my Facebook Group or Youtube Community. I created these groups for you to share pictures, ask questions, and help each other out.
MORE PATTERNS?
You know me, I love making homemade things and creating beautiful gifts for my family and my friends. I also love to make HOME DECORATIONS so much. If you do as well, you may would love to try these patterns as well:
CROCHET WAISTCOAT STITCH BASKET WITH WOODEN BOTTOM
MATERIALS AND DIRECTIONS:
This basket is fun to make!
So let me now get started and tell you what you will need in order to crochet this CROCHET WAISTCOAT STITCH BASKET WITH WOODEN BOTTOM FOR VERY BEGINNERS.
The pattern was made with yarns: AYAZ Cotton Lace
This yarn is similar to LACE yarn, just this yarn is 100 % cotton. This lace yarn and excellent cotton material is great for knitting and crocheting original baskets, handbags, bags, rugs, placemats, pillows and other home decorations and accessories.
One ball = 250 g, 125 m, lace yarn 100 % cotton
https://www.vlnika.cz/z12435-prize-cotton-lace
For this pattern you will need 5.0 mm, 6.0 mm, 7.0 mm crochet hooks.
Scissors
Sewing/Embroidery and yarn needle/tapestry needle
CROCHET WAISTCOAT STITCH BASKET WITH WOODEN BOTTOM
Size: one size
Difficulty Level: Level 1 – Easy, for beginners
US crochet terms:
SlSt – slip stitch
CH/s – chain/s
SC - single crochet
CSSC - centre stitch single crochet / waistcoat st
SK - skip
T - turn
ST/s - stitch(es)
REP – repeat
This pattern requires familiarity with stitches used and using invisible join when you work in closed rounds.
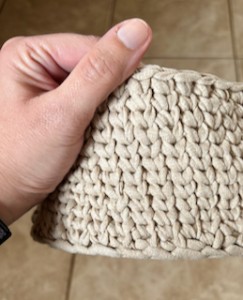
The Waistcoat stitch is also known as center post stitch. It’s as easy as a single crochet. The trick with this stitch is to insert your hook in the middle of the post, just under the inverted “v.”
Then, complete the stitch just as you would a sc: pull up the loop, yarn over, pull through both loops on the hook. To start this stitch, chain any number and start with one row of regular sc.
Some tips: when using cssc use a hook size bigger than usual, keep your stitches very loose, it helps when you’re trying to insert the hook. Use this stitch in the round to get a very consistent look.
The Waistcoat stitch is perfect to make baskets.
3RD LOOP: half double crochet stitches have a 3rd loop. The 3rd loop can be found just below the front loop on the side of the work that is facing you. Working in this special “3rd loop”, creates a nice braided look on the opposite side of the pattern.
CROCHET DOUBLE LAYERED SIDE BASKET WITH WOODEN BASE
PATTERN NOTES
1) A ch1 at beg of the row DOESN'T count as a stitch
2) Continuous rounds - the waistcoat stitches part of this basket is worked up in continuous rounds, which means that you will not be joining the last stitch of the round with the first one. Instead you will need to keep track of where each round started and how many stitches you have made because after each round you will continue right on to the stitches of the next round (with no join). It is useful to use a stitch marker or piece of yarn to mark the start or end of each round.
3) CLOSED ROUNDS - the beginning of this basket is worked in closed rounds, which means that you will be joining the last stitch of the round with the first one with a slip stitch. When you reach the beg of row, make a slip stitch on top of first stitch and then continue working in stitches from the previous round. I would recommend you to close the rounds with an invisible join to have a perfect baskets.
4) ( ) – The number of stitches that should be in a completed round/row are placed in brackets at the end of that round’s/row’s instructions.
5) This basket is worked up as a one piece, starting from the bottom to top and then top down to the bottom.
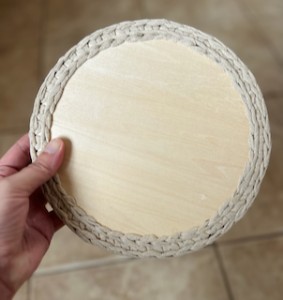
holes in base: 8 mm
HOW TO CROCHET WAISTCOAT STITCH BASKET WITH WOODEN BOTTOM FOR VERY BEGINNERS
WRITTEN PATTERN
Crochet Hook 5.0 mm / 5.5 mm
R1: work 1sc in each hole around, finish the row with an invisible join.
R2: work 1 sl st in each hole around, work on the bottom side of your wooden base, finish the row with an invisible join.
Crochet Hook 6.0 mm
R3: ch1, work 1sc in stitches in row R1 you created at the beginning, work in bump / the 3rd loop of each sc, make 6 times increase evenly (work 2 sc in every 7th stitch around)
Crochet Hook 7 mm
R3: 1sc waistcoast st in each st around (1cssc), work in spiral rounds with no join at the end of the round.
R4-R9: repeat round R3
Work in spiral rounds
R10: ch9, skip 8 sc st, 1sc waistcoat in next 17 st,
ch9, skip 8 sc st, 1sc waistcoat in next 18 st
R11: 1sc in each ch, work in bump (9sc), 1sc waistcoat in next 17 st,
1sc in each ch, work in bump (9sc), 1sc waistcoat in next 18 st,
finish the round with an invisible join.
Cut the yarn, weave in the ends.
You are all done with your amazing CROCHET BASKET WITH WOODEN BOTTOM BASE.
This cute CROCHET BASKET would a perfect handmade gift for all - for kids and adults! Could be a perfect gift for your love ones.
I hope you’ve enjoyed making this free CROCHET crochet pattern.
What’s Next?
Pin this post: Save this tutorial to your Pinterest boards so that you can come back to it later.
Leave a comment: I love to hear your feedback. Tell me in the comments below!
Share on Instagram and Facebook: When you make this project, share it on social media and tag me @sonanebeska. I love to see what you make!
You can browse through all of my other FREE crochet HOME and DECO patterns:
https://www.nebeska.eu/en/articles/crochet-patterns-and-tutorials/home-decoration-and-holidays/
Explore More Crochet Patterns
If you love to crochet as much as I do, I think you’ll love these other free EASTER crochet patterns. ❤️
Show your love any day of the year and make lovely and sweet little things for your loved ones:
♥♥♥
Have fun and let me know what you make. I would love to know how your project turns out.
Please don't forget to like and I really appreciate your comments.
If the pattern did not make sense to you, please don’t hesitate to contact me, I am happy to help :)
If you like this pattern, please follow and share my projects on social networks as a THANK YOU and to help me to create new projects and patterns for you.
Thank you very much once again for your visit and see you soon!
♥♥♥
