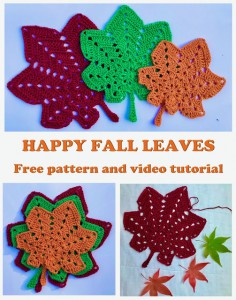
Happy Leaves
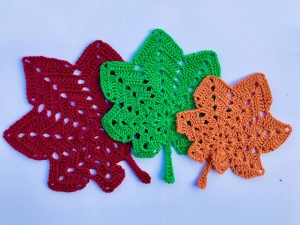
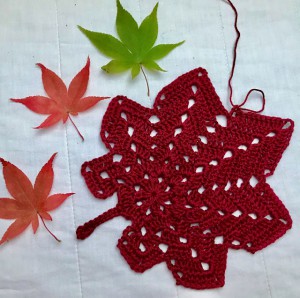
Hello my crochet friends! Who loves fall time? I do! And I am here with a crochet pattern for this charming fall leaf. And the pattern is surprisingly easy! This Happy Fall leaf pattern is a perfect for so many different projects!
The written pattern is available here below for free. It comes with a video guide as well.
VIDEO TUTORIAL
You can find the step-by-step video tutorials below which will help you along if you prefer to watch video instruction rather than using a written pattern. Don’t forget to subscribe if you like me videos, it’s FREE!![]()
A huge thanks to everyone who want to support my blog and download PDF paid pattern. Thank you very much, I really appreciate it and it helps me create more new video tutorials and patterns for you. Love you!
![]()
Let's start or PIN this idea to your Pinterest boards for later.
![]()
This pattern is made for beginners - only a basic skill level is required to make it. If you don't understand any of my instructions, don't worry I am here for you - enter the comments at the end of this post.
These crochet leaves an be used both individually or in sets. Stitched together, the leaves can make great bunting for decorating a party, classroom, or home. As motifs, the leaves can be attached to scarves, hats, bags, purses, and other accessories as a unique application.
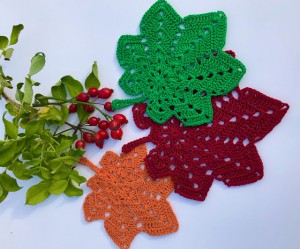
I know that the leaf-shaped design tends to show up most often in fall, crochet leaves provide great detail on designs used throughout the year.
HAPPY FALL LEAF DIRECTIONS
This leaf is easy to make.
The pattern uses only basic crochet stitches - double crochets and chains.
The pattern was made with Cotton NGM: 100% cotton, 50g/1.76oz = 125m/136.7yrds
Crochet hook from 3mm till 1mm.
Difficulty Level: Level 1 – Easy, for beginners
US crochet term:
SlSt – slip stitch
CH/s – chain/s
SC – single crochet
HDC - half double crochet
DC - double crochet
SK - skip
T - turn
ST/s - stitch(es)
REP - repeat
Pattern Notes
1) Before you start choose the size of the leaf and use the correct crochet hook accordingly. Please see bellow.
2) A Ch 3 at beg of the row counts as dc throughout.
3) Finish rounds with sl st
4) This happy fall crochet leaf is worked first in the round and then later in rows to create the many lobes around the circle. It's really a wonderful design - you can create smaller or larger leaf that would make a great coasters, doilies or wall art. If you will work with bulky yarn and a larger hook and use the pattern to create a floor rug or wall art.
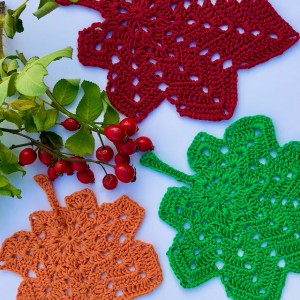
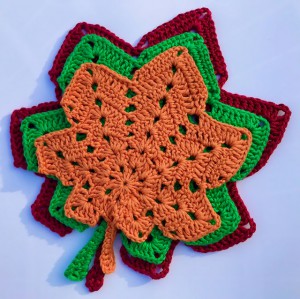
5) If you like to make the same pattern, adding leaves in different colours is a great way to create a small change. This leaf design can be worked in every colour of the rainbow to use in any season of the year.
6) For this pattern you can choose the crochet hook depending on size of the leaf you want to have:
crochet hook 3mm for red leaf
crochet hook 2mm for green leaf
crochet hook 1mm for orange leaf.
Please see the measurement of each leaf bellow.
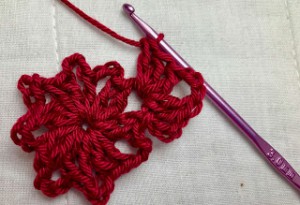
Make magic ring
Round 1: Chain 3 (counts as 1 dc), ch3, 1dc, *1dc, ch3, 1dc repeat from * 6 more times, end up with sl st in the top of 3rd ch from beg
You will have 8 groups of "V" pattern = "1dc, ch3, 1dc" pattern
Round 2: ch 3 (counts as 1 dc), into the 1st group work 2dc, ch3, 3dc, * into the next group work "3dc, ch3, 3dc" repeat from * 5 more times.
Into the last ch3 space work 3dc, ch8, ch3 (as 1 dc), in the 4th ch from your hook work 1dc, 1hdc into next 2 st, 1sc into 5 next st, then into the ch sp work 3dc, end up with sl st to the 3rd ch from beg. Turn your work.
You will have 7 groups of "3dc, ch3, 3dc" pattern and 1 "stalk"!
Your leaf is starting to shape :)
Now work in rows!
Row 3: sl st into next 2 st to move.
ch 3 into the 3st from the previous row, into ch3 sp work "3dc, ch3, 3dc", 1dc in next st.
*skip 4 st 1dc in next st, into ch3 sp "3dc, ch3, 3dc", 1dc in next st* repeat from *to* 5 more times. Turn
Row 4: ch3, sk 2 st, 1dc in next 2 st, into ch3 sp "3dc, ch3, 3dc", 1dc in next 2 st.
*skip 4 st, 1dc in next 2 st, into ch3 sp "3dc, ch3, 3dc", 1dc into next 2 st* repeat from *to* 5 more times. skip 1st, 1dc into next st. Turn.
Row 5: sl st into next 13 st to move to next "lobe"
ch3, sk 2 st, 1dc in next 3 st, into ch3 sp "3dc, ch3, 3dc", 1dc in next 3 st.
*skip 4 st, 1dc in next 3 st, into ch3 sp "3dc, ch3, 3dc", 1dc into next 3 st* repeat from *to* 3 more times. skip 2st, 1dc into the sp. Turn.
Row 6: ch3, sk 2 st, 1dc in next 4 st, into ch3 sp "3dc, ch3, 3dc", 1dc in next 4 st.
*skip 4 st, 1dc in next 4 st, into ch3 sp "3dc, ch3, 3dc", 1dc into next 4 st* repeat from *to* 3 more times. skip 2st, 1dc into the sp. Turn.
Row 7: sl st into next 17 st to move to next "lobe"
ch3, sk 2 st, 1dc in next 5 st, into ch3 sp "3dc, ch3, 3dc", 1dc in next 5 st.
*skip 4 st, 1dc in next 5 st, into ch3 sp "3dc, ch3, 3dc", 1dc into next 5 st* repeat from *to* 1 more time. skip 2st, 1dc into the sp. Turn.
Row 8: ch3, sk 2 st, 1dc in next 6 st, into ch3 sp "3dc, ch3, 3dc", 1dc in next 6 st.
*skip 4 st, 1dc in next 6 st, into ch3 sp "3dc, ch3, 3dc", 1dc into next 6 st* repeat from *to* 1 more time. skip 2st, 1dc into the sp. Turn.
Row 9: sl st into next 21 st to move to the last "lobe" in the middle
ch3, sk 2 st, 1dc in next 7 st, into ch3 sp "3dc, ch3, 3dc", 1dc in next 7 st, skip 2st, 1dc into the sp. Cut the yarn and fasten off.
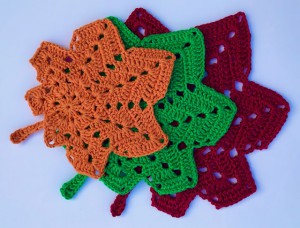
TIP: Table Runner
Crochet 4 or 5 leaves for a table runner, depending of the size of your table. Sew the leaves with matching tread.
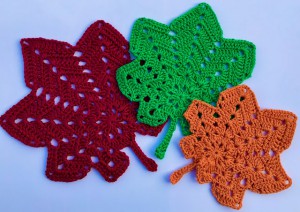
THE FINAL SIZE MEASUREMENT:
The orange leaf: 5.1inch / 13cm wide
The orange leaf: 5.9inch / 15cm long incl. stalk
The green leaf: 5.5inch / 14cm wide
The green leaf: 6.7inch / 17cm long incl. stalk
The red leaf: 6.7inch / 17cm wide
The red leaf: 8.3inch / 21cm long incl. stalk
Want a printable copy of this pattern? Why not visit my Etsy shop and purchase the PDF with photo instructions. Not only does it mean you get your own copy of the pattern to print, you also support a small business and help me to keep making free patterns!
Have fun and let me know what you make. I would love to know how your project turns out.
Please don't forget to like and I really appreciate your comments.
If the pattern did not make sense to you, please don’t hesitate to contact me, I am happy to help :)
If you like this pattern, please follow and share my projects on social networks as a THANK YOU and to help me to create new projects and patterns for you.
Thank you very much once again for your visit and see you soon!


