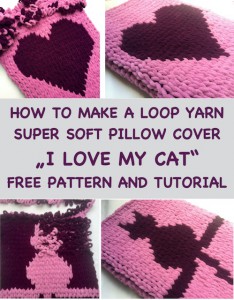
I love my cat - loops yarn pillow cover or pyjamas case
I love loop yarns, they are so soft and fun to work with! There are many different style and brands and so many colours! For this project I I used my favourite yarn from Alize Puffs and More. There are 2 colours at one yarn, so you can create the two colours pattern super easily.
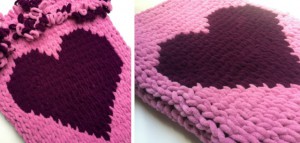
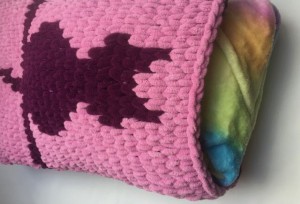
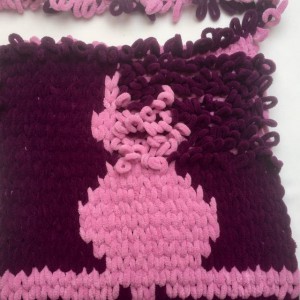
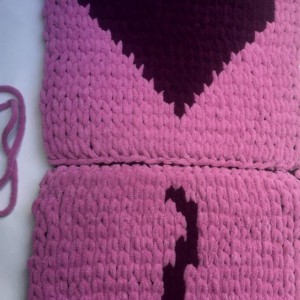
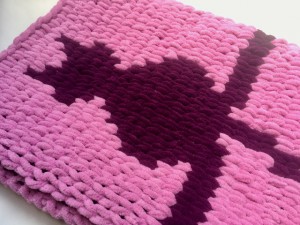
In this video tutorial I will show you how to make a pillow cover which I call "I love my cat" - one side is with heart and another one with cat.
Or you can use it as a perfect bag for your pyjamas - do you know pyjamas eater? So this is it!
This loop yarn pillow cover would be a perfect gift for all Cat lovers.
Or if you use the heart pattern only, it would be a perfect gift for Valentine's Day.
VIDEO TUTORIAL
You can find the step-by-step video tutorials below which will help you along if you prefer to watch video instruction rather than using a written pattern.
Don’t forget to subscribe if you like me videos, it’s FREE!
![]()
A huge thanks to everyone who want to support my blog and download PDF paid pattern. Thank you very much, I really appreciate it and it helps me create more new video tutorials and patterns for you. Love you!
![]()
Let's start or PIN this idea to your Pinterest boards for later.
![]()
Do you like crocheting gifts for your friends? You may love this drawstring bag with heart as well:
For this cover pillow I love my cat you need:
Alize puffy more - no needles, no hooks, 150 g / 5.29 Oz, 11,5 mt / 12.58 yds, 100% micropolyester, machine washable at 30°C - 1 skein for one panel, I made 2 panels and I used 2 skeins
Stuffing / or just your pyjamas
Templates: heart and cat
DIRECTIONS for I love my cat case:
The pillow cover is 14 inch wide x 18 inch high.
If you would like a larger pillow cover, you can add more loops on each side.

INSTRUCTIONS for I love my cat case
Make 2 panels / rectangles of pillow cover.
There are 25 foundation chains.
Each row has 25 stitches
There are 30 rows in total.
Work from bottom up.
See below the instructions STEP 1 till STEP 6 for one panel.
Repeat STEP 1 till STEP 6 for second panel.
Then join both panels together: STEP 7.
STEP 1) COUNT FOUNDATION LOOPS
For this pillow cover, start with 25 loops.
I used an odd number of loops so that the middle of the heart will be in the center. Count out 25 loops from your background loop yarn colour, mine is pink for the background.
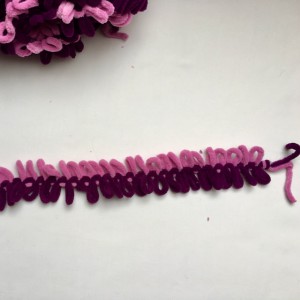
STEP 2) FOUNDATION CHAIN
This pillow cover uses all stocking stitches.
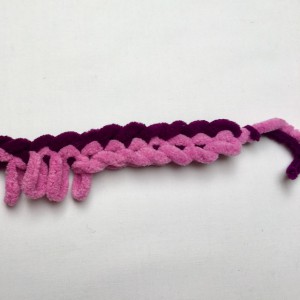
Start working at beginning of yarn, make a knot, take the second loop from the knot and putt it in the first loop from back to front and pull it down.
Continue this way: working across the foundation loops, take the next loop in your working yarn and pass it through previous / just finished stitch from back to front. Continue with the next loop in the working yarn and the next loop in the foundation loop chain. Work your way all the way across.
Make 25 loops foundation chain of one colour.
Repeat STEP 2 for the second colour as well.
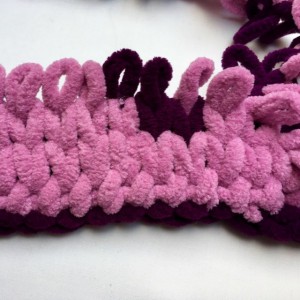
STEP 3) STOCKING STITCH FIRST ROW and NEXT ROWS
Start stocking in just finished stitch/ last stitch in foundation chain, take the next loop in the working yarn and pull it through the previous / just finished st, then continue by taking the next loop in your working yarn and putting it through the previous stitch/loop from back to front and pulling up.
NOTE:
CAT PATTERN: Make 1 row with background colour, pink colour.
HEART PATTERN: Make 3 rows with background colour, pink colour working back and forth across the rows making stocking stitches.
Make sure you have 25 loops in each row.
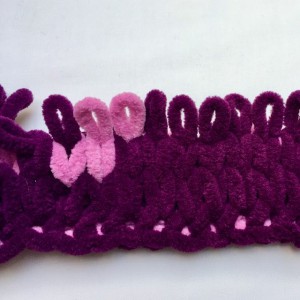
STEP 4) SHAPE CAT / HEART PATTERN
CAT
The second row starts the cat. Stitch across 11 loops and then 2 CAT violet loops. The Cat loops will also be made with stocking loops on the opposite side of loops yarn, so the number of loops does not change.
Turn your loops yarn toward yourself, take the next loop, but a violet colour loop and work as normal, put it in the previous / just finished stitch from back to front and pull it down. Repeat for the second Cat / viole loops. When you change colours, using another colour on the looped yarn, always leave the other colour loop on the wrong side. So, the main colour is always in the front, on right side.
Finish the second row with 12 pink stitches.
Next row, the third row, make 12 pink stitches, 2 violet stitches and 11 pink stitches.
Continue finishing the pattern below.
NOTE: be careful, every second row of Cat pattern, you work back to beginning, from right to left side, in this second row of Cat pattern you have to work 12 Cat loops at the beginning, the same system in every second row, keep the position of colours as written below.
Make sure in each row there are 25 stitches.
HEART
The fourth row starts the heart. Stitch across 12 loops and then the first violet loop. The heart loops will also be made with stocking loops on the opposite side of loops yarn, so the number of loops does not change.
Turn your loops yarn toward yourself, take the next loop, but a violet colour loop and work as normal, putt it in the previous / just finished stitch from back to front and pull it down. When you change colours, using another colour on the looped yarn, always leave the other colour loop on the wrong side. So, the main colour is always in the front, on right side.
Finish the fourth row with 12 pink stitches.
Next row, the fifth row, make 11 pink stitches, 3 violet stitches and 11 pink stitches.
Continue finishing the pattern below.
Make sure in each row there are 25 stitches.
HEART = ROW 4 - 22

Continue stocking rows as per directions above. Follow the pattern and make the remainder of the heart. Once you finish row 22, continue stitching with just the PINK yarn for the remainder of the rows for the front. I made 30 rows in total. When you are finished with the rows of the front, check to make sure the pillow will cover the front of your pillow form (if you are using one). If necessary, add more rows.
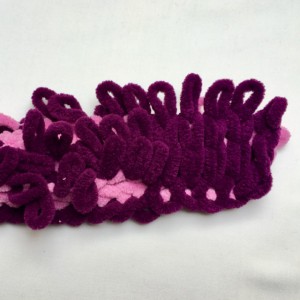
STEP 5) MAKE THE BACK / WRONG SIDE
Start with the first loop on left side from the first row and pull this loop into the first loop from foundation chain, the same colour. Then take the loop one row above just finished loop and pull this loop in the loop one row below. Pull loop always from back to front. Make sure loops are not twisted. Repeat these instructions.
If you are a bit lazy, as these loop on wrong side will be on the inside side of the pillow cover, they will not be seen, so, you can just left the loops. It's up to you!
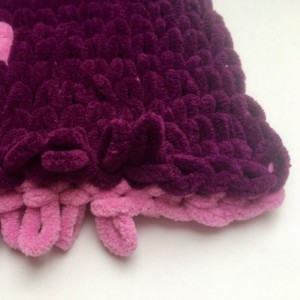
STEP 6) LAST ROW ENDING = BIND OFF
Binding off with loop yarn can be done in either direction - right to left or left to right. However, you always have to start to bind off in the same direction as your last row (the end without the tail of loops).
Starting with the first colour. Bind off the row by taking the 2nd loop and passing it through the first loop and pull. Then take the 3rd loop and pass it through the 2nd loop. Continue across the row slipping the next loop into the previous loop.
Repeat binding off for the second colour.
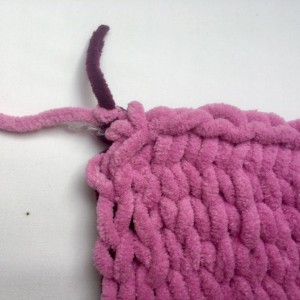
After inserting the last loop, carefully cut off both tail of loops, make a knot. You now have two yarn tails. Thread the first tail on a tapestry needle and weave the tail through the thickest part of the stitches, repeat it for the second tail as well.
The bind/binding off is completed.
MAKE A SECOND PANEL WITH CAT
STEP 7) JOIN PANELS TOGETHER
Place the front panel on the back panel, so the front panel is matching with the back panel, with the wrong sides facing up, the right sides insides. Make sure the rows are aligned.
Start at the bottom right corner to join the bottom side, sew both sides, stitch to stitch, you will have 25 stitches across.
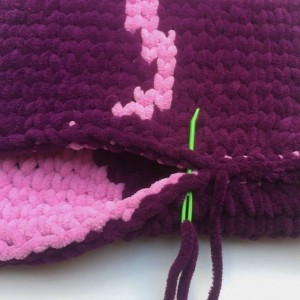
Take another long piece of yarn with the loops cut and join the sides - sew sides from bottom up, sew both sides. Make sure rows are aligned. Make sure to get the corners into the corners correctly
When you get to the ends, tie it off.
Fasten off your work and hide the end.
The loop yarn pillow cover or pyjamas case is finished. I hope you enjoyed this tutorial and make a loop yarn I love my cat pillow cover for yourself.
HEART PATTERN = 19 rows
P = PINK colour
V = VIOLET colour
R1: 12 P, 1 V, 12 P
R2: 11 P, 3 V, 11 P
R3: 10 P, 5 V, 10 P
R4: 9 P, 7 V, 9 P
R5: 8 P, 9 V, 8 P
R6: 7 P, 11 V, 7 P
R7: 6 P, 13 V, 6 P
R8: 5 P, 15 V, 5 P
R9: 4 P, 17 V, 4 P
R10: 3 P, 19 V, 3 P
R11 - R16: 2 P, 21 V, 2 P
R17: 3 P, 9 V, 1 P, 9 V, 3 P
R18: 4 P, 7 V, 3 P, 7 V, 4 P
R19: 5 P, 5 V, 5 P, 5 V, 5 P
CAT PATTERN = 26 rows
P = PINK colour
V = VIOLET colour
R1: 11 P, 2 V, 12 P (from left to right side)
R2: 12 P, 2 V, 11 P (be careful, every second row, you work back to front, from right to left side, in this row you have to work 12 V at the beginning, the same system in every second row, keep the position of colours as written)
R3: 11 P, 1 V, 13 P
R4: 13 P, 1 V, 11 P
R5: 11 P, 2 V, 12 P
R6: 12 P, 2 V, 11 P
R7: 12 P, 2 V, 11 P
R8: 11 P, 2 V, 12 P
R9: 12 P, 2 V, 11 P
R10: 9 V, 1P, 2 V, 1P, 12 V
R11: 25 V
R12: 8 P, 8 V, 9 P
R13: 8 P, 10 V, 7 P
R14: 6 P, 12 V, 7 P
R15: 7 P, 12 V, 6 P
R16: 6 P, 12 V, 7 P
R17: 8 P, 10 V, 7 P
R18: 8 P, 8 V, 9 V
R19: 10 P, 6 V, 9 V
R20: 10 P, 4 V, 11 V
R21: 10 P, 6 V, 9 V
R22: 8 P, 8 V, 9 V
R23: 9 P, 8 V, 8 P
R24: 9 P, 6 V, 10 P
R25: 10 P, 2 V, 2 P, 2 V, 9 P
R26: 9 P, 1V, 4 P, 1V, 10P
Want a printable copy of this pattern? Why not visit my Etsy shop and purchase the PDF with photo instructions. Not only does it mean you get your own copy of the pattern to print, you also support a small business and help me to keep making free patterns!
Have fun and let me know what you make. I would love to know how your project turns out.
Please don't forget to like and I really appreciate your comments.
If the pattern did not make sense to you, please don’t hesitate to contact me, I am happy to help :)
If you like this pattern, please follow and share my projects on social networks as a THANK YOU and to help me to create new projects and patterns for you.
Thank you very much once again for your visit and see you soon!


