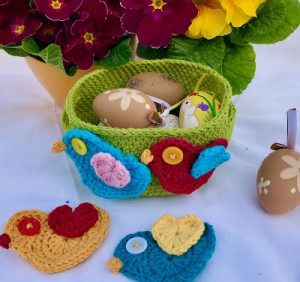
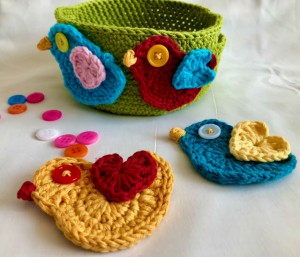
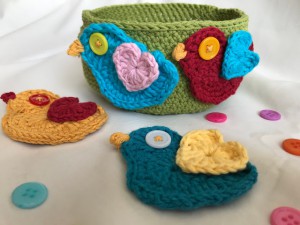
Spring Birdie Basket
Easter is on its way, I am ready to welcome this wonderful holiday with my another cute Spring Crochet
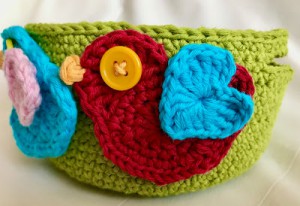
Patterns which is now available also for you! Look at these amazing birds and their Spring basket! There is a crochet video tutorial to show you this wonderful pattern.
The written pattern is available here below for free. It comes with a video guide as well.
VIDEO TUTORIAL
You can find the step-by-step video tutorials below which will help you along if you prefer to watch video instruction rather than using a written pattern. Don’t forget to subscribe if you like me videos, it’s FREE!![]()
A huge thanks to everyone who want to support my blog and download PDF paid pattern. Thank you very much, I really appreciate it and it helps me create more new video tutorials and patterns for you. Love you!
![]()
Let's start or PIN this idea to your Pinterest boards for later.
![]()

This amazing Easter Spring Basket will put your home in the spirit of the season. I hope you love it as much as I do! These cute crochet birdies will put a smile on anyone's face and making one is a great way to pass get a jump start on the holiday.
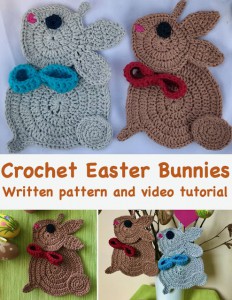
If you like home decoration you would may love to create these projects as well:
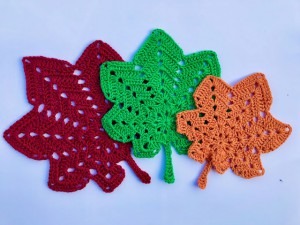
And Happy Colourful Leaves:
This pattern is a super easy birdie and basket, it is strung on a basic crochet stitches only. The same pattern could be used to make a birdie ornament for other projects.
I can’t even tell you how happy I am to be sharing this pattern with you!
This pattern is made for beginners. If you don't understand any of my instructions, don't worry I am here for you - enter the comments at the end of this post.
SPRING BIRDIE BASKET DIRECTIONS
This Birdie Basket is very easy and quick to make.
The pattern uses only basic crochet stitches - double crochets, single crochets and chains.
The pattern was made with Drops Paris and Drops Muskat.
Crochet hook: 3.50 mm.
Difficulty Level: Level 1 – Easy, for beginners
US crochet term:
SlSt – slip stitch
CH/s – chain/s
TR - tripple crochet / treble
DC - double crochet
HDC - half double crochet
SC - single crochet
SK - skip
T - turn
ST/s - stitch(es)
REP - repeat
Special stitches used:
Single Crochet Decrease (sc2tog)
A crochet decrease makes the current row or round that you are working on shorter than the one previous to it.
- Insert hook into the first stitch.
- Yarn over and draw through the loop.
- Do not complete the stitch as normal.
- Instead, insert the hook into the next stitch.
- Yarn over and draw through the loop.
- There should now be three loops on your hook
- Yarn over and draw through all three loops on the hook
- You should now have two single crochet stitches side-by-side, joined together into one stitch at the top.
PATTERN NOTES
1) A ch1, ch2, ch3 at beg of the first row don't count as a stitch throughout.
2) The project for a birdie is crochet as a circle.
3) The Cute Little Birdie measures 3 inches, 7.5 cm, Wind measures 2 inches / 5 cm.
You can make Birdie bigger or smaller with a thicker/thinner yarn or a larger/smaller hook size.
This Basket measures 4.7 inches / 12 cm (circle), 2.36 inch / 6 cm (high)
4) You need several colours:
colour A = for basket = spring green
colour B = for birdie = yellow or blue or red etc.
colour C = for wing = red, yellow, pink, red or any colour you like
colour D = for nose = orange or yellow
5) You need a button size about 1.2 inch / 0.5 cm
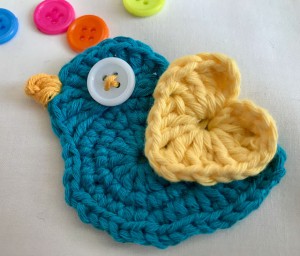
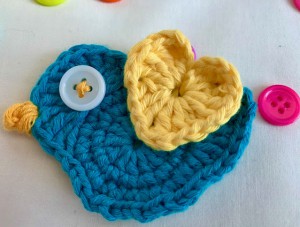
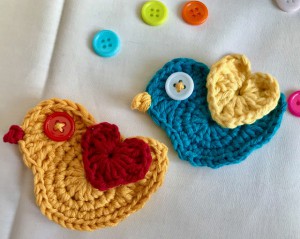
Birdie has 3 parts:
1) Birdie Body
2) Nose
3) Wing
THE WRITTEN PATTERN
BIRD
Use colour B
Make a magic ring
R1: Ch3 (doesn't work as a st), 12 dc into magie ring, sl st in 3rd ch from beg to join the row (12dc)
R2: Ch1 (doesn't work as a st), 2sc in each st around, sl st in 1st ch from beg (24sc)
R3: ch1 (doesn't work as a st), 1sc in first st, 2 sc in next, rep * 1 sc in next st, 2 sc in next st * repeat from * to * till you have 6 st left to last st,
1hdc in next st, 2 dc in next st, 1 dc in next st, 2tr in next st, 1 tr in next st, 2 dtr in next st, ch5, sl st in ch1 from beg to join the row
R4: 1st st in next 4 st, sk 3 st, 10 tr in one st, sk 3 st, sl st in each st till you reach the 1st ch of ch5 from R3, (which is the top of tail), cut the yarn and make a invisible ending
NOSE
Use color D
Work all stitches in 7th tr in R3 of Bird body
ch1, sc2tog, sl st
WING
Use colour C
make a magic ring
work in magic ring: ch3, 3tr, ch1, 3dc, ch1, 1tr, ch1, 3dc, ch1, 3tr, ch3
finish wish a slip stitch, cut the yarn - I would recommend you to leave a longer end (approx. 7.8 inch / 20 cm) and use this end to join the wing with the body.
Measurement
Bird: 3inch / 7.5 cm
Wind: 2inch / 5 cm
Basket
Use colour A
Make a magic ring
ch1 at the beginning doesn't work as a st
R1: ch1, 8 sc
R2, ch1, 2sc in each st (16 sc)
R3: ch1, rep * 2sc in one st, 1 sc in next st * repeat from * to * till end of round, sl st in ch1 from beg to join round (24 sc)
R4: ch1, rep * 2sc in one st, 1 sc in next 2 st * repeat from * to * till end of round, sl st in ch1 from beg to join round (32 sc)
R5: ch1, rep * 2 sc in one st, 1 sc in next 3 st * repeat from * to * till end of round, sl st in ch1 from beg to join round (40 sc)
R6: ch1, rep * 2sc in one st, 1 sc in next 4 st * repeat from * to * till end of round, sl st in ch1 from beg to join round (48 sc)
R7: ch1, rep * 2sc in one st, 1 sc in next 5 sc * repeat from * to * till end of round, sl st in ch1 from beg to join round (56 sc)
R8: ch1, rep * 2sc in one st, 1 sc in next 7 st * repeat from * to * till end of round, sl st in ch1 from beg to join round (64 sc)
R9: ch1, rep * 2 sc in one st, 1 sc in next 14 sc * repeat from * to * till end of round, sl st in ch1 from beg to join round (68 sc)
R10: ch1, rep * 2sc in one st, 1 sc in next 33 sc * repeat from * to * 2 time, sl st in ch1 from beg to join round (70 sc)
Circle Measurement: 4.7 inch / 12 cm
R11 - R20: 1 sc in each st around (70 sc in each round)
Measumerent: 2.36 inch / 6 cm high
Change a crochet hook: 4.00 mm. We will make 2 handles in next round.
R21: 1 sc in each st around (70 sc)
R22: ch10, make sure the chain is NOT twisted!
sk 10 st, 1 sc in each 25 st, ch10, sk 10 st, 1sc in next each 25 st till end of round, don't join the round and keep continue crocheting
R22: 10sc under ch10, 1sc in each next 25 st till you reach ch10, 10 sc under ch10, 1 sc in each next 25 st till end of round
R23: 1 sc in each st around (70 sl st)
R24: sl st in each st around (70 sl st)
Cut the yarn, fasten off and wave all ends in.
FINISHING with a tapestry needle
With a tapestry needle add a button as an eye on Birdie Body. Place the button on stitch where are placed 10 trc (R3 of Birdie Body).
Join Wing with Body, place Wing on the middle of magic circle of Birdie Body. Use a tapestry needle and sew both parts together.
Sew the eye on the head.
Weave in all ends.
Want a printable copy of this pattern? Why not visit my Etsy shop and purchase the PDF with photo instructions. Not only does it mean you get your own copy of the pattern to print, you also support a small business and help me to keep making free patterns!
Have fun and let me know what you make. I would love to know how your project turns out.
Please don't forget to like and I really appreciate your comments.
If the pattern did not make sense to you, please don’t hesitate to contact me, I am happy to help :)
If you like this pattern, please follow and share my projects on social networks as a THANK YOU and to help me to create new projects and patterns for you.
Thank you very much once again for your visit and see you soon!


