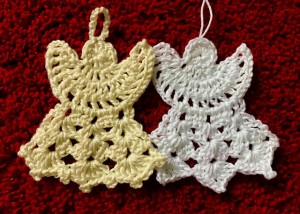
Sweet Little Angels
How to crochet Sweet little Angels ornaments
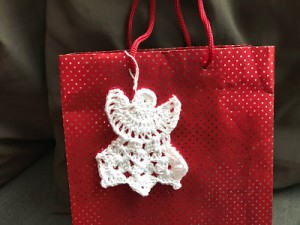
You know me, I love making homemade things, particularly around the holiday and creating beautiful gifts for my family and my friends. I also love doing my own crochet decorations and if you do as well, get ready for Christmas by decorating your Christmas tree with this Sweet Little Angel Ornament!
The written pattern is available here below for free. It comes with a video guide as well.
VIDEO TUTORIAL
You can find the step-by-step video tutorials below which will help you along if you prefer to watch video instruction rather than using a written pattern. Don’t forget to subscribe if you like me videos, it’s FREE!![]()
A huge thanks to everyone who want to support my blog and download PDF paid pattern. Thank you very much, I really appreciate it and it helps me create more new video tutorials and patterns for you. Love you!
![]()
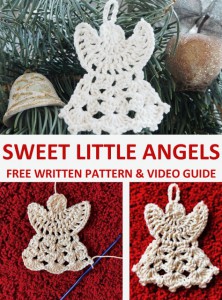
Let's start or PIN this idea to your Pinterest boards for later.
![]()
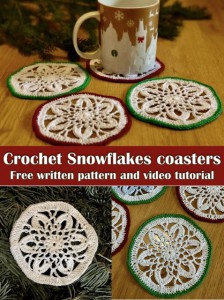
If you like Christmas decoration you would may love to create these SNOWFLAKES COASTERS as well:
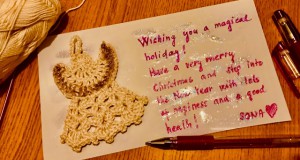
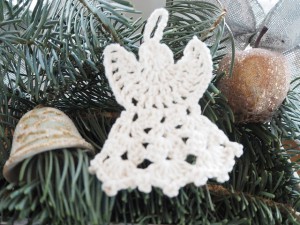
I hope you enjoy these crochet Sweet little Angel ornament patterns and I hope they keep you busy right through the holidays making beautiful decorations to add to your trees or place on Holidays Greeting's cards or on Christmas gifts and presents.
So if you're looking for something very simple and quick, I would suggest making these cute little Angels ornaments. They are perfect and I think you'll be happy with the result. I think crocheting and Christmas ornaments and decorations go hand in hand. What do you think? This pattern is made for beginners - only a basic skill level is required to make it. If you don't understand any of my instructions, don't worry I am here for you - enter the comments at the end of this post.
SWEET LITTLE ANGEL DIRECTIONS
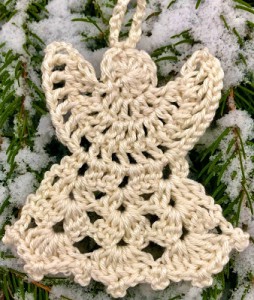
This Angel is very easy and quick to make.
The pattern uses only basic crochet stitches - double crochets and chains.
The pattern was made with YarnArt Begonia: 100% cotton, mercerized cotton, 50g/1.76oz = 169m/185yrds
Crochet hook 2.5 mm.
Difficulty Level: Level 1 – Easy, for beginners
US crochet term:
SlSt – slip stitch
CH/s – chain/s
DC - double crochet
SK - skip
T - turn
ST/s - stitch(es)
REP - repeat
Special stitches used: Picot Stitch
Picot stitch directions: Create three chain stitches from the point in your row where you want to add the picot stitch. Insert your hook in the third chain from the hook. Yarn over and pull the yarn through the stitch and through the loop on the hook. This is one completed picot stitch.
PATTERN NOTES
1) A ch3 at beg of the row counts as a dc throughout.
2) The project started as a circle, the circle is finished by a slip stitch. Then the project is crocheted in rows. Finish each row with a dc placed in the 3rd ch from the previous row.
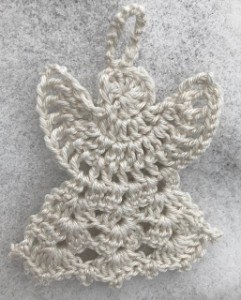
3) This Sweet Little Angel measures 3.14 inches by 3.0 inches, 8 cm by 7.6 cm.
4) You can make the Sweet Little Angel bigger with a thicker yarn or a larger hook size.
THE PATTERN
Make a magic ring.
R1: ch3 (counts as a dc), work 11 dc into the magic ring, sl st to the 3rd ch from beg (12dc)
You will have 12 dc placed in the magic ring. It will be the head of your sweet little angel ornament.
R2: ch3 and place 1dc into the same st as ch3, 2dc in next 3 st, turn (8dc)
R3: ch3 and place 2dc into the same st as ch3, 2dc in next 6 st, 3dc in the last st, turn (18dc)
R4: ch3, rep *ch1, dc between 2 dc from previous row* rep from * to * 17 more time, place 1 dc into the last st from R3 (work a dc into the 3rd ch from the R3), turn (19dc)
R5: sl st into each next 12 st (to move to the 7th dc from the beg of the previous row)
ch3, 1dc into the ch1 sp, ch1, 2dc into the next ch1 sp,
rep *2dc into the next ch1 sp, ch1, 2dc into the next ch1 sp* from * to * one more time. Turn
You will have 6 groups of 2dc (12dc)
R6: ch3, rep *2dc into the next ch1 sp, ch1, 2dc into the same ch1 sp* from * to * two more times, place 1dc into the last st from R5 (to the 3rd ch from the previous row). Turn
You will have 3 groups of "2dc,ch1,2dc"
R7: ch3, rep *3dc into the next ch1 sp, ch2, 3dc into the same ch1 sp* from * to * two more times, 1dc into the last st from R6 (to the 3rd ch from the previous row). Turn
You will have 3 groups of "3dc,ch2,3dc"
R8: ch3, rep *7dc into the next ch2 sp* from * to * two more times, 1dc into the last st from R7 (to the 3rd ch from the previous row).
You will have 3 groups of "7dc"
Cut the yarn. Fasten off.
Create a loop on top of the Angels head by sewing a loop to hang it.
Or create a chain on the top of the Angel, work 14 chains and the slip stitch into the stitch you started the chain.
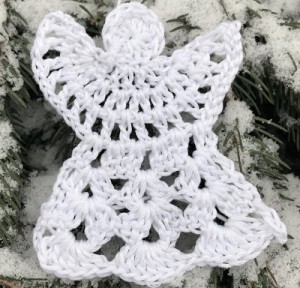
Optional:
Make the last row with picots.
R9: Make a picot (see the Special stitch section above), 3 slip stitches to move into the middle of the first groups of dc, make a picot into the 4th dc in this fist group, 3 slip stitches to move to the end of this group of dc, make a picot there.
Rep: *3 sl st, picot, 3 sl st* four more times across till you reach the end of this row.
Cut the yarn. Fasten off.

Want a printable copy of this pattern? Why not visit my Etsy shop and purchase the PDF with photo instructions. Not only does it mean you get your own copy of the pattern to print, you also support a small business and help me to keep making free patterns!
Have fun and let me know what you make. I would love to know how your project turns out.
Please don't forget to like and I really appreciate your comments.
If the pattern did not make sense to you, please don’t hesitate to contact me, I am happy to help :)
If you like this pattern, please follow and share my projects on social networks as a THANK YOU and to help me to create new projects and patterns for you.
Thank you very much once again for your visit and see you soon!


