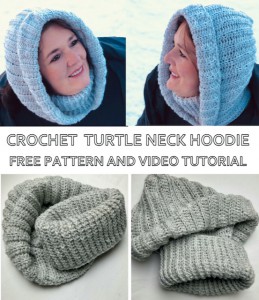
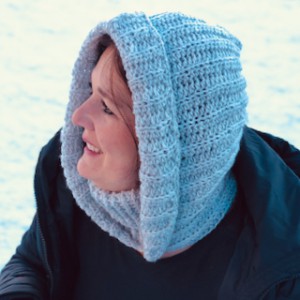
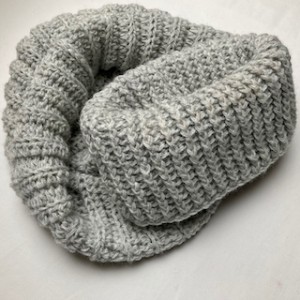
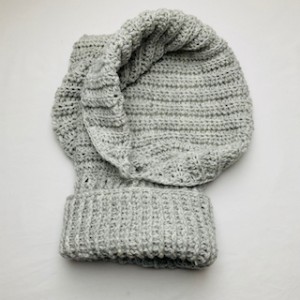
Crochet SUPER EASY Turtle Neck HOODIE
This crocheted soft Turtle Neck Hoodie pattern is so practical and fun to make. I love this easy and simple style, it is a perfect from Fall to Spring time – there is still a bit cold in morning, your head will be toasty thanks to the hood. And moreover, this is a really trendy wear item.
You know me, I really love that hooded style on my pattern and I’m so pleased with how this item turned out!
A super soft, absolutely easy and beautiful Turtle Neck Hoodie pattern is here for you!

This Hoodie crochet pattern is an easy, beginner friendly project that works up faster than you’d think!
This free pattern is great for practicing double crochets and half double crochets working in back loops. But you don’t have to be a beginner to love this TurtleNeck Hoodie. It’s one of those patterns that’s good for anyone whether you’re making it for yourself, a family member, or selling it at a craft fair!
It’s a super easy project and it’s my fave – a nice simple neutral grey color that goes perfectly with every other color.
So let me get to this super easy project for you.
VIDEO TUTORIAL
You can find the step-by-step video tutorials below which will help you along if you prefer to watch video instruction rather than using a written pattern. Don’t forget to subscribe if you like me videos, it’s FREE!![]()
I hope you enjoy these crochet TURTLE NECK HOODIE pattern.
This pattern is made for very beginners - only a basic skill level is required to make it. If you don't understand any of my instructions, don't worry I am here for you - enter the comments at the end of this post.
A huge thanks to everyone who want to support my blog and download PDF paid pattern. Thank you very much, I really appreciate it and it helps me create more new video tutorials and patterns for you. Love you!
![]()
If you pin my patterns to your Favorites and share it on social media as a link, I will be able to share a lot more free crochet patterns for you all.
Stay in touch at Facebook, Instagram and Pinterest.
Let's start or PIN this idea to your Pinterest boards for later.
![]()
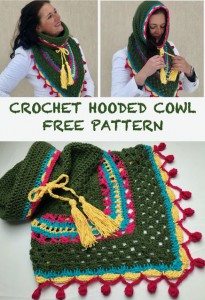
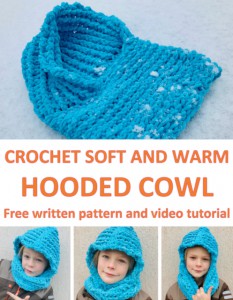
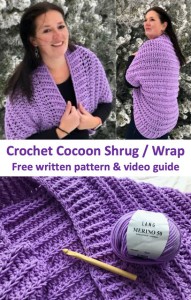
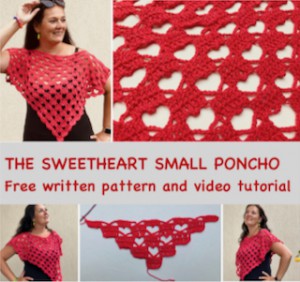
If you’ve been looking for more COWLS and SCARF patterns for you or for your friends and family, you may will love these patterns. They are different levels of difficulties and techniques that you might have never seen before.
You might like these ones below. Just click on them and you can find the free pattern, each of the patterns comes with a video tutorial.


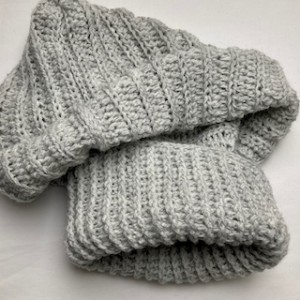
Crochet TURTLE NECK HOODIE Construction
TURTLE NECK HOODIES are my favorite kinds of HOODED COWLS to make because they work up quickly and they are absolutely beautiful in every color. It looks like it could be complicated, but it’s really simple and never disappoints.
In fact, this TURTLE NECK HOODIE works up so quickly that I bet you could have one of these finished within a few hours. Yes, even if you’re a beginner!
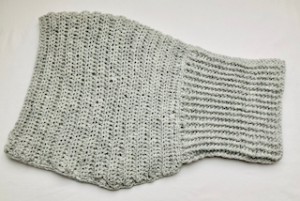
The main body of this HOODIE is created from a RECTANGLE with A HOOD.
So let me now get started and tell you what you will need in order to crochet this amazing TURTLE NECK HOODIE.

TURTLE NECK HOODIE DIRECTIONS
When trying to decide on a yarn for this hoodie I knew I wanted something warm and soft. I chose ALIZE SUPERLANA YARN.
For this S/M size you will need:
YARN: ALIZE SUPERLANA, 100g, 570m, 75% acrylic, 25% cotton
1 - 1,5 ball
For this pattern you will need 5.0 crochet hook.
Size: M / S size - this can easily be adapted to a smaller size or bigger size just by reducing or increasing the number of rows.
PATTERN NOTES:
1) Before you start take a measurement. Chain until you reach the measurement around the head - the neck-warmer should be easily slipped over head.
2) The direction shown are adult woman S/M size, but can be easily converted into bigger size or smaller size – just measure your starting chain around your head, if it fits snuggly then you can use this chain amount for your size.
3) A Ch 1, ch2 at beg of the row DOESN'T count as hdc throughout

4) There are 2 parts of this project:
A) NeckWarmer
B) Hood
This pattern can easily adapt to a smaller size or bigger size just by reducing or increasing the number of ch and rows for the hood and as well as making less or more chains for the cowl.
There are 2 parts = 2 rectangles:
This Hoodies is made of 2 panels (crocheted as a one part) – one is for the neckwarmer and one is for the hood.
PART A) NECKWARMER / TURTLE NECK - this is a rectangle
PART B) HOOD - this is a rectangle as well, we add the hood on this NECKWARMER rectangle.
5) NECKWARMER'S rounds start with CH 3 = 1 DC
6) NECKWARMER is worked in joining rounds with right side facing at all times
7) Joining rounds - part A is worked in joining rounds, which means that you will be joining the last stitch of the round to the first one with a slip stitch and than chaining 3 before continuing with the next round.
8) The direction shown are for S/M size but can be easily converted into bigger size or smaller size – just add more or less rows.
Level: Easy - for beginners
Abbreviations (US Crochet Terms):
SP - space
SlSt – slip stitch
CH/s – chain/s
HDC - half double crochet
DC - double crochet
FPDC - front post double crochet
BPDC - back post double crochet
SK - skip
T - turn
ST/s - stitch(es)
REP - repeat
YO – yarn over
BLO - back loop only
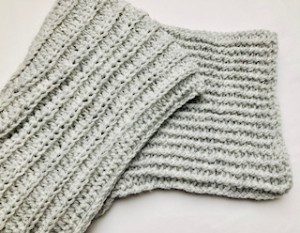
Special stitches used: hdc in back loop only - the back loop is hidden under the front loop.
Special stitches used: front post double crochet (fpdc) and front post triple crochet (fptr)
Front and back post crochet stitches are used to create wonderful texture in crochet. Instead of making your stitch through the loops at the top of the stitch, you make it around the stitch. Everything else stays the same. The most challenging things about crochet post stitches are knowing where and how to insert the hook. There are front post stitches and back post stitches.
For front post double crochet stitches (fpdc): yarn over, insert your hook from front to back then from back to front around post of stitch indicated, yarn over, pull through stitch, then finish your double crochet as normal, yarn over, pull through 2 lps, yarn over, pull through last 2 lps

WRITTEN PATTERN
Crochet Hook 5.50 mm
PART A = THE COWL
Pick up the 5mm hook and let’s make a foundation chain loosely.
Chain 64 chains, join the chain with a slip stitch.
Work in closed joined rounds
Foundation Chain Measurement: 45 cm / 18 inch

R1: ch3 (1dc), 1dc in each and every st around till end of row, sl st in 3rd ch from beg to close round (64 dc)
R2: ch3 (1dc), *1fpdc in next st, 1bpdc in next st* repeat from *to* around till end of row, sl st in 3rd ch from beg to close round (64 dc)
R3 – R27 repeat R2
You will have 64 stitches in each round.
Repeat R3 till you are satisfied with the length of your Turtle Neck Warmer
R28: slip stitch in each st around, invisible join
Fasten off your work and hide all loose tails.
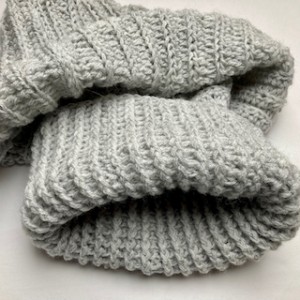
THE TURTLE NECK WARMER PART IS DONE!
The TURTLE NECK WARMER is 21 cm / 8.3 inch long.

PART B = THE HOOD
Still use the 5mm crochet hook.
Let’s make a slip knot, join your work, start at any st of R1 of part A.
R1: ch1 (don’t count it as a st), 2hdc in first st BLO, *1hdc in next 9st BLO, 2hdc in next st BLO*
R2: ch1 (don’t count it as a st), 2hdc in first st BLO, *1hdc in next 19st BLO, 2hdc in next st BLO* r
R3: ch1 (don’t count it as a st), 2hdc in first st BLO, *1hdc in each st across BLO* repeat from *to* around till end of row, 2 hdc in last st BLO, turn (77 hdc)
R4 – R8: repeat R3
R9 – R24: ch1, 1hdc in each and every st across till end of row BLO, turn (87 hdc)
Fasten off your work and hide all loose tails.

Hoodie Border
R1: ch1, 1hdc in each and every st around the hood, invisible join
Fasten off your work and hide all loose tails.
Directions: Fold the HOOD in half, place the beg to the end, work on wrong side facing you, use tapestry needle and join stitch to stitch.
Fasten off your work and hide all loose tails.
Cut the yarn. Then fasten off and wave in all ends.
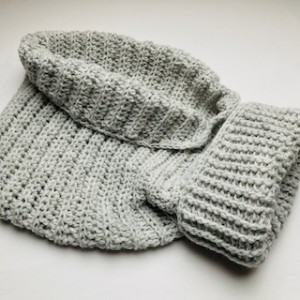
You are all done with your amazing TURTLE NECK HOODIE
THE FINAL SIZE MEASUREMENT:
HOOD IS 35 CM / 14 INCH LONG
TURTLE NECK IS 21 CM / 8 INCH LONG
HOOD IS 62 CM / 24.5 INCH WIDE

♥♥♥
Have fun and let me know what you make. I would love to know how your project turns out.
Please don't forget to like and I really appreciate your comments.
If the pattern did not make sense to you, please don’t hesitate to contact me, I am happy to help :)
If you like this pattern, please follow and share my projects on social networks as a THANK YOU and to help me to create new projects and patterns for you.
Thank you very much once again for your visit and see you soon!
♥♥♥


