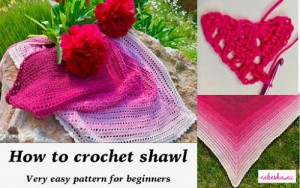
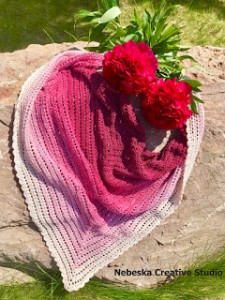
Linda shawl - very easy crochet shawl for beginners
This wonderful crochet shawl was made for my lovely friend Linda from the USA. That is why I named it "Linda" and here is a free crochet pattern - very easy to follow.The crochet shawl pattern is easy and simple and makes the project come alive very fast! There are only double crochet stitches - works up so quickly.
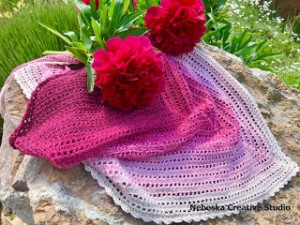
If you have never crocheted a shawl or a scarf before then this pattern will be perfect, especially for beginners.
VIDEO TUTORIAL
You can find the step-by-step video tutorials below which will help you along if you prefer to watch video instruction rather than using a written pattern. Don’t forget to subscribe if you like me videos, it’s FREE!![]()
Let's start or PIN this idea to your Pinterest boards for later.
![]()
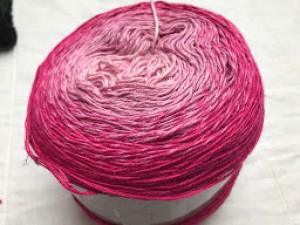
Furthermore, crocheting with the Etrofil yarn, which is a super fine cotton, is such a delight as it moves so smoothly thru your hook like no other yarn.
I used hook 3,5 mm for this project.
Yarn: Etrofil Puzzle (55 % Organic Cotton, 45% Anti pilling Acyrlic), 250 g / 8,80 oz, 1000 m / 1093,60 ydrs
Recommended hook: 2,25 mm – 3,5 mm
Level: Easy - for beginners
US crochet term:
MC - magic circle
SlSt – slip stitch
CH - chain
SC – simple crochet
DC - double crochet
PATTERN NOTES:
Each row starts with 3 CH = 1 DC
Pattern is worked beginning in the centre of the shawl and worked in turned rows to expand the size. Close attention paid to increases at the beginning and end of each row are imperative.
Each long side of the triangle (and each row) should always have the same number of stitches.
WRITTEN INSTRUCTIONS FOR THE LINDA SHAWL:
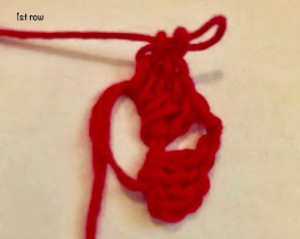
1st row: make a loose magic circle (MC), into this MC place 3 chains (ch), continue 3 double crochets (DC), continue 2 chs, continue 4 DC
Wonderful! You have a triangle, which is a basic for this shawl. Turn.
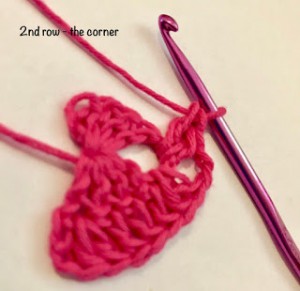
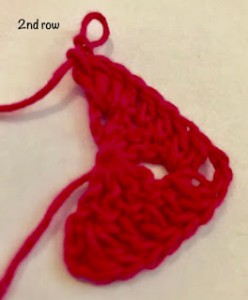
2nd row: Ch 3 and then place DC 2 in the first Ch – this is how to start each new row, then continue DC 1, DC 1, DC 1 (which means 1 dc in each of the other chs) until you reach the „corner“ (you are in the middle of your triangle) and then make DC 2, Ch 2, DC 2
Continue DC 1, DC 1, DC 1 (1 dc in each chs) until the last st where you place 3 DC (this is the end of each row). Turn
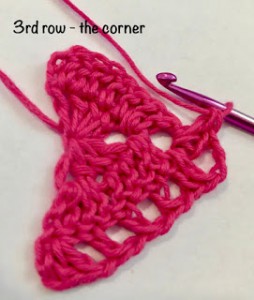
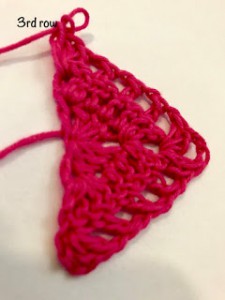
3rd row: Ch 3 and then place 2 DC in the first Ch , Ch 1, skip 1 St, DC 1, Ch 1, skip 1 st, DC 1, Ch 1, skip 1 St, DC 1, skip 1 St, then again the corner: 2 DC 2 Ch 2 DC
1 Ch, skip St, 1 DC 1, repeat: „Ch 1 skip St 1 DC 1“ until the last ST where you place 3 DC (this is the end of each row as you already know), turn
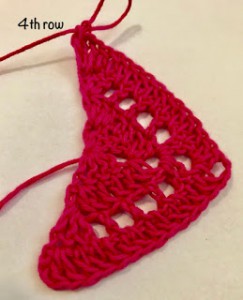
4th row: Ch 3 and then place 2 DC in the first Ch, then continue 1 DC in each of the other Chs (1 DC in the Ch space, 1 DC in the next ST...), until you reach the „corner“ and then DC 2, Ch 2, DC 2, continue again and repeat 1 DC in each of the other Chs until the last St where you place 3 DC. Turn
Repeat rows 3 and 4 until you used up the skein of Etrofil finishing with Row 4 (I had 63 rows).
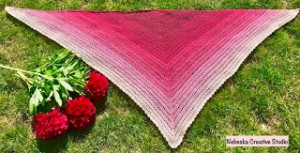
FINAL SIZE:
180 mm / 7 inch (wides width) x 120 mm / 4,7 inch (long side)
That it is! Weave your ends and add some decorations, tassels or a label on your gorgeous shawl.
Now you know how to do a wonderful crochet shawl!
ONE MORE TIP:
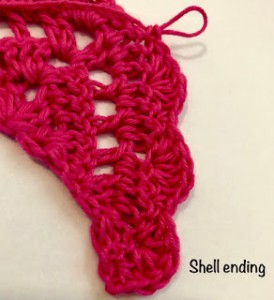
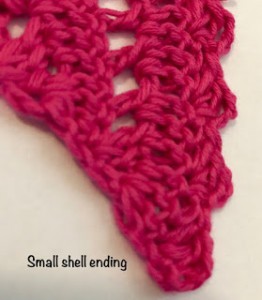
You can make a decorative shell ending – it is the easiest crochet border ever, really simple but still beautiful!
Shells will give you a more dainty looking finish. I used them for this scarf.
Shells: CH 1, SC in first ST, *skip 1 ST, 5 DC in next ST, skip 1 ST, 1 SC in next ST. Repeat from * to end, SC in last ST. Fasten off.
Small shells: * CH 3, 2 DC in the same ST, skip 2 ST, slip stich in next ST and continue Rep from * to end. Fasten off.
Have fun and let me know what you make. I would love to know how your project turns out.
Please don't forget to like and I really appreciate your comments.
If the pattern did not make sense to you, please don’t hesitate to contact me, I am happy to help :)
If you like this pattern, please follow and share my projects on social networks as a THANK YOU and to help me to create new projects and patterns for you.
Thank you very much once again for your visit and see you soon!


