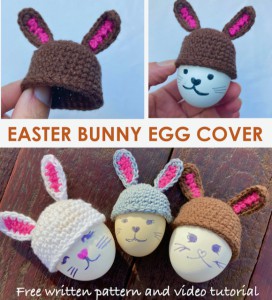
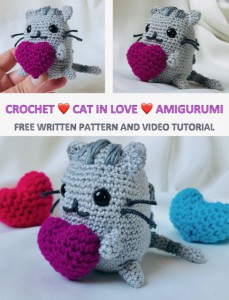
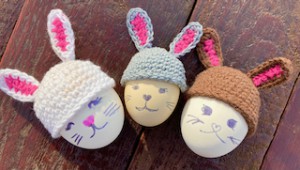
Crochet Easter Bunnies Eggs Covers
CUTE LITTLE EASTER BUNNIES and CHICKENS are among the cutest of all Easter symbols. Kids love BABY EASTER BUNNIES and CHICKS. I do love them as well.
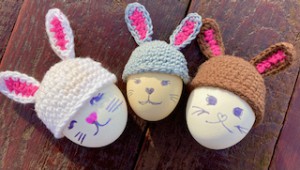
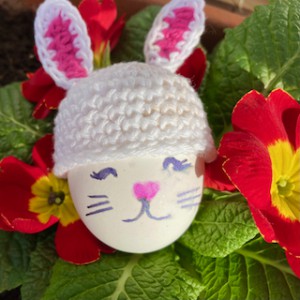
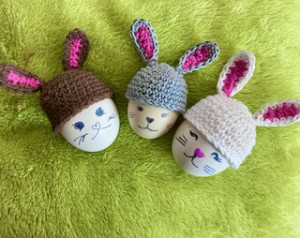
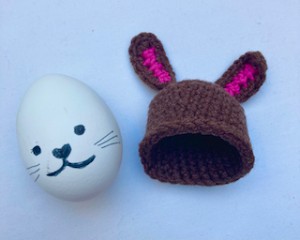
You can use CROCHET LITTLE BUNNY EGG COVER as gifts as well as for Easter party decor.
When on the lookout for some last-minute gift for EASTER holiday for your friends or loved ones, try this CROCHET LITTLE BUNNY EGG COVER pattern.
The CROCHET LITTLE BUNNY EGG COVER is the perfect project for beginners crocheting and I am excited to share with you the CROCHET LITTLE BUNNY EGG COVER pattern.
The written pattern is available here below for free. It comes with a video guide as well.
VIDEO TUTORIAL
You can find the step-by-step video tutorials below which will help you along if you prefer to watch video instruction rather than using a written pattern. Don’t forget to subscribe if you like me videos, it’s FREE!![]()
A huge thanks to everyone who want to support my blog and download PDF paid pattern. Thank you very much, I really appreciate it and it helps me create more new video tutorials and patterns for you. Love you!
![]()
If you pin my patterns to your Favorites and share it on social media as a link, I will be able to share a lot more free crochet patterns for you all.
Stay in touch at Facebook, Instagram and Pinterest.
Please show your support and help me share this free pattern by simply pinning a PIN, or sharing a link with your crochet friends!
![]()
Let's start or PIN this idea to your Pinterest boards for later.
I love sharing crochet patterns for different themes and holidays.
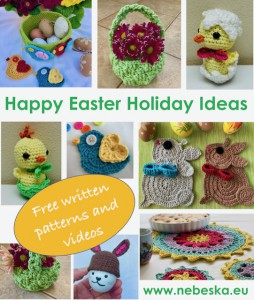
Spring is right around the corner and Easter on its way, I thought I would round up some super cute Crochet Patterns for you to get your hook into.
This is my List of HAPPY EASTER HOLIDAY crochet patterns I prepared for you – they are available for free and they comes with video tutorials as well. There is something for everyone. I’ve included cute little amigurumi EASTER CHICKENS and RABBITS egg cover, also some BASKETS and easy and quick BIRDIES and more!
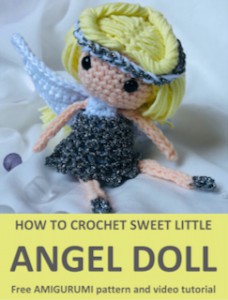
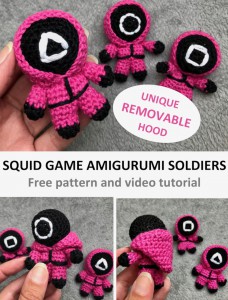
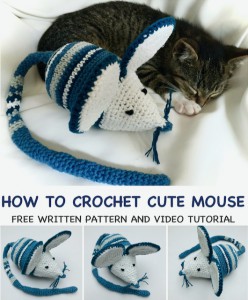
You know me, I love making homemade things and creating beautiful gifts for my family and my friends. I also love doing my own crochet Amigurumi. If you do as well, you may would love to try these patterns as well:

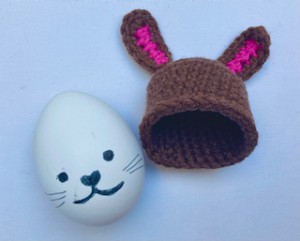
How to crochet LITTLE BUNNY EGG COVER
This pattern is made for beginners - only a basic skill level is required to make it. If you don't understand any of my instructions, don't worry I am here for you - enter the comments at the end of this post.
This CROCHET LITTLE BUNNY EGG COVERt is easy and quick to crochet, great project for beginners.
MATERIALS
Amigurumi Cotton Yarn, the color you like for:
Bunny (color A)
Inner Ears (color B)
I used:
YarnArt Jeans, 55 % Cotton 45% Acrylic, 50 gr. / 160 m, 1.76 Oz. / 174 yds
YarnArt Begonia: 100% cotton, mercerized cotton, 50g = 169m
Colors: light grey, grey, brown, white, black.... yarn for Bunny Head and pink one for inner Ears.
3 mm crochet hook
Scissors
Sewing/Embroidery and yarn needle/tapestry needle for sewing pieces together and weaving in ends
Markers
Pins
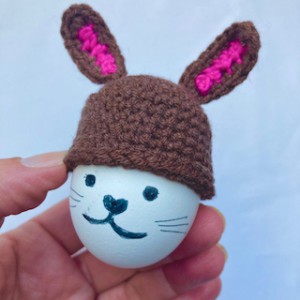
These cosies are designed to fit a standard egg size M.
I recommend trying the piece over the egg as you go. It should fit over comfortably without having to stretch or being too loose. If you find it too tight to fit over your egg, go up a hook size. If you find it very baggy around your egg, go down a hook size.
Difficulty Level: Level 1 – Easy, for beginners
The pattern uses the following basic US crochet stitches:
SlSt – slip stitch
CH/s – chain/s
SC - single crochet
HDC - half double crochet
SK - skip
T - turn
ST/s - stitch(es)
REP – repeat
This pattern requires familiarity with stitches used, attaching yarn, sewing parts together with a sewing needle.
Invisible Join – Crochet Technique:
We will be using an invisible join technique to finish off the egg animal bodies. This will give you a neat, seamless, edge around. To do this, cut your yarn after the last stitch, leaving a couple of inches of tail, and pull the end up through the last stitch made. Use your yarn needle to thread the end through under both loops of the second stitch along, and back into the middle of that last stitch. Pull to tighten, creating a faux stitch top over the first stitch. You may notice the real first stitch top poking out a little at the back. Thread the end up through the back loop of the real first stitch, and weave the end into the inside of the body to secure. Trim off any excess.
PATTERN NOTES
1) A ch1 at beg of the row DOESN'T count as a stitch
2) Magic ring = the starting point for crocheting in a spiral. Use which ever method you prefer.
3) Continuous rounds - BUNNy HEADs parts are worked up in continuous rounds, which means that you will not be joining the last stitch of the round with the first one. Instead you will need to keep track of where each round started and how many stitches you have made because after each round you will continue right on to the stitches of the next round (with no join). It is useful to use a stitch marker or piece of yarn to mark the start or end of each round.
4) ( ) – The number of stitches that should be in a completed round/row are placed in brackets at the end of that round’s/row’s instructions.
5) When slip stitching to level off, ensure you keep the stitch the same tension as your other stitches, do not pull this tight as if joining rounds.
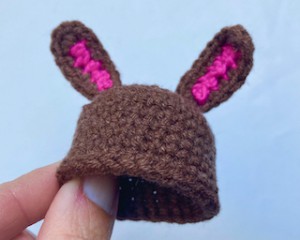
6) This CROCHET LITTLE BUNNY EGG COVER measures:
Head is 1.7 inch long / 4,5 cm
Head circumference is 5inch / 13 cm
Ear is 1.2 inch / 3 cm
6) You can make the BUNNY HEAD bigger with a thicker yarn or a larger hook size.
7) There is just minimal sewing, you will only sew the ears on to the head - this is quick and easy to do, there are no tricks.
THE WRITTEN PATTERN
THE HEAD
Colour A
We will be working in continuous spiral rounds, without joining rounds.
Do not join rounds.
Keep track of your rounds by marking your first stitch with a stitch marker.
Using your chosen bunny colour yarn, start with a magic ring,
Ch1 at the beginning of round don't count as a stitch.
Make a magic ring
R1 – R5 = increase rounds
R1: ch1, 6sc in magic ring, sl st (6sc)
R2: *2sc in each sc from R1 around* rep from * to * till end of round (12 sc)
R3: *1sc in next st, 2sc in next st * rep from * to * till end of round (18 sc)
R4: *1sc in next 2st, 2sc in next st * rep from * to * till end of round (24 sc)
R5: *1sc in next 3st, 2sc in next st * rep from * to * till end of round (30 sc)
R6 - R10: 1sc in each st around (30 sc)
R11: sl st in each st around (30 sc), fasten off with an invisible join
EARS
Colour A and B
For the ears, we will start by making the inner ear sections in color B: Pink (or your chosen accent colour), then work the outer ear, joining both pieces together.
Make 2 as follows:
Bunny Inner Ears:
Using Pink yarn, start by chaining 7.
Working along the 3rd loops / back bumps of the chain, starting from the 2nd chain from hook:
1 hdc in next 3 ch, 1 sc in next 3 ch
Cut the yarn and pull through the loop on hook to fasten off.
You would have made 6 stitches, but we will be using both sides of these stitches plus the turning chain, giving a total of 13 stitches to work in to.
Bunny Outer Ears:
Using your main bunny colour yarn, color A, start by chaining 7.
Working along the 3rd loops / back bumps of the chain, starting from the 2nd chain from hook:
1 hdc in next 3 ch, 1 sc in next 3 ch
Take the Pink inner ear piece and place it in front of the working piece (wrong side against wrong side) and work through both pieces together:
1sc in next 6 st, 3sc in next st, 1sc in next 6 st, sl st into the first st to pinch the two sides together, fasten off leaving a longer tail for attaching.
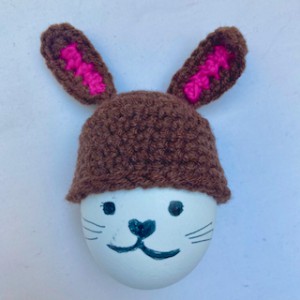
Attaching The Bunny Ears:
Use your yarn needle to tuck the short loose ends in between the 2 layers, and trim off excess. Use the long tail end to attach the ears by whip stitching them on to either side around R3 or R4 of the body.
Tip: If you find that your inner ear colour is showing through the back of the ears, use the excess tail end to weave through to cover up any gaps.
Congratulations! You have now completed your CROCHET LITTLE BUNNY EGG COVER.
I hope you’ve enjoyed making this free CROCHET LITTLE BUNNY EGG COVER crochet pattern.
You can browse through all of my other FREE crochet SPRING patterns:
♥♥♥
Have fun and let me know what you make. I would love to know how your project turns out.
Please don't forget to like and I really appreciate your comments.
If the pattern did not make sense to you, please don’t hesitate to contact me, I am happy to help :)
If you like this pattern, please follow and share my projects on social networks as a THANK YOU and to help me to create new projects and patterns for you.
Thank you very much once again for your visit and see you soon!
♥♥♥


