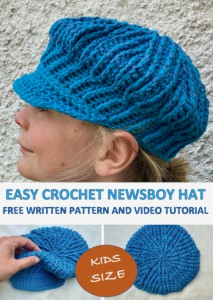
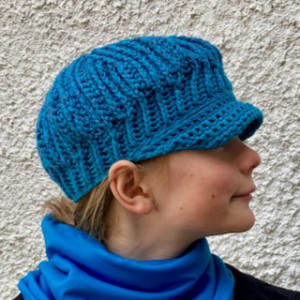
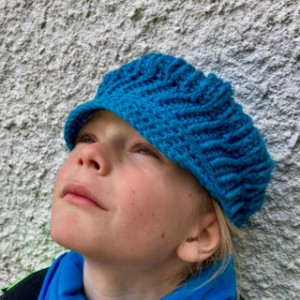
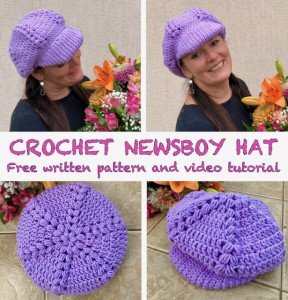
Crochet Newsboy hat for kids
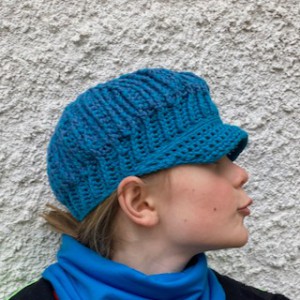
I love Newsboy hat style. All crochet hats just make the adorable head warmers but the crochet hats with brim also bring a dashing style to your head making you look entirely great!
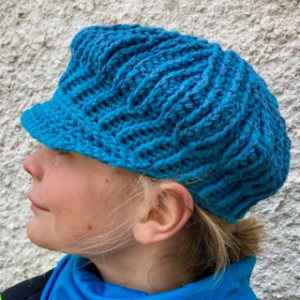
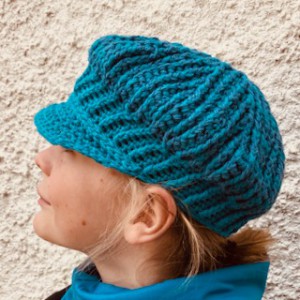
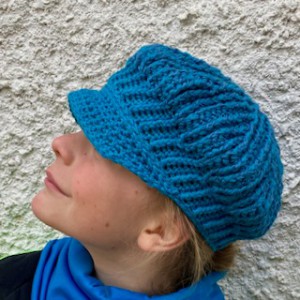
Check out here my new crochet newsboy hat for kids - that just perfects to wear over the head.
This Newsboy HAT is a super good for fall and spring time.
I am happy to show you how to crochet this perfect NEWSBOY HAT that really fits to all!
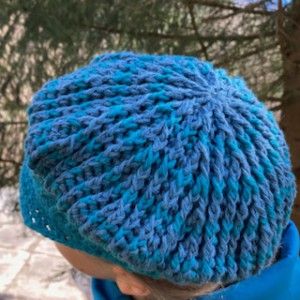
I love this wonderful yarn color and quality, it is not too thick, just the right thickness to show off some texture.
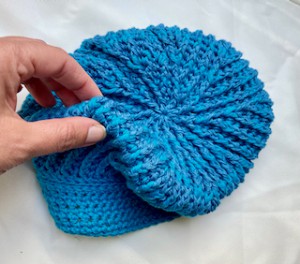
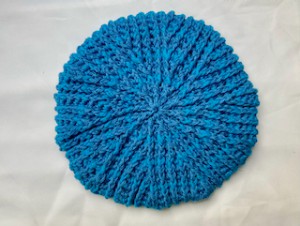
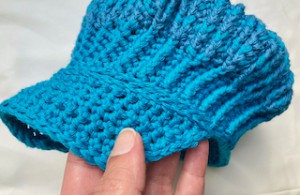
The texture on this NEWSBOY HAT is created using front post double crochets.
Make this NEWSBOY HAT to your hat collection!
The pattern is available here below for free. It comes with a video guide as well.
VIDEO TUTORIAL
You can find the step-by-step video tutorials below which will help you along if you prefer to watch video instruction rather than using a written pattern. Don’t forget to subscribe if you like me videos, it’s FREE!![]()
A huge thanks to everyone who want to support my blog and download PDF paid pattern. Thank you very much, I really appreciate it and it helps me create more new video tutorials and patterns for you. Love you!
![]()
If you pin my patterns to your Favorites and share it on social media as a link, I will be able to share a lot more free crochet patterns for you all.
Stay in touch at Facebook, Instagram and Pinterest.
Let's start or PIN this idea to your Pinterest boards for later.
![]()
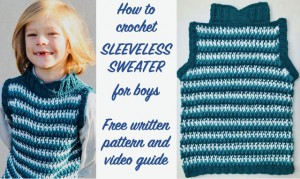
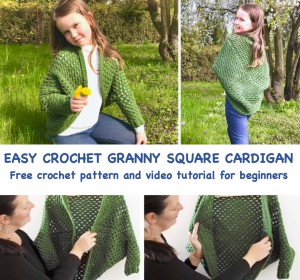
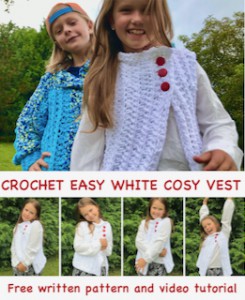
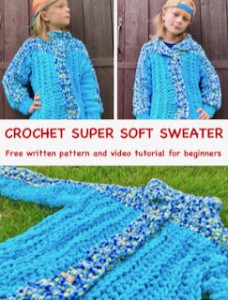
I would recommend you to match your NEWSBOY HAT with some beautiful crochet vests or cardigans:
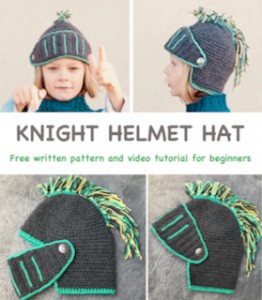
Or maybe would love to try some hats for kids:


This pattern is made for beginners and with my video tutorials everyone will manage to crochet this amazing pattern. If you don't understand any of my instructions, don't worry I am here for you - enter the comments at the end of this post.
Let’s get started to make this perfect pattern!
CROCHET NEWSBOY HAT KIDS DIRECTIONS:
For this kids' size you will need:
The crochet hook 4.0 mm.
Drop Belle – 53% cotton, 33% viscose, 14% linen, 50g/1.8oz, 120m/131yds - 2 skeins / 2 colors
CROCHET NEWSBOY HAT SIZE:
Size: bellow there is a pattern for kids size, the head measurement 8.7 inch / 51 cm, this one fits perfectly to my 7 years old son.
The CROCHET NEWSBOY HAT can easily be adapted to a smaller size or bigger size.
Difficulty Level: Level 1 – Easy, for Beginners
US crochet term:
SlSt – slip stitch
CH/s – chain/s
SC – single crochet
DC - double crochet
FPDC - front post double crochet
SC2TOG
FPDC2TOG
SK - skip
T - turn
ST/s - stitch(es)
REP - repeat
YO – yarn over
Special stitches used: front post double crochet (fpdc)
Front and back post crochet stitches are used to create wonderful texture in crochet. Instead of making your stitch through the loops at the top of the stitch, you make it around the stitch. Everything else stays the same. The most challenging things about crochet post stitches are knowing where and how to insert the hook. There are front post stitches and back post stitches.
For front post double crochet stitches (fpdc): yarn over, insert your hook from front to back then from back to front around post of stitch indicated, yarn over, pull through stitch, then finish your double crochet as normal, yarn over, pull through 2 lps, yarn over, pull through last 2 lps
SC2TOG / FPDC2TOG instructions: The TOG crochet abbreviation is simply shorthand for “together,” while the beginning determines the type of stitch. In this case, SC2 stands for “single crochet two" and FPDC2 stands for "front post double crochet two"
How to decrease with sc2tog: Insert hook in next stitch, yarn over and pull yarn through loop (2 loops on hook). Insert hook in next stitch, yarn over and pull yarn through loop (3 loops on hook), yarn over and pull yarn through all 3 loops on hook
How to decrease with fpdc2tog: yarn over and pull up a loop around next st, inserting hook from front to back and from back to front. Yarn over and pull up a loop through 2 loops on hook. Skipp next sc. Yarn over and pull up a loop around next st, inserting hook from front to back and from back to front. Yarn over and pull up a loop through 2 loops on hook. Yarn over and pull yarn through all 3 loops on hook.
CROCHET NEWSBOY HAT PATTERN NOTES
1) These pattern below is for kids' size, this can be easily adapted to a smaller size or bigger size just by reducing or increasing the numbers of stitches and as well as less or more numbers of rows. Remember that when making bigger hat size, you will need more yarn.
Kids'Size:
Head measurement: 8.7 inch / 51 cm
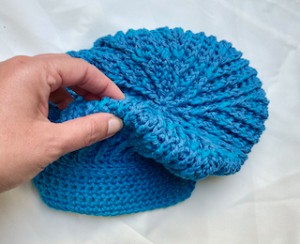
2) This Hat is crocheted in rounds from the top down using front post double crochet stitches and single crochet stitches.
3) A Ch 1 at beg of the row DOESN'T count as a stitch
4) Work in closed rounds
5) The Brim is crocheted in rows.
I love that CROCHET NEWSBOY HAT and many people do so, they are so popular!
HOW TO CROCHET NEWSBOY HAT / KIDS' SIZE
WRITTEN PATTERN - KIDS' SIZE
Color A
Make a magic circle.
Work in rounds
R1: ch3 (1dc) 9 dc in magic ring, sl st in the 3rd ch from beg. (10 dc)
R2: ch1, 1sc in 1st st, 1fpdc around 1st st, *1sc in next st, 1fpdc around same st *, repeat around from * to *, sl st in 1st ch from beg. (20 st)
R3: ch1, 1sc in 1st st, 2fpdc around next st *1sc in next st, 2fpdc around next st *, repeat around from * to *, sl st in 1st ch from beg. (30 st)
Color B
R4: ch1, 1sc in 1st st, 1fpdc around next st, 1sc in next st, 1 fpdc around same st
*1sc in next st, 1fpdc around next st, 1sc in next st, 1 fpdc around same st *
repeat around from * to *, sl st in 1st ch from beg. (40 st)
Color A
R5: ch1, 1sc in 1st st, 1fpdc in next st, 1sc in next st, 2fpdc around next st
*1sc in next st, 1fpdc in next st, 1sc in next st, 2fpdc around next st*
repeat around from * to *, sl st in 1st ch from beg. (50 st)
R6: ch1, 1sc in 1st st, 1fpdc around next st, 1sc in next st, 1fpdc around next st, 1sc in next st, 1 fpdc around same st
*1sc in next st, 1fpdc around next st, 1sc in next st, 1fpdc around next st, 1sc in next st, 1 fpdc around same st*
repeat around from * to *, sl st in 1st ch from beg. (60 st)
Color B
R7: ch1, 1sc in 1st st, 1fpdc in next st, 1sc in next st, 1fpdc in next st, 1sc in next st, 2fpdc around next st
*1sc in next st, 1fpdc in next st, 1sc in next st, 1fpdc in next st, 1sc in next st, 2fpdc around next st*
repeat around from * to *, sl st in 1st ch from beg. (70 st)
Color A
R8: ch1, 1sc in 1st st, 1fpdc around next st, 1sc in next st, 1fpdc around next st, 1sc in next st, 1fpdc around next st, 1sc in next st, 1 fpdc around same st
*1sc in next st, 1fpdc around next st, 1sc in next st, 1fpdc around next st, 1sc in next st, 1fpdc around next st, 1sc in next st, 1 fpdc around same st*
repeat around from * to *, sl st in 1st ch from beg. (80 st)
R9: ch1, 1sc in 1st st, 1fpdc in next st, 1sc in next st, 1fpdc in next st, 1sc in next st, 1fpdc in next st, 1sc in next st, 2fpdc around next st
*1sc in next st, 1fpdc in next st, 1sc in next st, 1fpdc in next st, 1sc in next st, 1fpdc in next st, 1sc in next st, 2fpdc around next st*
repeat around from * to *, sl st in 1st ch from beg. (90 st)
Color B
R10: ch1, 1sc in 1st st, 1fpdc around next st, 1sc in next st, 1fpdc around next st, 1sc in next st, 1fpdc around next st, 1sc in next st, 1fpdc around next st, 1sc in next st, 1 fpdc around same st
*1sc in next st, 1fpdc around next st, 1sc in next st, 1fpdc around next st, 1sc in next st, 1fpdc around next st, 1sc in next st, 1fpdc around next st, 1sc in next st, 1 fpdc around same st *
repeat around from * to *, sl st in 1st ch from beg. (100 st)
Color A
R11: ch1, 1sc in 1st st, 1fpdc in next st, 1sc in next st, 1fpdc in next st, 1sc in next st, 1fpdc in next st, 1sc in next st, 1fpdc in next st, 1sc in next st, 2fpdc around next st
*1sc in next st, 1fpdc in next st, 1sc in next st, 1fpdc in next st, 1sc in next st, 1fpdc in next st, 1sc in next st, 1fpdc in next st, 1sc in next st, 2fpdc around next st*
repeat around from * to *, sl st in 1st ch from beg. (110 st)
R12: ch1, 1sc in 1st st, 1fpdc around next st, 1sc in next st, 1fpdc around next st, 1sc in next st, 1fpdc around next st, 1sc in next st, 1fpdc around next st, 1sc in next st, 1fpdc around next st, 1sc in next st, 1 fpdc around same st
*1sc in next st, 1fpdc around next st, 1sc in next st, 1fpdc around next st, 1sc in next st, 1fpdc around next st, 1sc in next st, 1fpdc around next st, 1sc in next st, 1fpdc around next st, 1sc in next st, 1 fpdc around same st*
repeat around from * to *, sl st in 1st ch from beg. (120 st)
Color B
R13: ch1, 1sc in 1st st, 1fpdc around next st, 1sc in next st
*1sc in next st, 1fpdc around next st*
repeat around from * to *, sl st in 1st ch from beg. (120 st)
Color A
R14 - R16: Repeat R13
R14 and R15: color A
R16: Color B
Color A
R17: ch1, 1sc in 1st st, 1fpdc around next st, 1sc in next st, 1fpdc around next st, 1sc in next st, 1fpdc around next st, 1sc in next st, 1fpdc around next st, 1sc in next st,
there are 3 stitches left in this 12 st groups: fpdc2tog (work over 3 st), 1sc between fpds is skipped
*1sc in next st, 1fpdc around next st, 1sc in next st, 1fpdc around next st, 1sc in next st, 1fpdc around next st, 1sc in next st, 1fpdc around next st, 1sc in next st,
there are 3 stitches left in this 12 st groups: fpdc2tog (work over 3 st), 1sc between fpds is skipped*
repeat around from * to *, sl st in 1st ch from beg. (100 st)
R18: ch1, 1sc in 1st st, fpdc2tog (work over 3 st), 1sc between fpds is skipped, 1sc in next st, 1fpdc around next st, 1sc in next st, 1fpdc around next st, 1sc in next st, 1fpdc around next st
*1sc in next st, fpdc2tog (work over 3 st), 1sc between fpds is skipped, 1sc in next st, 1fpdc around next st, 1sc in next st, 1fpdc around next st, 1sc in next st, 1fpdc around next st*
repeat around from * to *, sl st in 1st ch from beg. (80 st)
Color B
R19: ch1, 1sc in 1st st, 1fpdc around next st, 1sc in next st, fpdc2tog (work over 3 st), 1sc between fpds is skipped, 1sc in next st, 1fpdc around next st
*1sc in next st, 1fpdc around next st, 1sc in next st, fpdc2tog (work over 3 st), 1sc between fpds is skipped, 1sc in next st, 1fpdc around next st *
repeat around from * to *, sl st in 1st ch from beg. (60 st)
Color B
R20: ch1, 1sc in 1st st, 1fpdc around next st, 1sc in next st
*1sc in next st, 1fpdc around next st*
repeat around from * to *, sl st in 1st ch from beg. (60 st)
R21-R25: repeat R20
BRIM
With your yarn and hook, work in rows, loosely.
I would recommend you to use a stitch marker, to divide the number of stitches in the last row in half and place a stitch marker on that stitch in half of the last row of the hat.
When you finish new row, remove marker from previous row and replace on the beginning and on the end of stitches just finished row.
R1: ch1, 1sc in each st around (60 st)
R2: ch1, 1sc in next 30 st, turn (30 st)
R3: ch1, sc2tog, 1sc in next st across, till 2 st left, sc2tog, turn (28 st)
R4: ch1, sc2tog, 1sc in next st across, till 2 st left, sc2tog, turn (26 st)
R5: Repeat R4 (24 st)
R6: ch1, 1sc in each st across (24 st)
SLIP STICH BORDER
Turn your work and make a slip stitch border around the hat from the brim corner to next brim corner. Work slip stitch in each stitch around.
Sl stitch in each st around the hat.
Sl stitch in each single crochet in last row of the hat: sl st in each st in R25 till end of row, turn your work and one more row: sl st in each st in row R25.
Cut the yarn, weave in the ends.
Optionally: Add 2 buttons of your choice
End off yarn, weave in ends. Turn your hat the right side out and smooth down.
You are all done with your amazing CROCHET NEWSBOY HAT!
Do you love the HAT crocheting? Hats are always good gift ideas. You would may like to try also these patterns:

♥♥♥
Have fun and let me know what you make. I would love to know how your project turns out.
Please don't forget to like and I really appreciate your comments.
If the pattern did not make sense to you, please don’t hesitate to contact me, I am happy to help :)
If you like this pattern, please follow and share my projects on social networks as a THANK YOU and to help me to create new projects and patterns for you.
Thank you very much once again for your visit and see you soon!
♥♥♥


