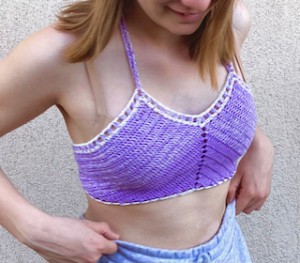
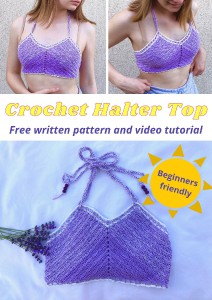
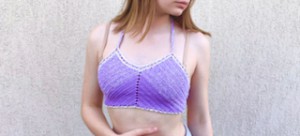
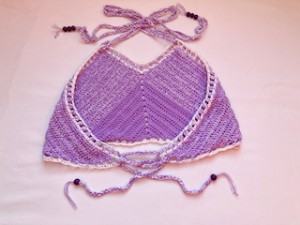
Crochet SUPER EASY Summer Halter Top
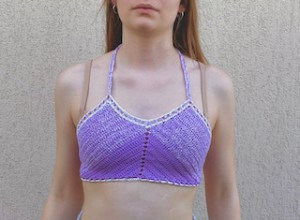
This cute crochet halter top is a perfect choice for summer time. This super easy and simple crochet halter top is quick to make, it is perfect for beginners.
You’ll enjoy wearing your handmade halter top to summer on the beach or go out in the evening.
This easy summer halter top has a beautiful and simple pattern. Make it in your favorite cotton and color!
I am so happy and pleased with how it turned out!
The pattern is available here below for free. It comes with a video guide as well.
VIDEO TUTORIAL
You can find the step-by-step video tutorials below which will help you along if you prefer to watch video instruction rather than using a written pattern.
Don’t forget to subscribe if you like me videos, it’s FREE!
![]()
This pattern is made for beginners - only a basic skill level is required to make it. If you don't understand any of my instructions, don't worry I am here for you - enter the comments at the end of this post.
A huge thanks to everyone who want to support my blog and download PDF paid pattern. Thank you very much, I really appreciate it and it helps me create more new video tutorials and patterns for you. Love you!
![]()
If you pin my patterns to your Favorites and share it on social media as a link, I will be able to share a lot more free crochet patterns for you all.
Stay in touch at Facebook, Instagram and Pinterest.
Let's start or PIN this idea to your Pinterest boards for later.
![]()
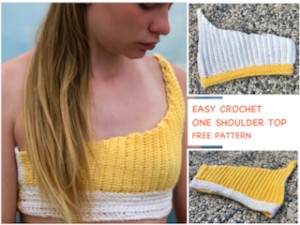
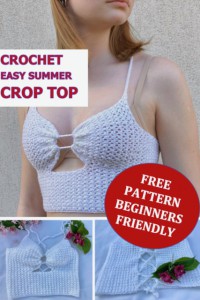
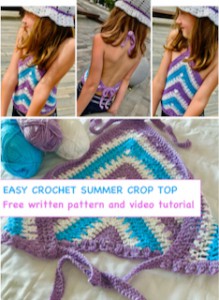
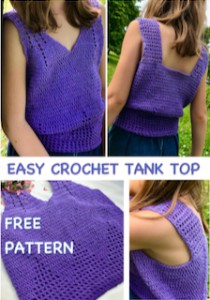
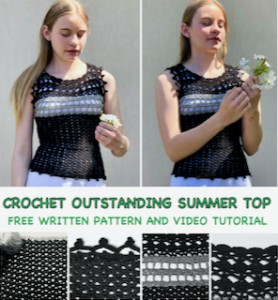
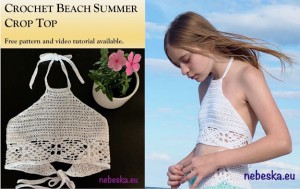
When summer rolls around, it’s time to lighten up your wardrobe with some summer crochet tops and tunics, you may will love these patterns. They are different levels of difficulties and techniques that you might have never seen before.
You might like these ones below. Just click on them and you can find the free pattern, each of the patterns comes with a video tutorial.

So let me now get started and tell you what you will need in order to crochet this amazing Summer Halter Top Pattern.
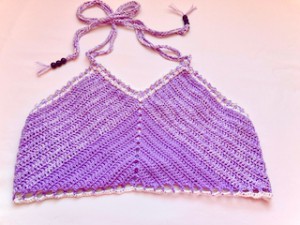
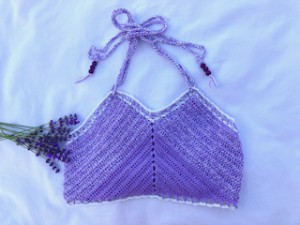
Summer Halter Top Pattern instructions
The pattern uses only basic crochet stitches - chains and double crochets.
This Crop top is crochet from bottom up as one part and then the border around.
You need to measure the body circumference and crochet the front part accordingly.
The direction shown are for girls size but can be easily converted into bigger size or smaller size.
The pattern was made with yarn: Duhova Fantazie, 200g / 800 m, 50% acrylic, 50% cotton.
For this halter top girls size you will need 1/3 skein of yarn Duhova Fantazie.
![]()
For this pattern you will need 3.00 mm crochet hook.
Scissors and tapestry needle
Some beads as per your choice
So let me now get started and tell you what you will need in order to crochet this lovely Summer Halter Top.
Pattern Notes
1) Before you start take a measurement of height of your body and a body measurement (please see the final measurement of the summer halter top below).
2) This pattern is for teenage size, but you can easily adapt to a smaller size or bigger size just by reducing or increasing the number of rows. Please find the instructions how to increase for S, M, L, XL sizes bellow.
Remember that when making your halter top bigger you will need more yarn.
3) A Ch 4 at beg of the row counts as tr throughout
4) A Ch 3 at beg of the row counts as dc throughout
5) The Halter top is made uo as one part with a border
6) The Halter Top is worked from the bottom, work upwards and outwards to each side as a triangle. Then divide the piece at the middle, and work up and outwards in each side separately.
7) Border: Work an edge along the top side of piece
8) Straps: work straps at the end on the top of V-neck
Difficulty Level: Level 1 – Easy, for beginners
US crochet terms:
SlSt – slip stitch
CH/s – chain/s
SC - single crochet
DC - double crochet
3DC CLUSTER = 3 double crochets together
TR - treble / tripple crochet
SK - skip
T - turn
ST/s - stitch(es)
REP - repeat
YO – yarn over
WRITTEN INSTRUCTIONS FOR SUMMER HALTER TOP PATTERN
Crochet hook 3.00 mm
Magic ring
Work in rows
R1 – R13
Start in Magic ring and continue and increase the same way on both sides.
R1: ch4 (1tr), ch3, 2dc in mr, ch3 (middle), 2dc in mr, ch3, 1tr in mr, turn
R2: ch4 (1tr), ch3, 2dc in ch3sp, 1dc in next 2 st, 2dc in ch3sp, ch3 (middle), 2dc in same ch3sp, 1dc in next 2 st, 2dc in ch3sp, ch3, 1tr in 4th ch from beg, turn
R3: ch4 (1tr), ch3, 2dc in ch3sp, 1dc in next 6 st, 2dc in ch3sp, ch3 (middle), 2dc in same ch3sp, 1dc in next 6 st, 2dc in ch3sp, ch3, 1tr in 4th ch from beg, turn
R4: ch4 (1tr), ch3, 2dc in ch3sp, 1dc in next 10 st, 2dc in ch3sp, ch3 (middle), 2dc in same ch3sp, 1dc in next 10 st, 2dc in ch3sp, ch3, 1tr in 4th ch from beg, turn
R5: ch4 (1tr), ch3, 2dc in ch3sp, 1dc in next 14 st, 2dc in ch3sp, ch3 (middle), 2dc in same ch3sp, 1dc in next 14 st, 2dc in ch3sp, ch3, 1tr in 4th ch from beg, turn
R6: ch4 (1tr), ch3, 2dc in ch3sp, 1dc in next 18 st, 2dc in ch3sp, ch3 (middle), 2dc in same ch3sp, 1dc in next 18 st, 2dc in ch3sp, ch3, 1tr in 4th ch from beg, turn
R7: ch4 (1tr), ch3, 2dc in ch3sp, 1dc in next 22 st, 2dc in ch3sp, ch3 (middle), 2dc in same ch3sp, 1dc in next 22 st, 2dc in ch3sp, ch3, 1tr in 4th ch from beg, turn
R8: ch4 (1tr), ch3, 2dc in ch3sp, 1dc in next 26 st, 2dc in ch3sp, ch3 (middle), 2dc in same ch3sp, 1dc in next 26 st, 2dc in ch3sp, ch3, 1tr in 4th ch from beg, turn
R9: ch4 (1tr), ch3, 2dc in ch3sp, 1dc in next 30 st, 2dc in ch3sp, ch3 (middle), 2dc in same ch3sp, 1dc in next 30 st, 2dc in ch3sp, ch3, 1tr in 4th ch from beg, turn
R10: ch4 (1tr), ch3, 2dc in ch3sp, 1dc in next 34 st, 2dc in ch3sp, ch3 (middle), 2dc in same ch3sp, 1dc in next 34 st, 2dc in ch3sp, ch3, 1tr in 4th ch from beg, turn
R11: ch4 (1tr), ch3, 2dc in ch3sp, 1dc in next 38 st, 2dc in ch3sp, ch3 (middle), 2dc in same ch3sp, 1dc in next 38 st, 2dc in ch3sp, ch3, 1tr in 4th ch from beg, turn
R12: ch4 (1tr), ch3, 2dc in ch3sp, 1dc in next 42 st, 2dc in ch3sp, ch3 (middle), 2dc in same ch3sp, 1dc in next 42 st, 2dc in ch3sp, ch3, 1tr in 4th ch from beg, turn
R13: ch4 (1tr), ch3, 2dc in ch3sp, 1dc in next 44 st, 2dc in ch3sp, ch3 (middle), 2dc in same ch3sp, 1dc in next 38 st, 2dc in ch3sp, ch3, 1tr in 4th ch from beg, turn
Measurement: teenage size from magic ring till middle point (R13) = 13 cm / 5 inch
You can easily adapt to a bigger size just by increasing the number of rows.
Continue and increase the same way until piece measures:
Measurement: S size from magic ring till middle point (R13) = 14 cm / 5.5 inch
Measurement: M size from magic ring till middle point (R13) = 16 cm / 6.3 inch
Measurement: L size from magic ring till middle point (R13) = 18 cm / 7 inch
Measurement: XL size from magic ring till middle point (R13) = 20 cm / 7.8 inch
R14: ch4 (1tr), ch3, 2dc in ch3sp, 1dc in next 48 st, 2dc in ch3sp, turn
R15: ch3 (1dc), 1dc in next 51 st , 2dc in ch3sp, ch3, 1tr in 4th ch from beg, turn
R16: ch4 (1tr), ch3, 2dc in ch3sp, 1dc in next 54 st, turn
R17: ch3 (1dc), 1dc in next 55 st , 2dc in ch3sp, ch3, 1tr in 4th ch from beg, turn
R18: ch4 (1tr), ch3, 2dc in ch3sp, 1dc in next 58 st, turn
R19: ch3 (1dc), 1dc in next 59 st , 2dc in ch3sp, ch3, 1tr in 4th ch from beg, turn
R20: ch4 (1tr), ch3, 2dc in ch3sp, 1dc in next 62 st, turn
R21: ch3 (1dc), 1dc in next 63 st , 2dc in ch3sp, ch3, 1tr in 4th ch from beg, turn
R22: ch4 (1tr), ch3, 2dc in ch3sp, 1dc in next 66 st, turn
R23: ch3 (1dc), 1dc in next 67 st , 2dc in ch3sp, ch3, 1tr in 4th ch from beg, turn
R24: ch4 (1tr), ch3, 2dc in ch3sp, 1dc in next 70 st, turn
R25: ch3 (1dc), 1dc in next 71 st , 2dc in ch3sp, ch3, 1tr in 4th ch from beg, turn (74dc)
Measurement teenage size:
from magic ring to bottom corner (R25) = 32 cm / 12.5 inch
from bottom line to top corner = 21 cm / 8 inch
from bottom corner to top corner = 32 cm / 12.5 inch
from middle point to top corner (V-neck) = 10 cm / 4 inch
Repeat the same way along the other side but begin from the middle.
R13: ch3 (1dc), 1dc in ch3sp, 1dc in next 46 st, 2dc in ch3sp, ch3, 1tr in 4th ch from beg, turn
R14: ch4 (1tr), ch3, 2dc in ch3sp, 1dc in next 50 st, turn
R15: ch3 (1dc), 1dc in next 51 st, 2dc in ch3sp, ch3, 1tr in 4th ch from beg, turn
R16: ch4 (1tr), ch3, 2dc in ch3sp, 1dc in next 54 st, turn
R17: ch3 (1dc), 1dc in next 55 st, 2dc in ch3sp, ch3, 1tr in 4th ch from beg, turn
R18: ch4 (1tr), ch3, 2dc in ch3sp, 1dc in next 58 st, turn
R19: ch3 (1dc), 1dc in next 59 st, 2dc in ch3sp, ch3, 1tr in 4th ch from beg, turn
R20: ch4 (1tr), ch3, 2dc in ch3sp, 1dc in next 62 st, turn
R21: ch3 (1dc), 1dc in next 63 st, 2dc in ch3sp, ch3, 1tr in 4th ch from beg, turn
R22: ch4 (1tr), ch3, 2dc in ch3sp, 1dc in next 66 st, turn
R23: ch3 (1dc), 1dc in next 67 st, 2dc in ch3sp, ch3, 1tr in 4th ch from beg, turn
R24: ch4 (1tr), ch3, 2dc in ch3sp, 1dc in next 70 st, turn
R25: ch3 (1dc), 1dc in next 71 st, 2dc in ch3sp, ch3, 1tr in 4th ch from beg, turn
EDGE
Color B
Lay your work down. Center your halter top and work a single crochet edge along all 5 halter top sides.
R1: start new yarn on right bottom corner, make a slip knot and ch1.
Place 1 sc in each st.
Place 3st in each corner.
Place 2 sc in middle in ch3sp
ch1, 3sc do ch3sp (right corner), then 1sc in each sl, till end of row, 3sc in last st in row (top right corner), then work 2sc along each end stitch, then 2 sc in ch3sp (middle point), then work 2sc along each end stitch, 3sc in last st in row (top left corner, then 1sc in each st till end of row, 3sc do ch3sp (left corner) and continue crochet along the bottom side, 4sc along each end st.
Don’t cut and fasten the yarn.
Do not turn piece, work next row from same side.
R2: don't turn your work.
Color A
Start new yarn on right bottom corner.
Work along 4 sides (don’t work along the bottom side)
Fasten yarn with 1 slip stitch in first stitch.
Make 3 dc clusters = 3 dc together
The first 3dc cluster = work 2 chain stitches and 2 double crochets in first stitch.
Make a slip knot and 3dc cluster (work ch2 as a dc and 2ds), ch2, skip 2 sl, 3dc cluster in next st,
*ch2, skip 2 sl, 3dc cluster in next st* repeat from * to * till you reach the right top stitch,
work a corner: 3dc cluster in top sl, ch2, skip 1sc, 3dc cluster
*ch2, skip 2 sl, 3dc cluster in next st* repeat from * to * till you reach the middle point of work (V-neck),
skip 4 stitches (2 + 2), 3c cluster (don't chain 2 between 2 3-dc clusters in the middle)
*ch2, skip 2 sl, 3dc cluster in next st* repeat from * to * till you reach the left top stitch,
work a corner: 3dc cluster in top sl, ch2, 3dc cluster in same sl, then
* ch2, skip 2 sl, 3dc cluster in next st* repeat from * to * till you reach the end of 4th side. (25 + 9 + 9 + 25 3dc-clusters)
Cut and fasten the yarn.
Do not turn piece, work next row from same side.
R3:
don't turn your work, work on right side
Color B
Continue with color B yarn from right bottom corner.
Work along 4 sides (don’t work along the bottom side)
ch1, 3sc in each ch2sp, 5sc in each corner, last sc on top of last cluster
Cut and fasten the yarn.
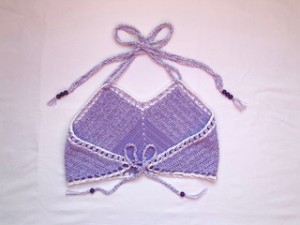
STRAPS
Use 3 yarns / strands together and chain 115 cm / 45 inch long foundations chain.
Pull this chain through the top corner on one side of V-neck.
Make one more STRAND 115 cm / 45 inch long and pull it through the second top corner.
Tie both STRANDS around the neck.
Use 3 yarns / strands together and chain 75 cm / 25 inch long foundations chain.
Pull this chain through the bottom corners on back and make a bow.
Use bead of your choice and decorate the STRANDS's ends.
FINAL MEASUREMENT:
from magic ring to bottom corner = 32 cm / 12.5 inch, in total from one bottom corner to second bottom corner = 74 cm / 45 inch
from bottom line to top corner = 22 cm / 8.5 inch
from bottom corner to top corner = 32 cm / 12.5 inch
V-neck from middle point to top corner = 9 cm / 3.8 inch
You can easily work this to fit any size you need!
I absolutely love this simple and sport design.
Enjoy and wear your lovely Halter Crop top on many wonderful sunny days!
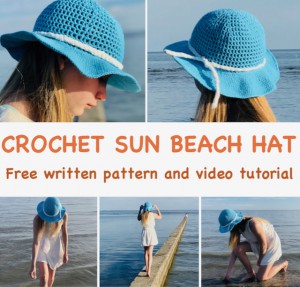
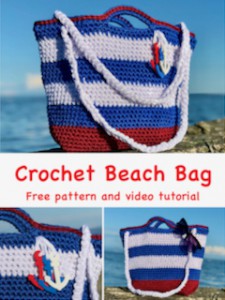
You may would love to match your Summer Crop Top with some Sun Beach HAT and beach BAG.
Try these my popular patterns and tutorials:
♥♥♥
Have fun and let me know what you make. I would love to know how your project turns out.
Please don't forget to like and I really appreciate your comments.
If the pattern did not make sense to you, please don’t hesitate to contact me, I am happy to help :)
If you like this pattern, please follow and share my projects on social networks as a THANK YOU and to help me to create new projects and patterns for you.
If you pin my patterns to your Favorites and share it on social media as a link, I will be able to share a lot more free crochet patterns for you all.
Stay in touch at Facebook, Instagram and Pinterest.
Thank you very much once again for your visit and see you soon!
♥♥♥


